Midjourney User Guide
Contents |
Introduction
Midjourney is a powerful and creative tool that lets you generate images from text prompts. Whether you want to create photos, art, illustrations, logos, or anything else, you can use Midjourney to turn your imagination into reality.
With Midjourney, you can write simple or complex sentences to describe what you want to see in the image. You can also use image URLs to influence the style and content of the generated image. Additionally, you can use various parameters to customize your image output, such as size, quality, format, model version, and more.
In this guide, you will learn how to use Midjourney and its features to generate amazing images from text prompts. You will also learn some tips and tricks to make your prompts more effective and expressive. By the end of this guide, you will be able to use Midjourney to create stunning images for any purpose.
If you wanna read more about potential applications of this kind of text-to-image model – see our article here: Applications of Text-to-Image Models for Business, Media and Personal Use.
General prompt structure
- To generate images you need to write clear and descriptive prompts that tell the AI what you want to see. Midjourney will use its advanced neural network to interpret your prompt and produce an image that matches your request.
- A prompt is a short text phrase that the Midjourney bot interprets to produce an image.
- A prompt can consist of four elements: image URLs, text description and parameters.

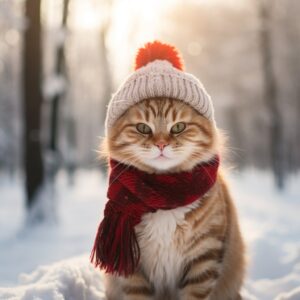
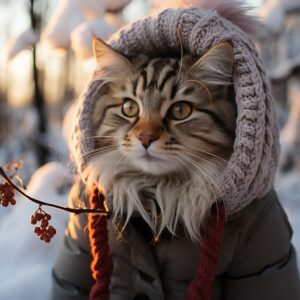
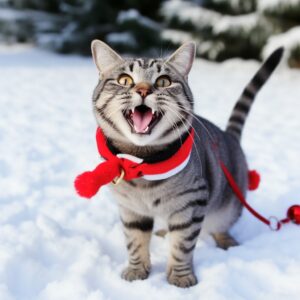
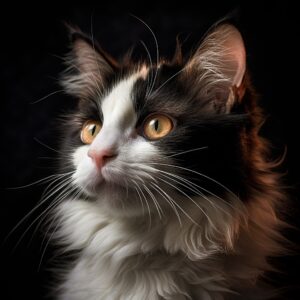
Text description is the main part of the prompt that specifies what you want to see in the image. You can use simple or complex sentences, emotion words, color words, location words, etc. For example: /imagine a happy cat wearing a red hat in a snowy forest
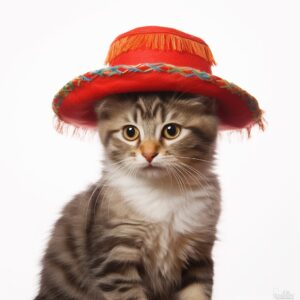
- Image URLs can be added to a prompt to influence the style and content of the finished result. Image URLs always go at the front of a prompt. For example: /imagine https://s.mj.run/_g_KYUAbRhM ::5 cat wearing red hat
| Source Image | Prompt: cat wearing red hat |
 |
|
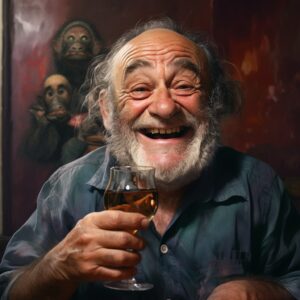
| Source Image | Prompt: photo of very happy man with a drink in his hand –iw 0.5 (image weight 0.5) |
 |
 |
- Parameters are optional elements that can be used to customize your image output, such as quality, size, format, quality, model version and others, You can use the parameter keywords at the end of the prompt, preceded by a double dash (–). For example: /imagine a happy cat wearing a red hat in a snowy forest –-stylize 1000 –c 10
- in this example: –stylize (or –s) or –chaos (or –c) are used. more about it in Chapter “Parameters”
| a happy cat wearing a red hat in a snowy forest –stylize 1000 –c 10 | a happy cat wearing a red hat in a snowy forest –stylize 0 –c 100 |
 |
 |
Text Description
General rules for text description
- Clarity and Specificity:
- Focus on What You Want: Clearly define the subject, setting, and mood of the image you desire.
- Be Specific: Provide detailed and specific descriptions, avoiding vague terms. For instance, prefer ” happy cat wearing a hat in a snowy forest” over a generic “a cat“.
| photo of cat | Photo of a happy cat wearing a hat in a snowy forest |
 |
|
- Descriptive Language:
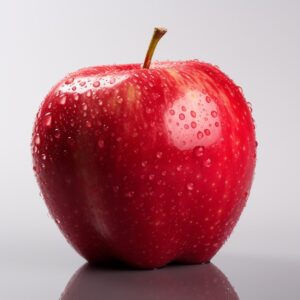
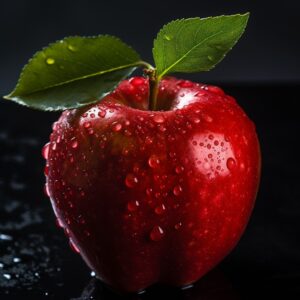
- Vivid Descriptions: Use descriptive language to vividly portray the details in your prompt. Instead of “a red apple,” opt for “a shiny red apple with a green stem and a few leaves.“
| photo of a red apple | Photo of a shiny red apple with a green stem and a few leaves |
 |
 |
- Consideration of Details:
- Think About What Matters: Recognize that anything unspecified will be randomized by MidJourney. Being clear about context and details is crucial for achieving desired results.
- Context and Details: Consider important factors such as subject, medium, environment, lighting, color, mood, and composition. Clearly express your preferences regarding these elements to guide the generation process.
|
Context |
Examples |
|
Subject |
Person, Girl, Man, Animal, Character, Location, Object, Woman, Robot, Alien |
|
Medium |
Photo, Picture, Painting, Illustration, Sculpture, Doodle, Tapestry, Digital Art, Print, Collage, Sketch, Meme, Emoi, Icon, Logo |
|
Environment |
Indoors, Outdoors, On the Moon, Underwater, Fantasy Realm, Urban Setting, Rural Landscape, Abandoned City |
|
Location |
Desert, Jungle, Mountain, Forest, Salt Flat, Cityscape, Seaside, Countryside, Space Station, Post-Apocalyptic Wasteland |
|
Lighting |
Soft, Ambient, Overcast, Neon, Studio Lights, Candlelight, Sunrise, Sunset, Twilight, Starlight |
|
Color |
Vibrant, Muted, Black & White, Warm, Cool, Two-toned, Natural, Sepia, Blue Tinted, Pastel, Gold and Burgundy, Monochromatic |
|
Mood |
Sedate, Calm, Energetic, Serene, Mysterious, Joyful, Melancholic, Whimsical, Nostalgic, Dramatic, Peaceful, Adventurous, Gloomy, Curious, Relaxing, Dynamic, Graceful, Spooky, Cheerful, |
|
Composition |
Portrait, Headshot, Closeup, Birds-eye View, Panorama, Silhouette, Action Shot, Macro, Abstract, Minimalist, Leading Lines, Symmetrical, Vortex, Diagonal, Perspective, Golden Ratio, Low / high angle shot, ground / eye level shoot |
|
Styles |
Block Print, Folk Art, Cyanotype, Graffiti, Risograph, Ukiyo-e, Pixel Art, Blacklight Painting, Cross Stitch, Stained Glass, Pop Art, Impressionism, Cubism, Surrealism, Manga, Realism, Gothic |
|
Ethnicity/Nationality |
Asian, African, Arabic, French, Mediterranean, Indigenous, Western, Viking, Mayan |
|
Decade |
1940s, 1950s, 1960s, 1970s, 1980s, 1990s, Retro, Vintage, Futuristic, Ancient, Medieval, Renaissance, Baroque, Victorian, Edwardian, Art Deco, Steampunk, Cyberpunk |
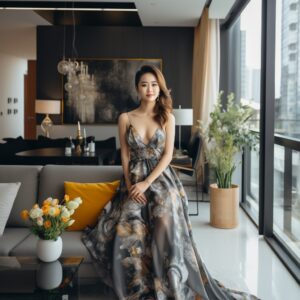
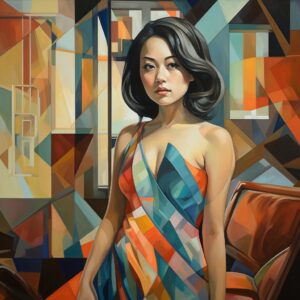
Try to experiment and add more details:
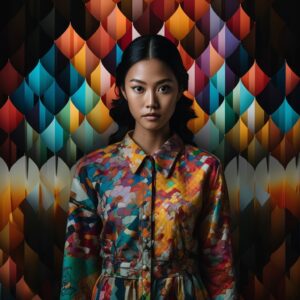
| young Thai woman in a designer dress in modern apartment | painting of young Thai woman in a designer dress in modern apartment in cubism style |
 |
 |
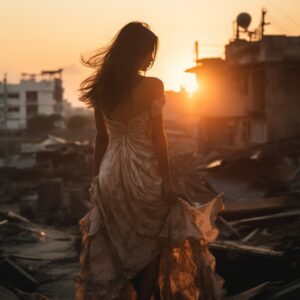
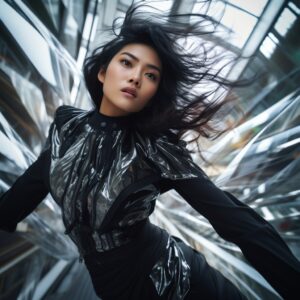
| young thai woman in a designer dress in abandoned city sunset back light | young thai woman in a designer dress futuristic action shot low angle |
 |
 |
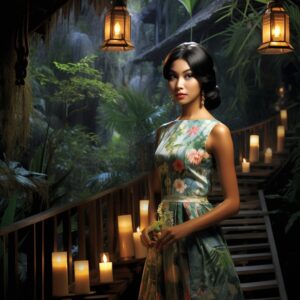
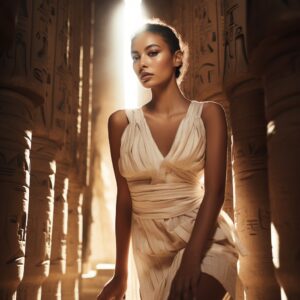
| young thai woman in a designer dress in jungle house candle light in 1960s | young thai woman in a designer dress fashion editorial photography style by Helmut Newton studio lighting in Egyptian temple |
 |
 |
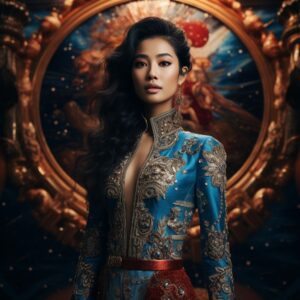
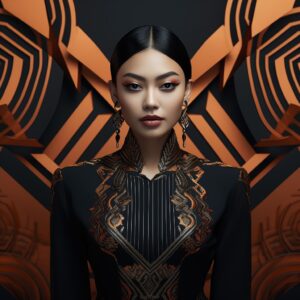
| Photography of young thai woman in a designer dress in Celestial Baroque style, with blue and red ornate details set against a cosmic backdrop | young thai woman in a designer dress symmetrical portrait in art deco style |
 |
 |
- Experiment with different prompts and variations. Midjourney is a creative tool that can generate different results for the same prompt. You can try changing or adding words, images, or parameters to your prompt to see how it affects your image. You can also use the “Generate Variations” button to see multiple versions of your image based on your prompt.
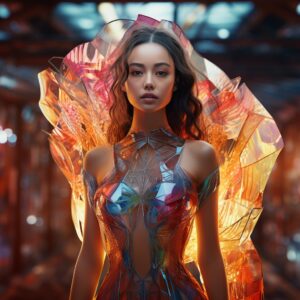
| Photography of young thai woman in a designer dress , hair down, in the style of translucent geometries, glowing colors, karol bak, hip hop aesthetics, 3d, detailed, layered compositions, 32k uhd | Photo of young thai woman in a designer dress in a vividly colored tessellation, a moving widescreen view of pointed pixels, their edges emitting a spectrum of colors within a subdued backdrop |
 |
 |
- Formatting Considerations:
- Ignore Capitalization: MidJourney does not distinguish between uppercase and lowercase letters.
- Limited Punctuation: Recognize that MidJourney only processes double-hyphens (–), double-colons (::), and spaces. Avoid using other punctuation like brackets, colons, or dashes, as they are considered noise.
- Weights for Adjusting Importance:
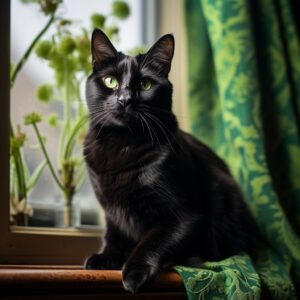
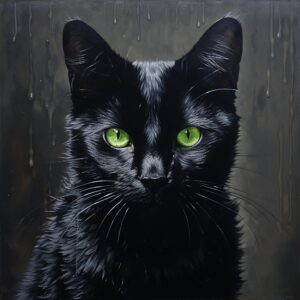
- Utilize Weights: Incorporate numerical weights to adjust the importance of different elements in the prompt. Specify weights after each part of the prompt separated by double-colons (::). For example, “a black cat::2 with green eyes::3 sitting on a windowsill::1” emphasizes the eyes and the cat more than the windowsill.
| a black cat with green eyes sitting on a windowsill | a black cat::3 with green eyes::3 sitting on a windowsill::1 |
 |
 |
- Use negatives
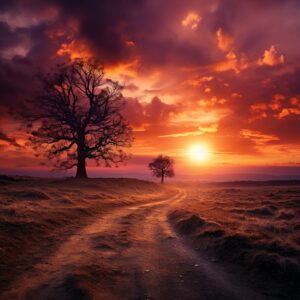
- Negative prompting in Midjourney is a way to tell the AI what you do not want in your generated images. You can use negative prompting by adding –no followed by the words you want to exclude, or by using negative weights with ::-1 after the words you want to reduce. Prompt: A beautiful sunset –no water will generate an image of a sunset without any water in the scene.
| Photo of a beautiful sunset | Photo of a beautiful sunset –no water |
 |
 |
- Balance Between Specificity and Vagueness:
- Details vs. Variety: While being specific ensures desired details, introducing some vagueness can lead to diverse outcomes. However, keep in mind that too much vagueness may result in unexpected variations.
- For more inspiration see: links to useful resources.
Levels of Text Prompt Structure
Sample four-level prompt structure framework is described below. It covers the essential elements of creating images: subject, style, effect, and composition.
- Level 1 – Subject:
- This is the most basic level of prompt structure, focusing on describing the main subject of your prompt. The subject can be a person, an animal, an object, a scene, or anything else you want to generate an image of. You can use simple nouns, adjectives, colors, and numbers to specify the subject. For example, “A boy running in the streets wearing a blue shirt.” The AI generator will try to create an image that matches your description as closely as possible.
- Level 2 – Styles:
- At this level, you add artistic styles to your subject for more diverse and creative outputs. You can use the name of an artist, a genre, a period, a technique, or a mood to indicate the style of your image. For example, “A cat wearing a bow tie and a hat in the style of Picasso.” The AI generator will try to create an image that combines your subject and your style in a harmonious and interesting way.
- Level 3 – Effects:
- This level involves introducing effects to enhance the visual appeal and quality of your image. You can use the name of a filter, a camera, a lens, lighting, or a texture to indicate the effect of your image. For example, “Close-up of a cat with Kodak Gold 200 photography effect.” The AI generator will try to create an image that applies your effect to your subject in a realistic and natural way. However, the output may not be very original or expressive, as the effect may not change the content or the meaning of your image.
- Level 4 – Composition:
- Consideration of the overall composition and layout of your image for the best results. You can use the name of a rule, a principle, a technique, or a style to indicate the composition of your image. For example, “Uniformly staged images of a lady in a brown dress.” The AI generator will try to create an image that follows your composition and creates a balanced and pleasing visual effect. However, the output may not be very easy or simple, as the composition may require more complex and specific instructions.
These four levels of prompt structure are not mutually exclusive, and you can mix and match them to create more diverse and complex prompts. For example, you can combine level 1 and level 2 to create a prompt like “A dog playing fetch in the style of impressionism.” You can also combine level 3 and level 4 to create a prompt like “A symmetrical image of a flower with a bokeh effect.” You can even combine all four levels to create a prompt like “A surreal image of a fish flying in the sky in the style of Dali with a sepia tone and a rule of thirds composition.” The more you experiment with different levels and combinations, the more you can explore the possibilities and limitations of the AI generator.
Examples:
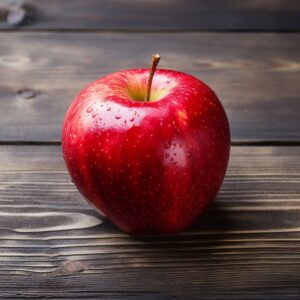
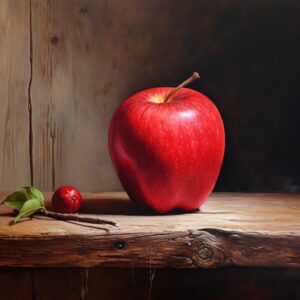
| Level 1 – Subject: A red apple on a wooden table | Level 2 – Styles: A red apple on a wooden table in the style of ALBERT KECHYAN |
 |
 |
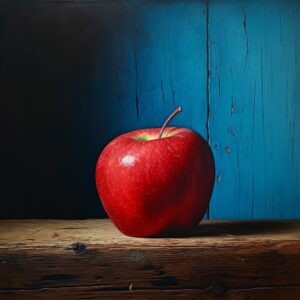
| Level 3 – Effects: A red apple on a wooden table in the style of ALBERT KECHYAN in blue and red tint | Level 4 – Composition: A red apple on a wooden table in the style of ALBERT KECHYAN in blue and red tint in bird eyes view |
 |
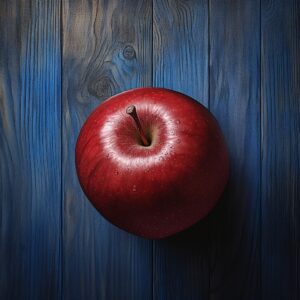 |
Image prompts
- Image prompts are images that you can use to influence the composition, style, and colors of the generated image.
- You can use image prompts alone or with text prompts to create more diverse and interesting results.
- To add image prompts, you need to type or paste the web address of the image in the prompt box. The address must end with an extension like .png, .gif, or .jpg.
- Image prompts go at the front of the prompt. You must have at least two images or one image and text to make a valid prompt.
- The image weight parameter –iw is a way to adjust how much the image part of a prompt affects the final output. It has a different default value and a different range for each Midjourney version model. The default value is what the parameter is set to when you don’t specify it. The range is the minimum and maximum values that you can use for the parameter. Here are the default values and ranges for each Midjourney version model:
- Version 5: The default value is 1 and the range is 0 to 2.
- Version 4: This model does not have the image weight parameter.
- niji 5: The default value is 1 and the range is 0 to 2.
- More information and examples of image prompts on the Midjourney Image Prompts page: https://docs.midjourney.com/docs/image-prompts
| Image to influence the output picture | https://s.mj.run/3jZT_DGTU0E photo of very happy man with a drink in his hand –iw 0.5 |
|
|
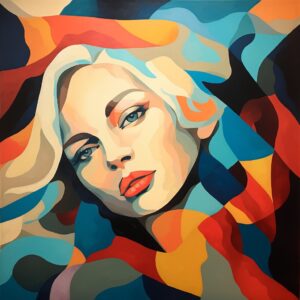
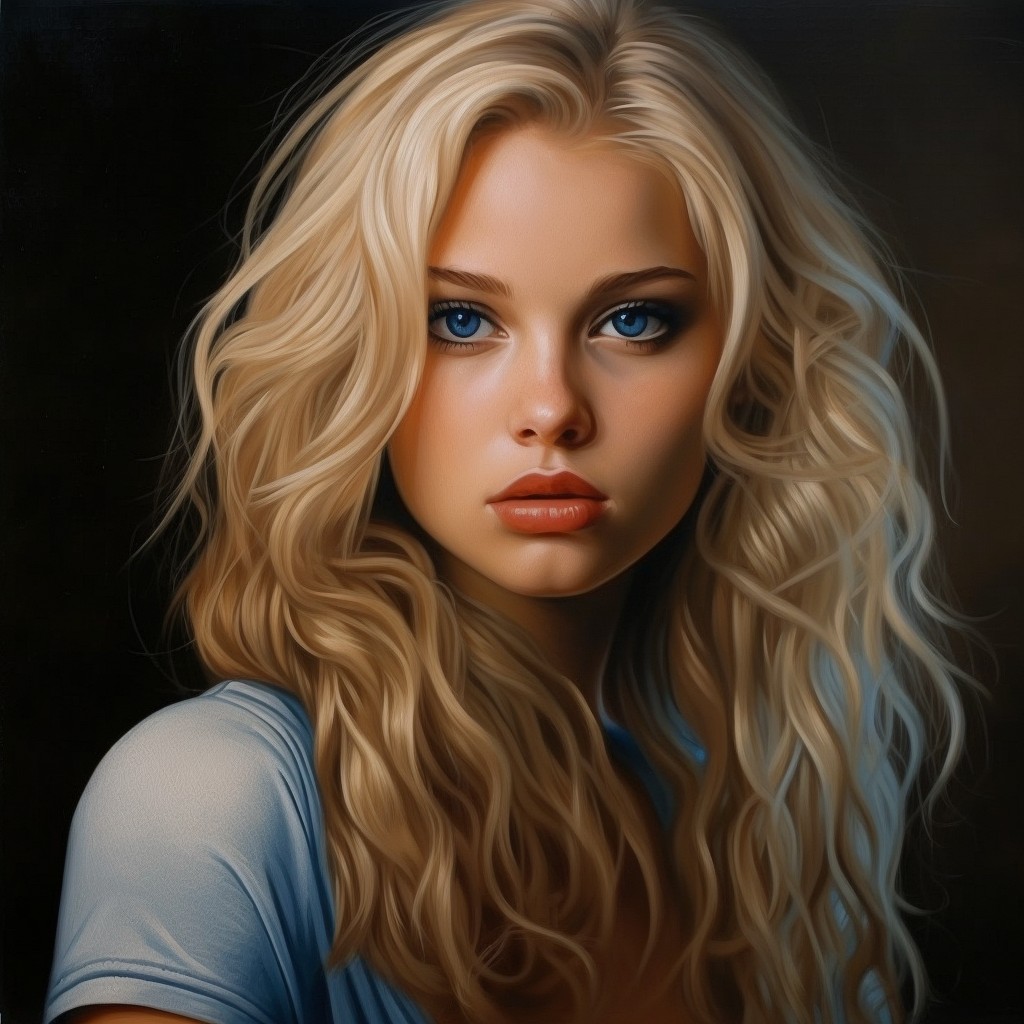
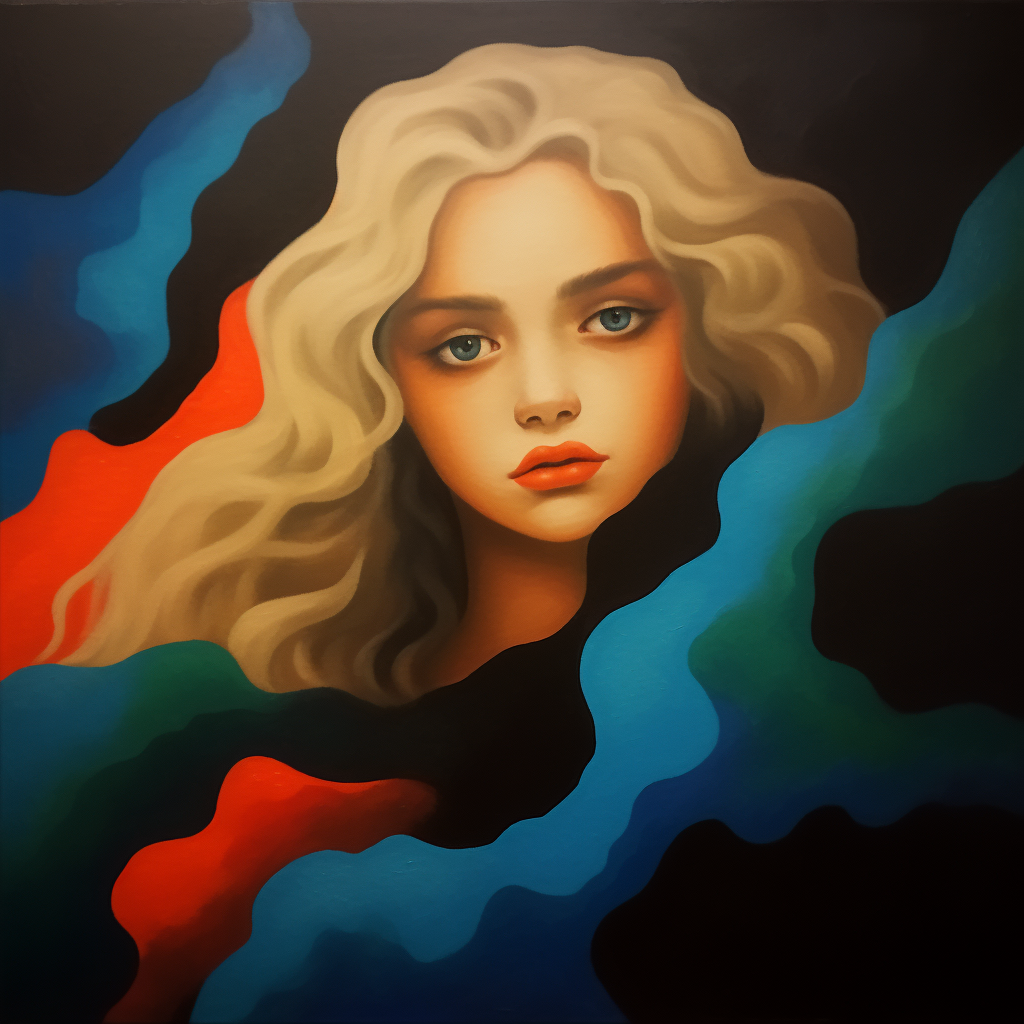
| Image to influence the output picture | https://s.mj.run/vxAUxHBHa_I beautiful blonde girl face in cubism style |
 |
 |
Parameters
Aspect Ratios
- The aspect ratio (–aspect or –ar) parameter in MidJourney is a way to control the shape and size of the images that are generated by the tool. The aspect ratio is the ratio of the width to the height of an image, expressed as two numbers separated by a colon. For example, an aspect ratio of 16:9 means that the image has 16 units of width for every 9 units of height.
- The aspect ratio parameter can be used to create images that fit different screen sizes, orientations, and layouts. For example, if you want to create a banner image for a website, you might use an aspect ratio of 4:1, which means that the image is four times wider than it is tall. If you want to create a square image for a social media post, you might use an aspect ratio of 1:1, which means that the image has the same width and height.
- To use the aspect ratio parameter in MidJourney, you need to specify the desired aspect ratio in the format of –ar width:height or –aspect width:height. For example: –ar 3:2 or –aspect 3:2.
- The aspect ratio parameter will resize the output image to fit the specified dimensions. If the aspect ratio is not provided then the default aspect ratio is 1:1.
- More: : https://docs.midjourney.com/docs/aspect-ratios
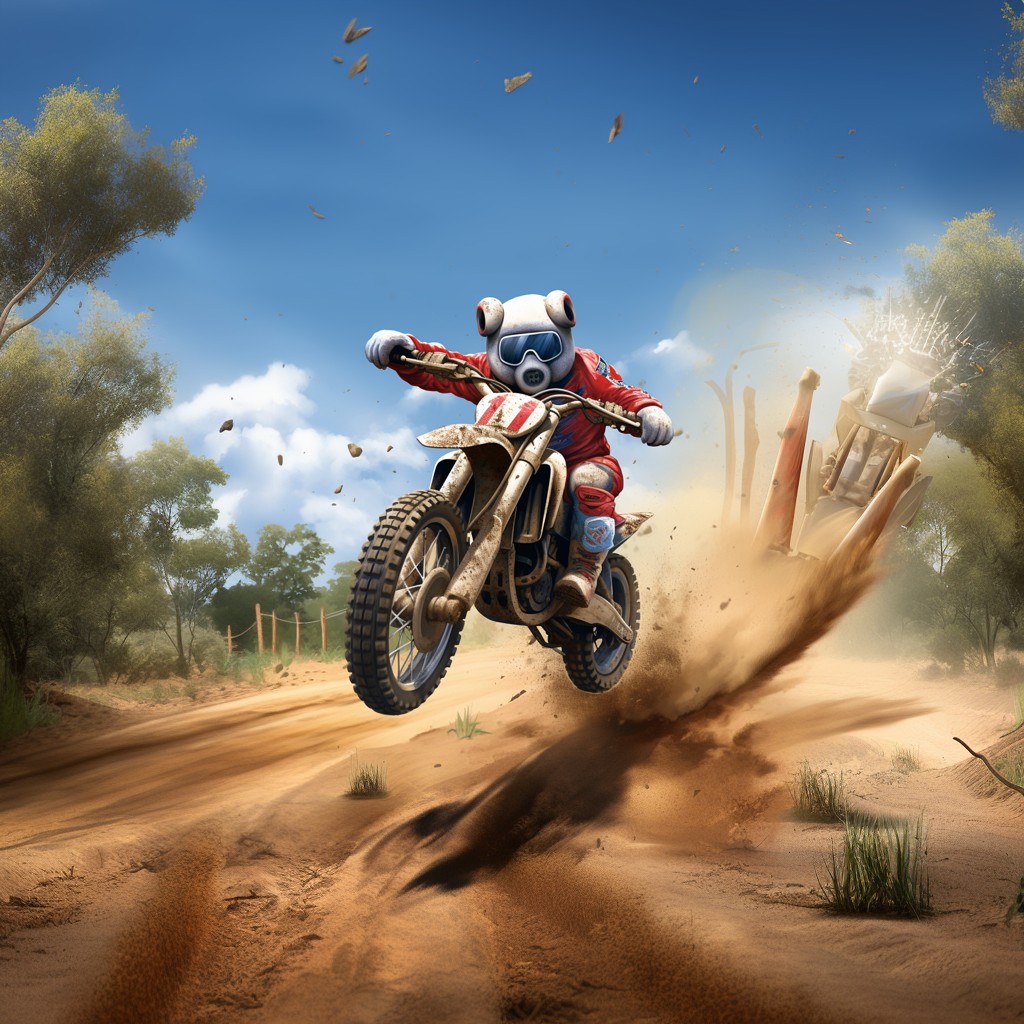
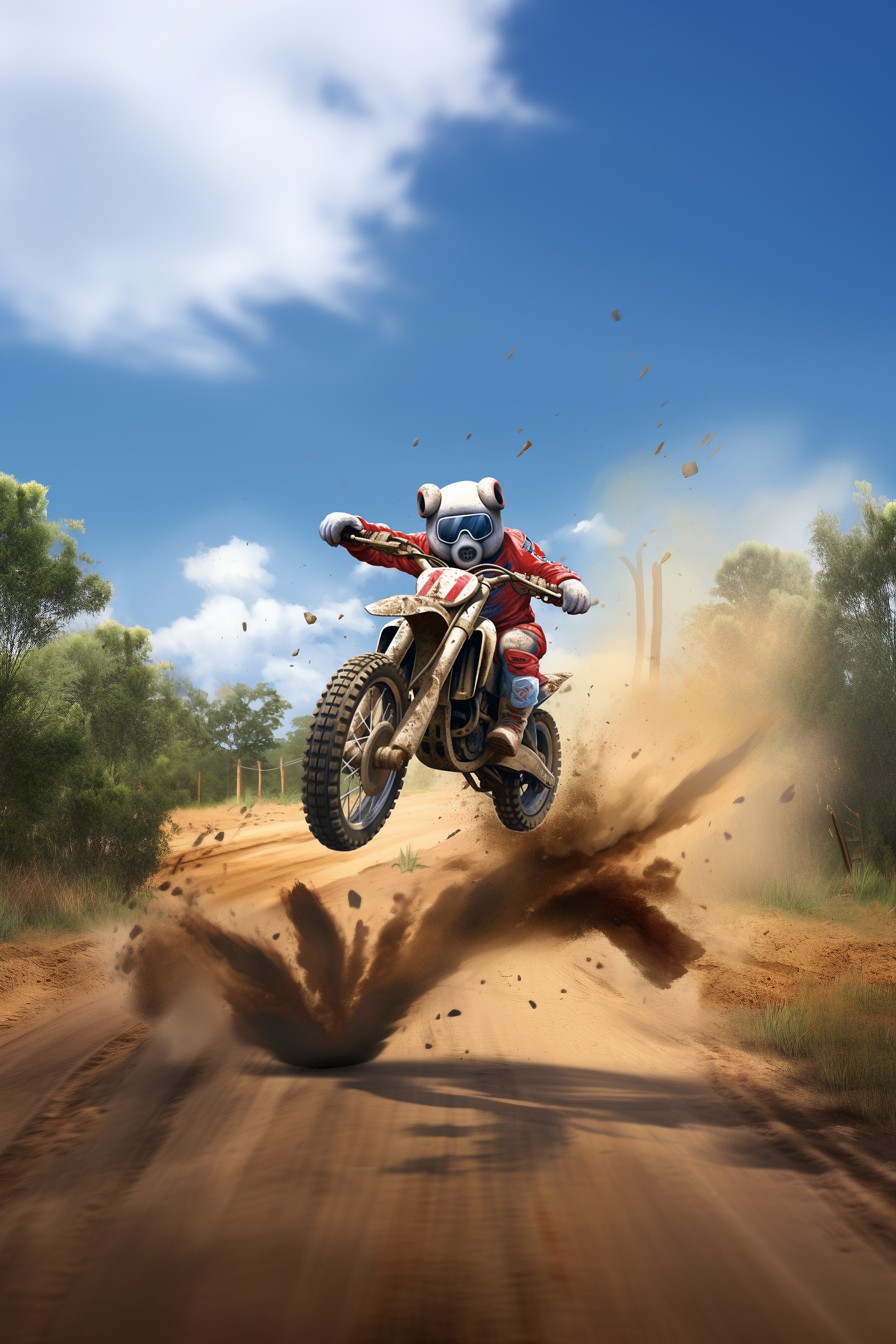
| Standard ratio 1:1 (no –ar parameter) | –ar 2:3 |
|
 |
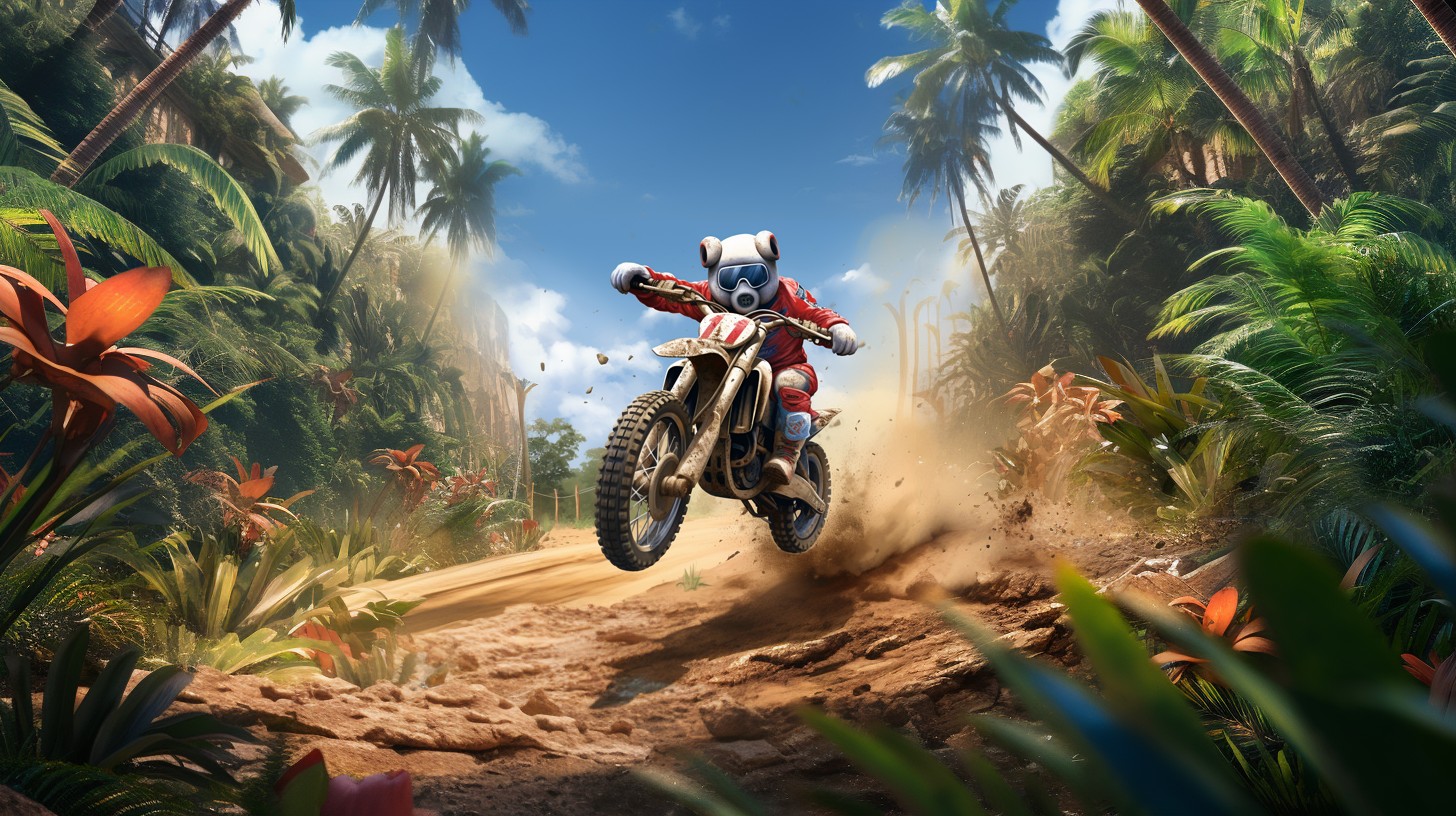
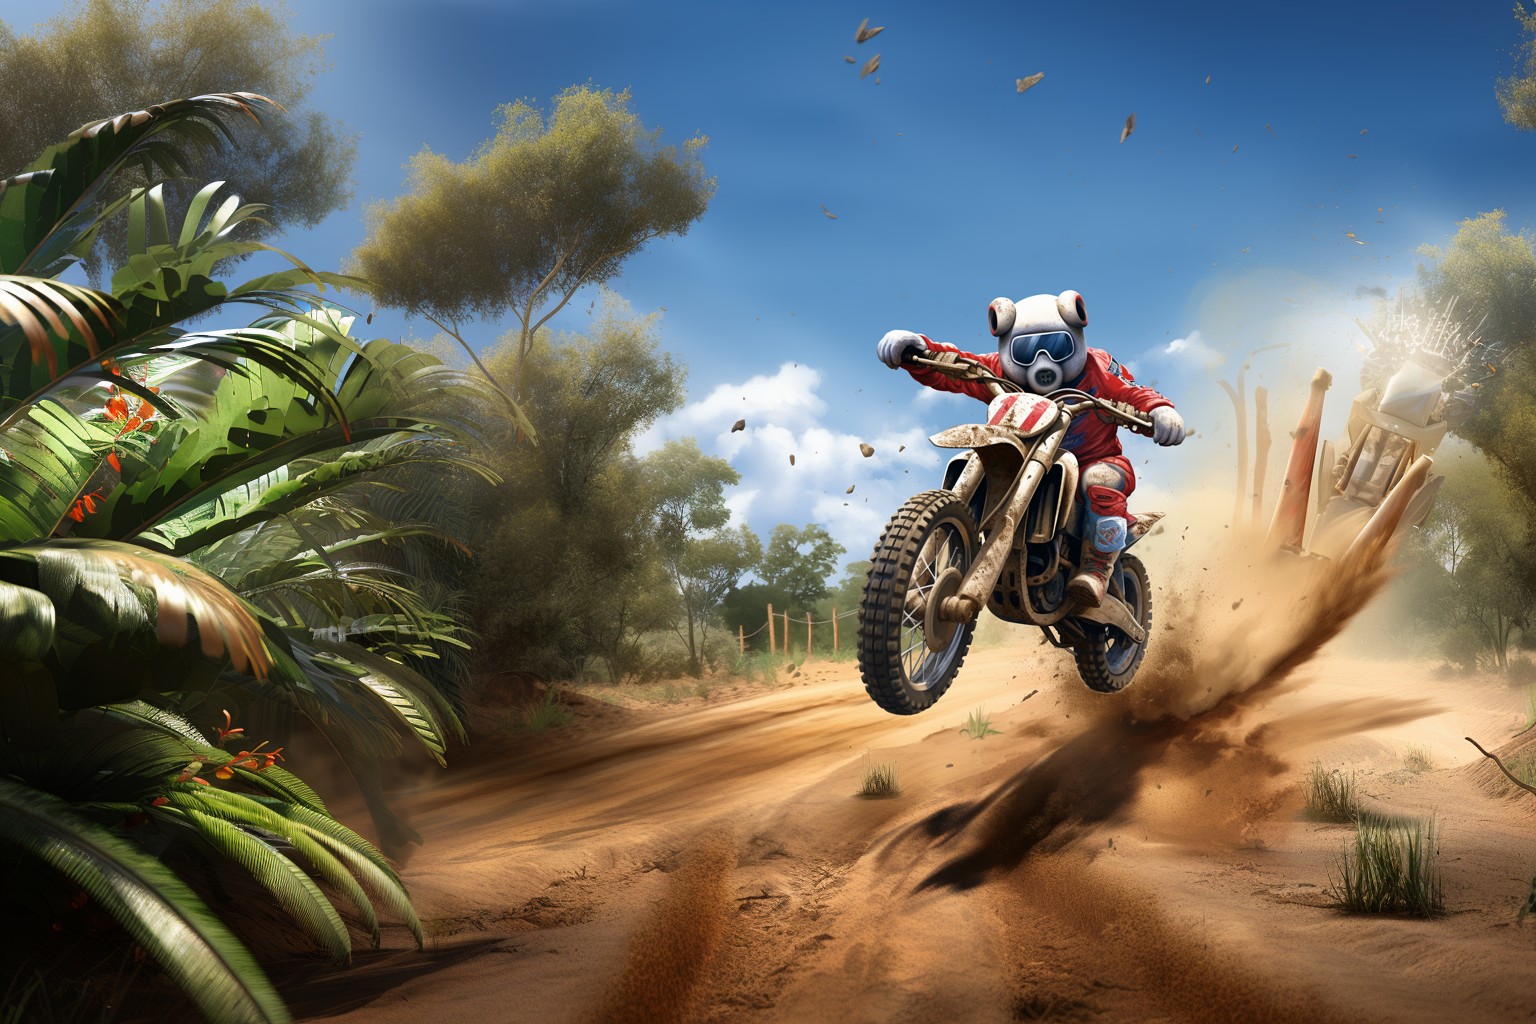
| –ar 3:2 | –ar 4:1 |
 |
 |
Some standard aspect ratios that are used in media creation are:
- 3:2 (2:3) – This is the aspect ratio that is used for most digital cameras and DSLRs, as it is based on the 35mm film format. It is also used for some print media, such as magazines and posters. It is suitable for displaying natural and realistic scenes. ¹²
- 16:9 – This is the most common aspect ratio for videos, as it is the standard for high-definition (HD) and ultra-high-definition (UHD) formats. It is also widely used for web pages, computer monitors, and TV screens. It is suitable for displaying wide scenes and landscapes.
- 4:3 – This is the classic aspect ratio for TV and film, as it was the standard before the advent of HD. It is still used for some video games, presentations, and digital cameras. It is suitable for displaying portraits and close-ups.
- 1:1 – This is the square aspect ratio that is popular for social media platforms such as Instagram, Facebook, and Twitter. It is suitable for displaying symmetrical and balanced compositions.
- 9:16 – This is the vertical aspect ratio that is used for mobile devices, especially for platforms such as TikTok, Snapchat, and Instagram Stories. It is suitable for displaying full-body shots and dynamic movements.
- 3:4 – This is the inverse of the 4:3 aspect ratio, and it is used for some vertical videos and images, especially for platforms such as Pinterest and YouTube Shorts. It is suitable for displaying tall and narrow scenes.
No
- The –no parameter in Midjourney is an option that you can add to your prompt to tell the bot what not to include in your image. For example, if you want to create a landscape without any trees, you can write: /imagine prompt landscape –no trees
- The –no parameter accepts multiple words separated by commas, so you can exclude more than one thing at a time. For example, if you want to create a portrait without any hair or glasses, you can write: /imagine prompt portrait –no hair, glasses
- The –no parameter is useful for removing unwanted elements from your image, or for creating abstract or minimalist images
- More: https://docs.midjourney.com/docs/no
| Photo of a beautiful sunset | Photo of a beautiful sunset –no water |
|
|
Quality
- The –quality parameter in Midjourney is an option that you can add to your prompt to change how much time is spent generating an image. Higher-quality settings take longer to process and produce more details, but they also use more GPU minutes per job. The quality setting does not affect the resolution of the image.
- The default –quality value is 1, which means the image will be generated with the normal amount of time and detail. You can also use –quality 0.5 or –quality 0.25 to reduce the quality and speed up the process, but the image will be less detailed and more blurry. These lower-quality settings might be useful for creating abstract or gestural images, or for testing different prompts quickly.
- To use the –quality parameter, you need to add it to the end of your prompt, after the /imagine command. For example, if you want to create a detailed peony illustration with high quality, you can write: /imagine prompt detailed peony illustration –quality 1
- If you want to create a blurry peony illustration with low quality, you can write: /imagine prompt detailed peony illustration –quality 0.25
- More: https://docs.midjourney.com/docs/quality
Chaos
- –chaos parameter in is an option that you can add to your prompt to change how varied and unexpected the results will be. Higher –chaos (or –c) values will produce more unusual and interesting images, while lower –chaos values will produce more reliable and consistent images.
- The –chaos parameter accepts values from 0 to 100, and the default value is 0.
- To use the –chaos parameter, you need to add it to the end of your prompt, after the /imagine command. For example, if you want to create a realistic picture of face of a blonde girl with normal variation, you can write:
- realistic picture of face of a blonde girl or realistic picture of face of a blonde girl –c 0
- If you want to create a picture with high variation, you can write: realistic picture of face of a blonde girl –c 50
- More: https://docs.midjourney.com/docs/chaos
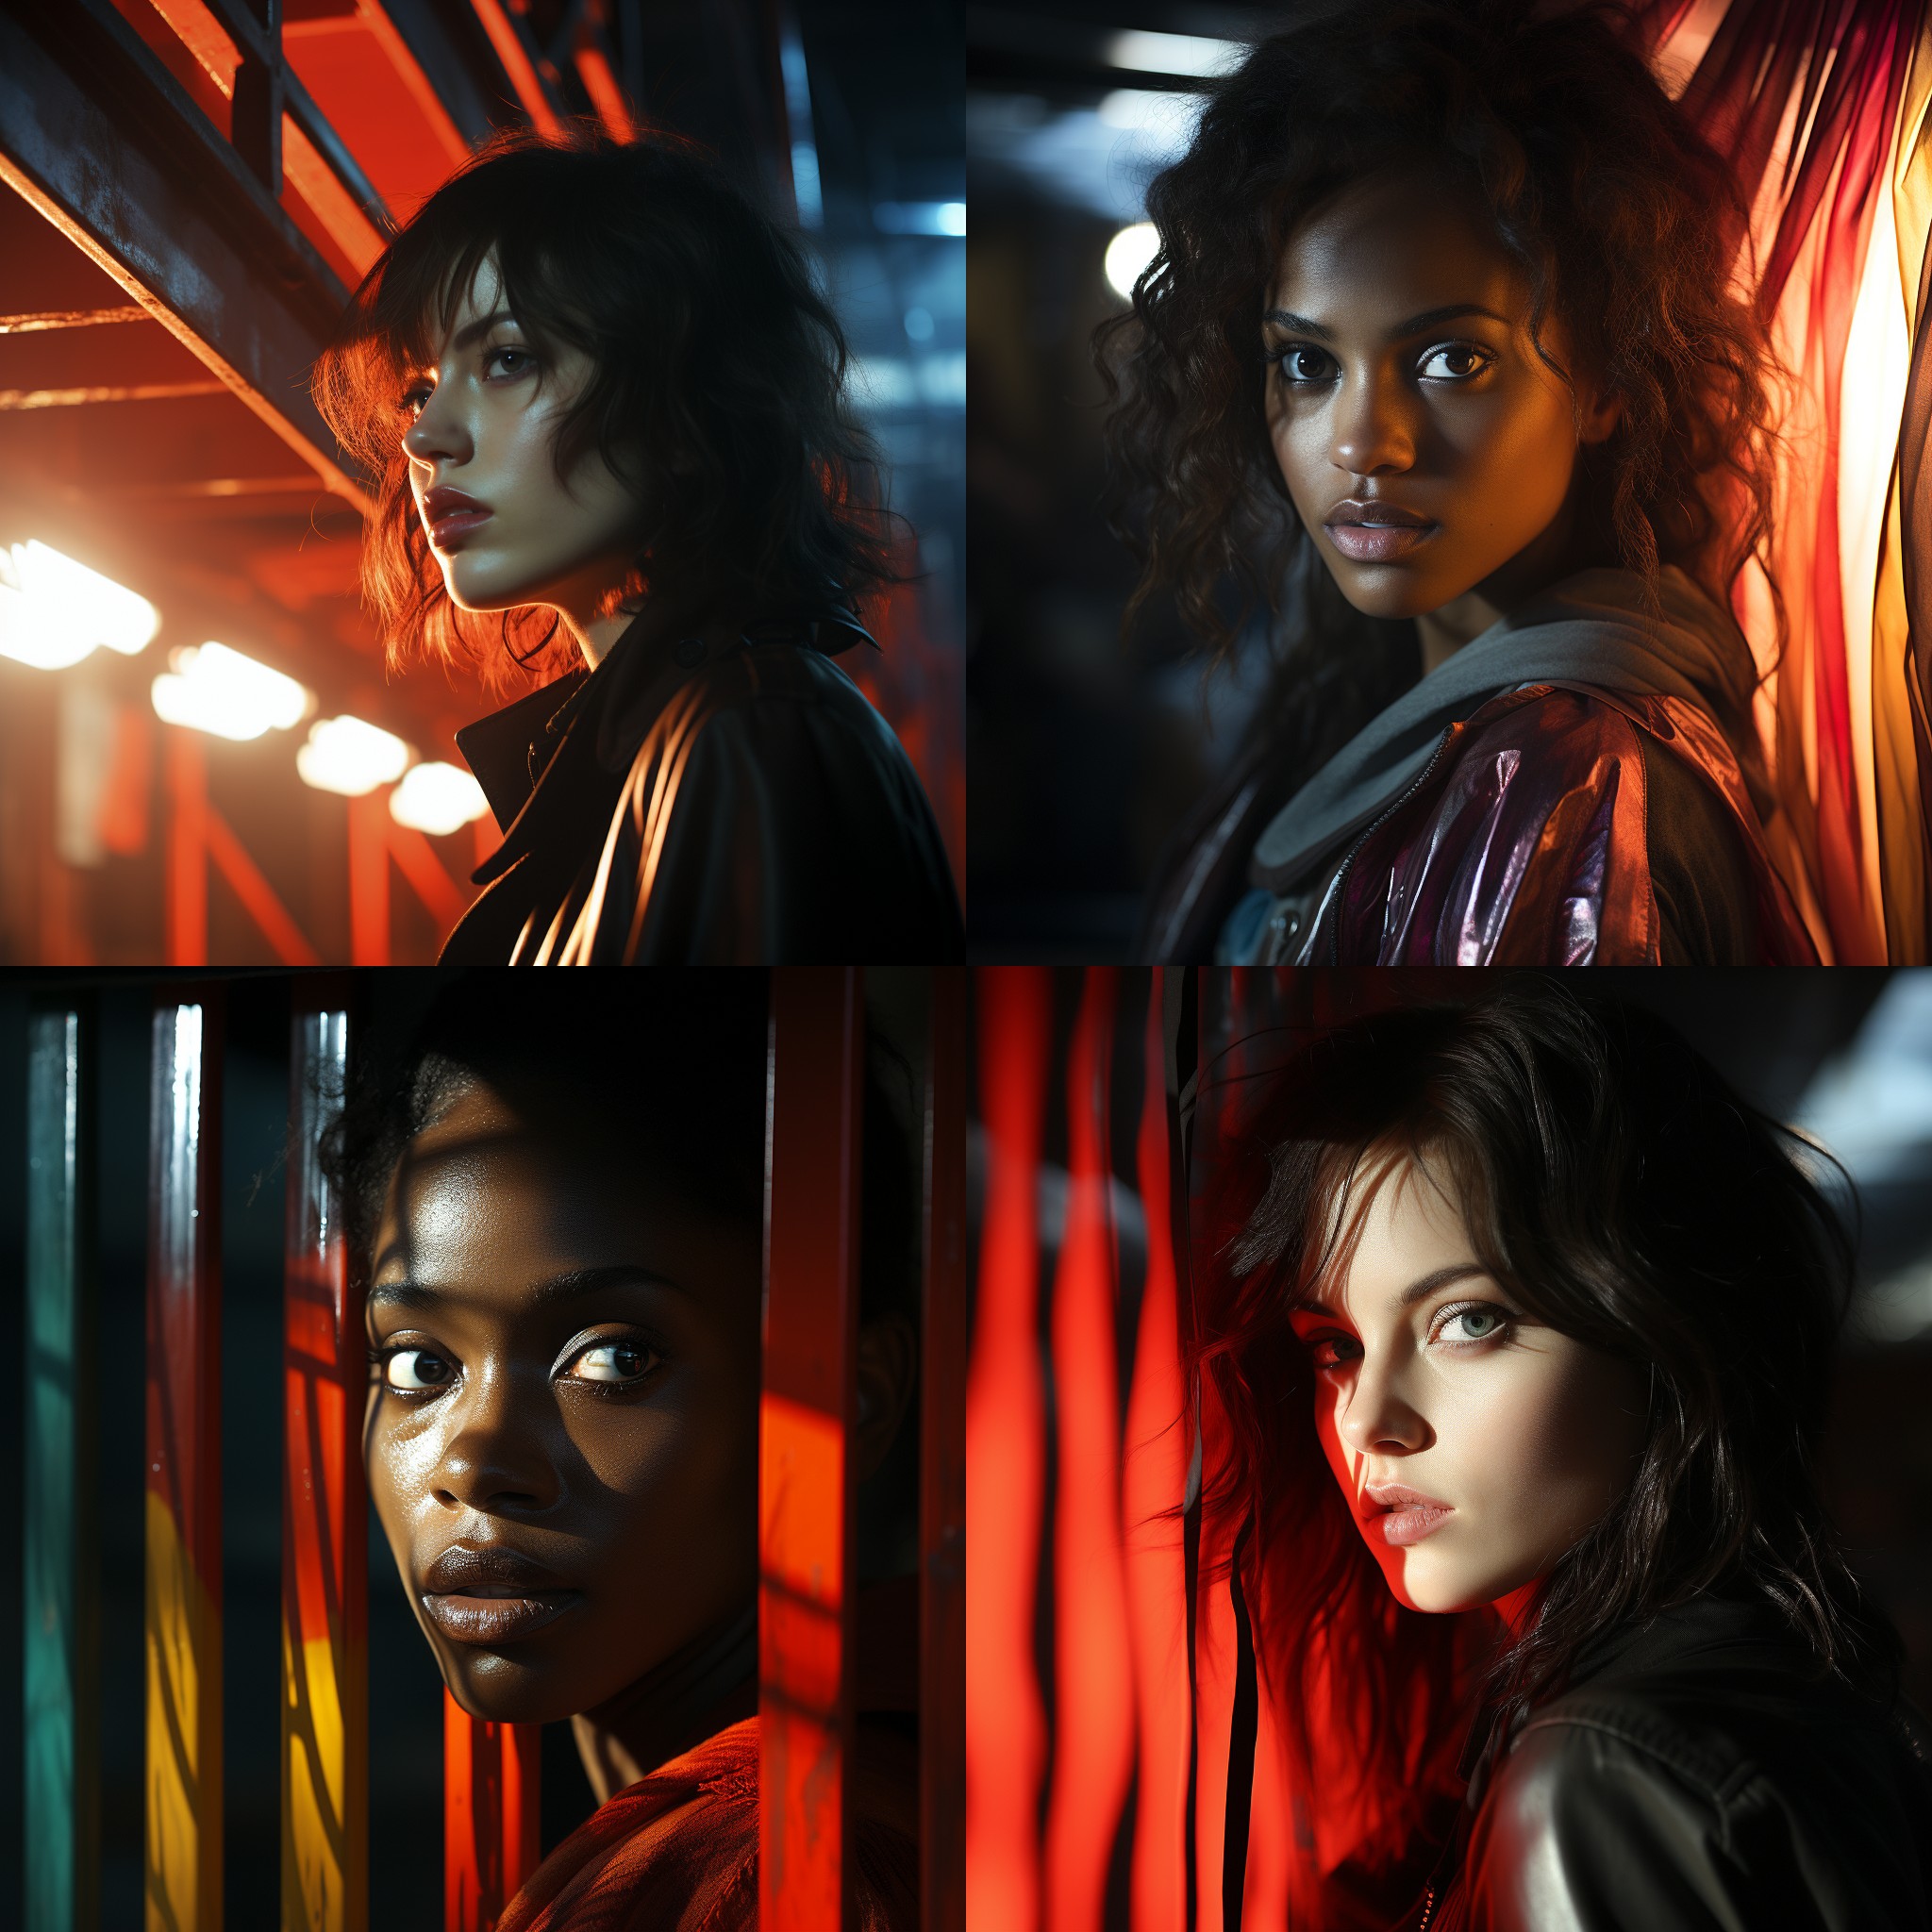
| realistic picture of face of a blonde girl –c 0 | realistic picture of face of a blonde girl –-c 50 |
|
|
|
| realistic picture of face of a blonde girl –c 100 | |
|
|
|


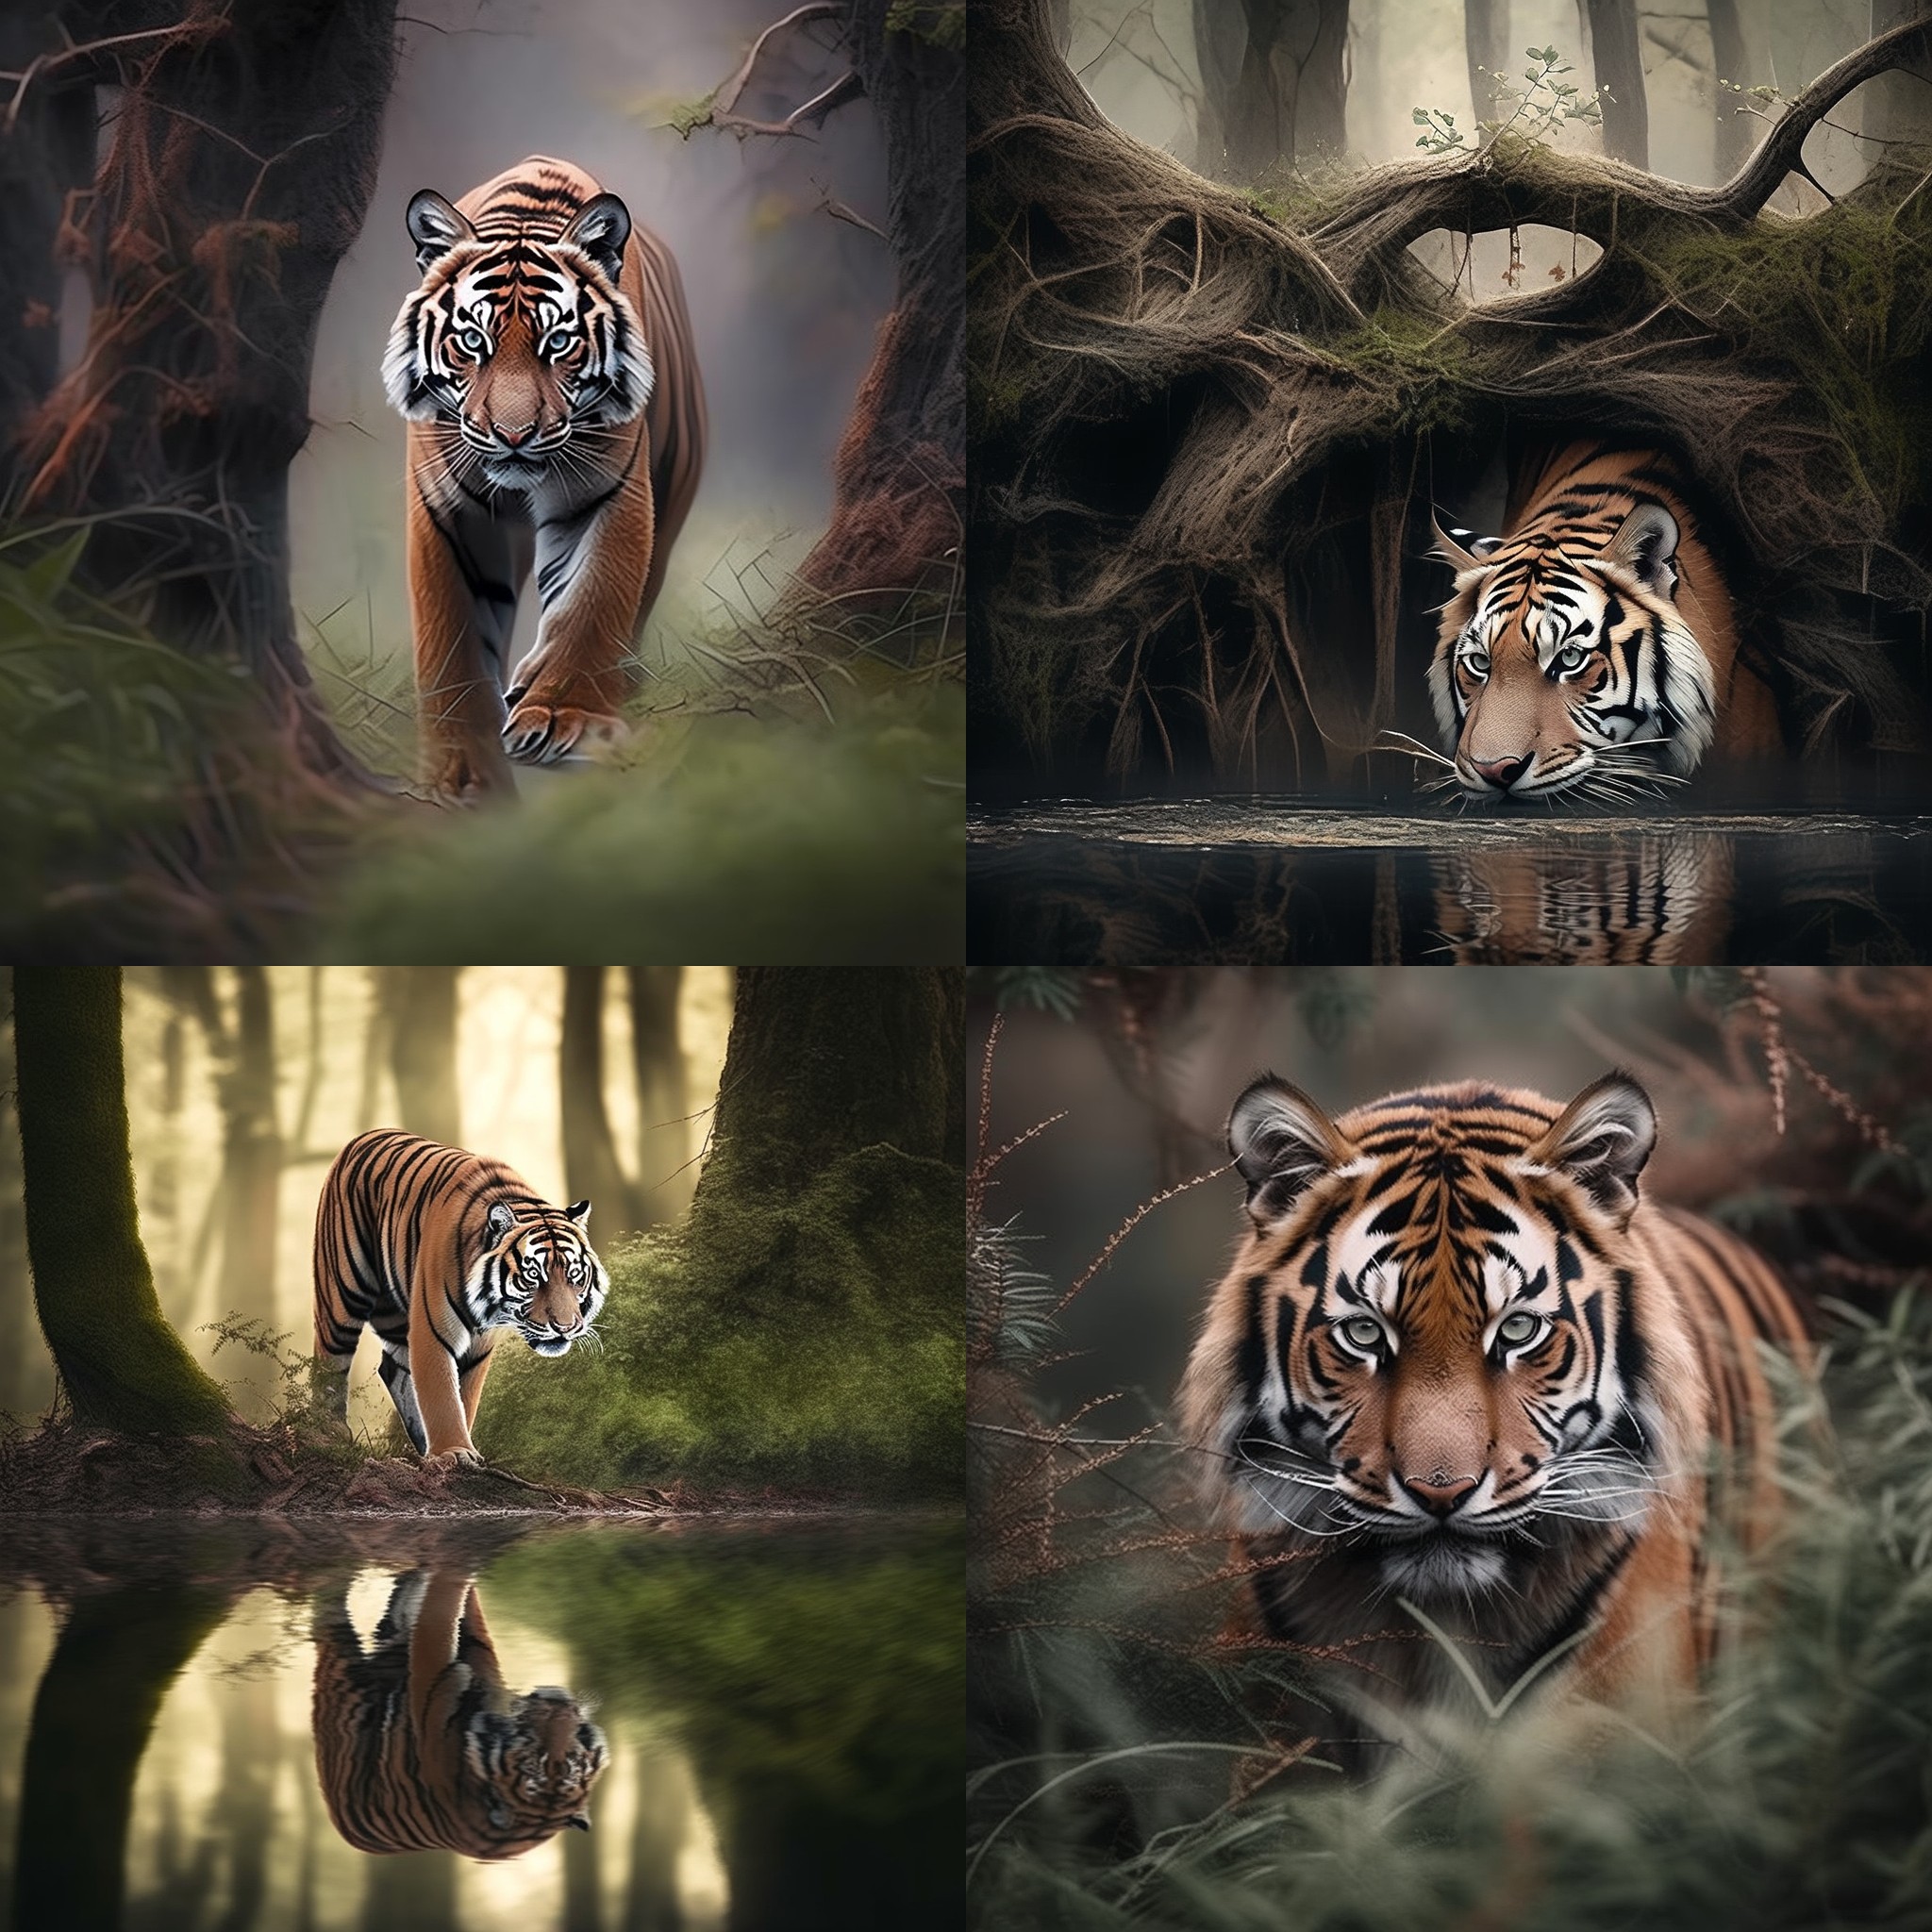
Weird
- -weird parameter in Midjourney is an option that you can add to your prompt to explore unconventional aesthetics in AI-generated images. It’s a tool for creativity and experimentation, enabling users to generate unique and unexpected outcomes
- The –weird parameter accepts values from 0 to 3000, and the default value is 0. Higher –weird values will produce more distorted and abstract images, while lower –weird values will produce more realistic and coherent images. The –weird parameter does not affect the resolution of the image.
- As per MJ documentation “–weird is a highly experimental feature. What’s weird may change over time”
- This parameter s compatible with Midjourney Model Versions 5, 5.1, and 5.2 only and is not fully compatible with seeds
- More at: https://docs.midjourney.com/docs/weird
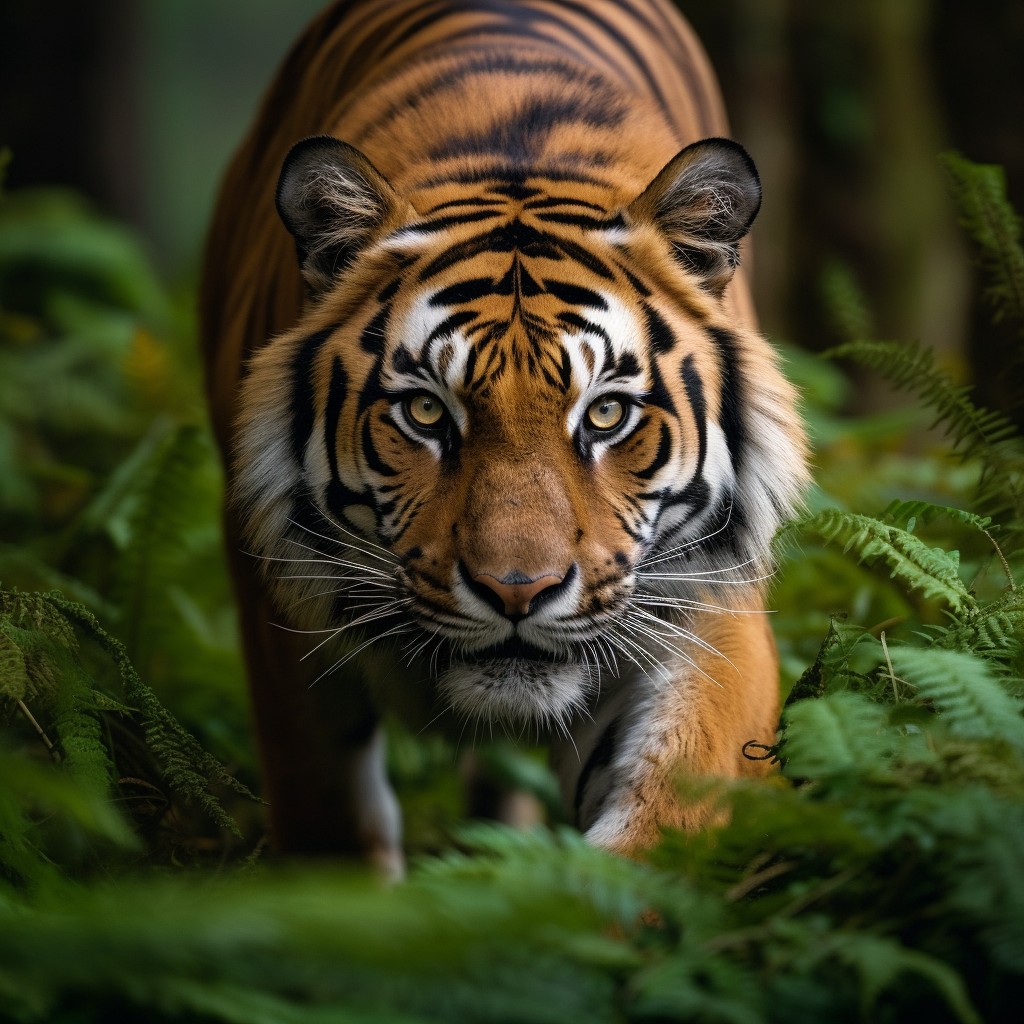
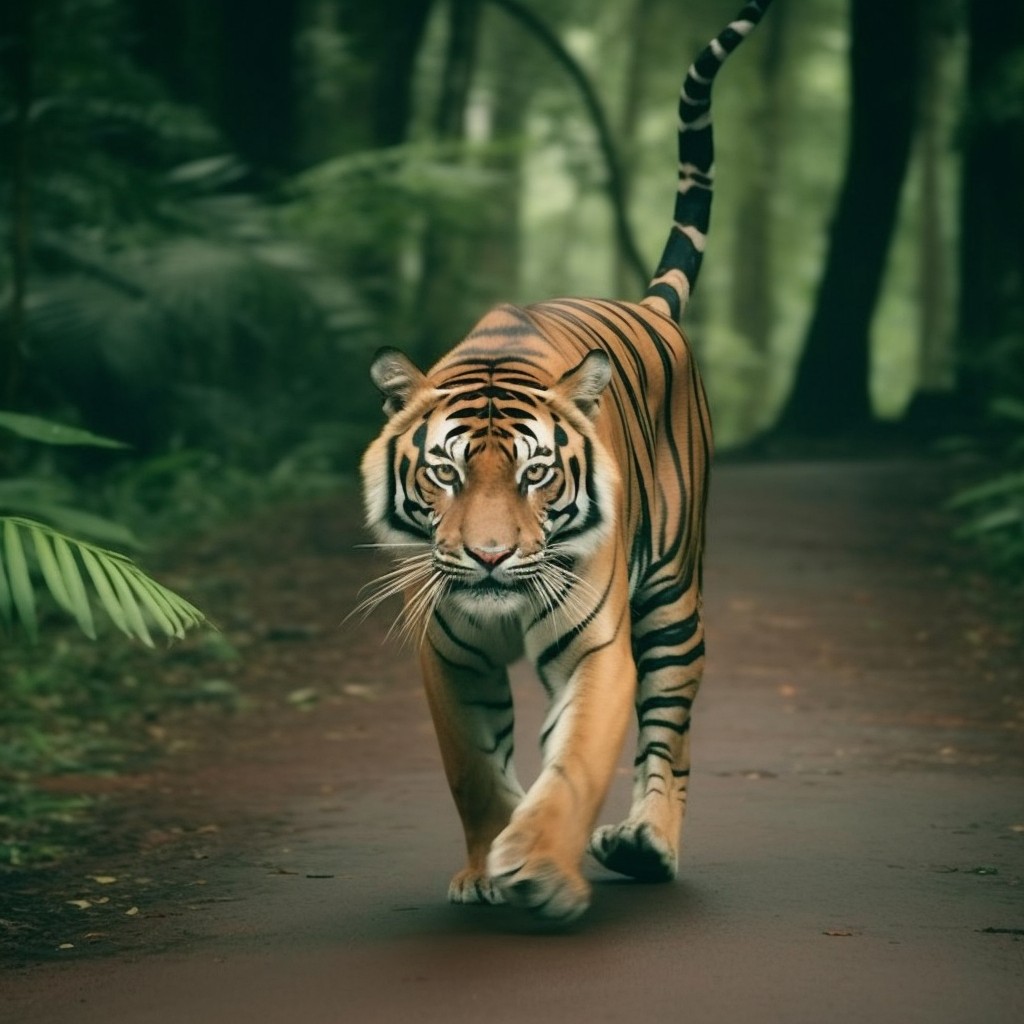
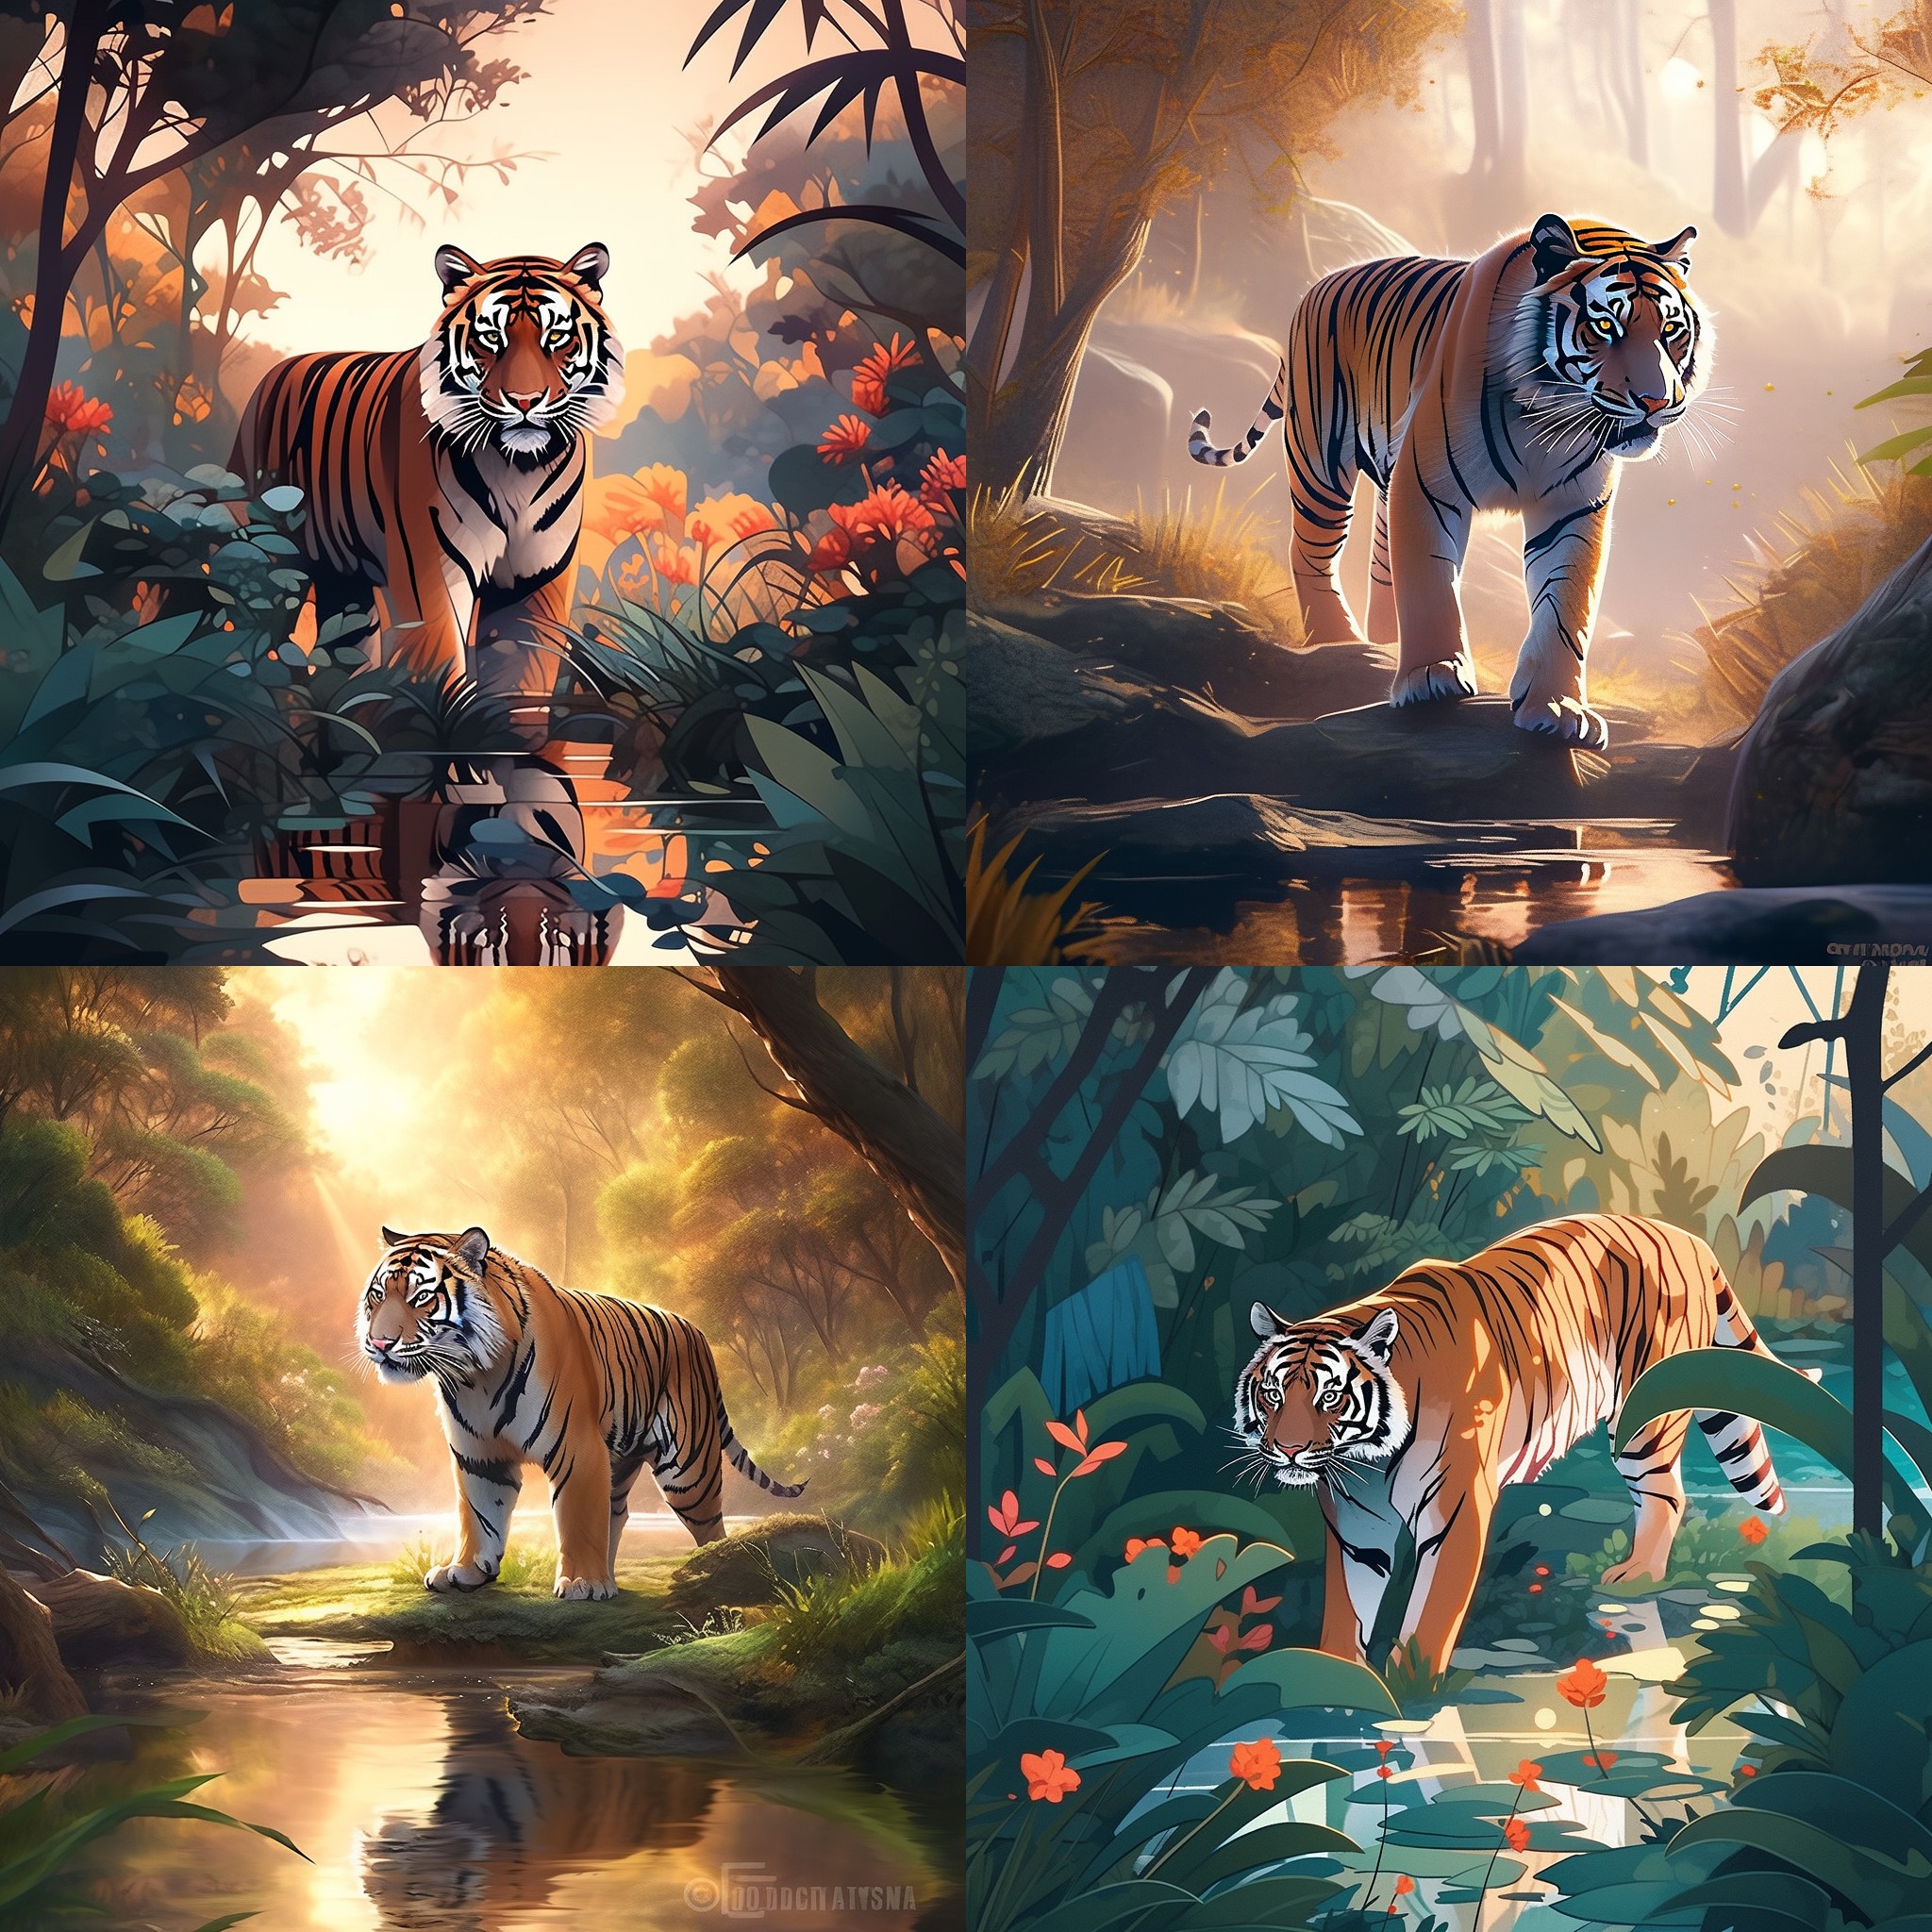
| photo of tiger in natural habitat –w 0 | photo of tiger in natural habitat –w 1000 |
 |
 |
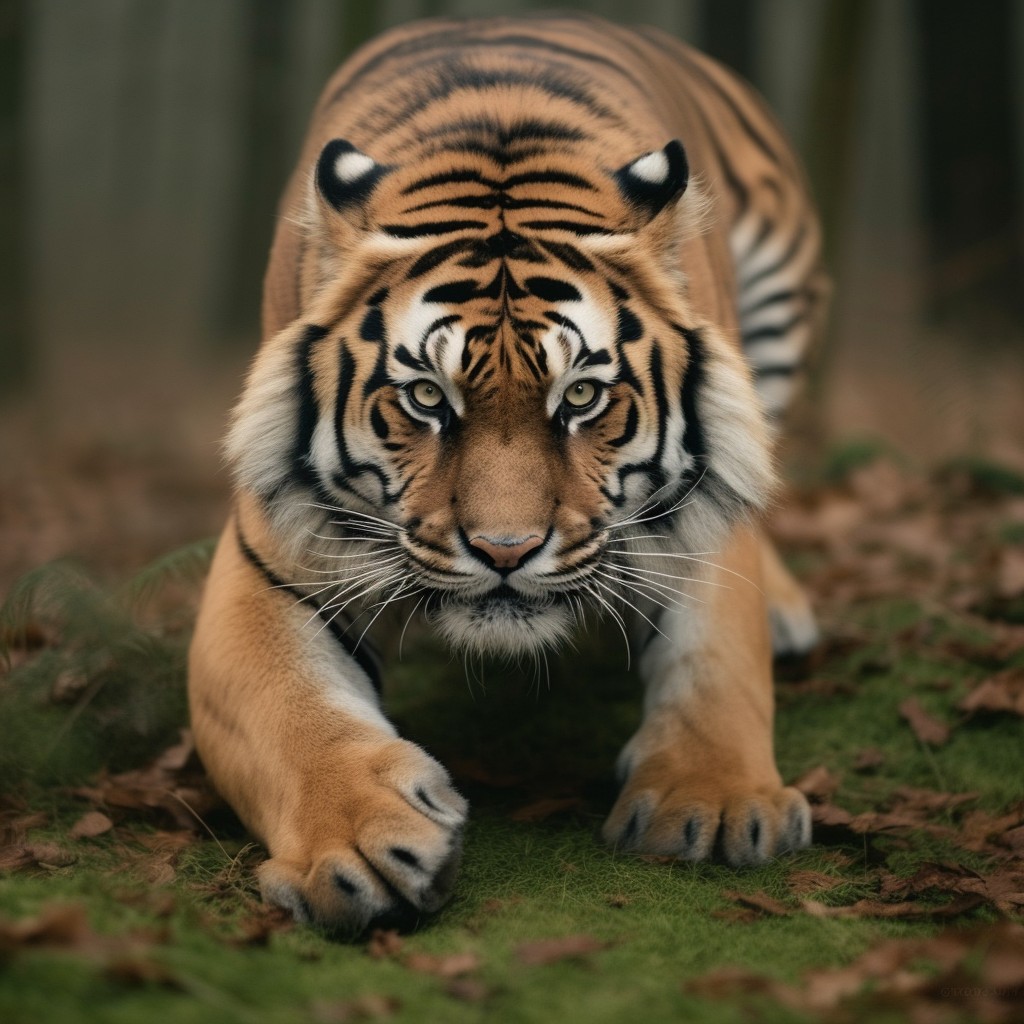
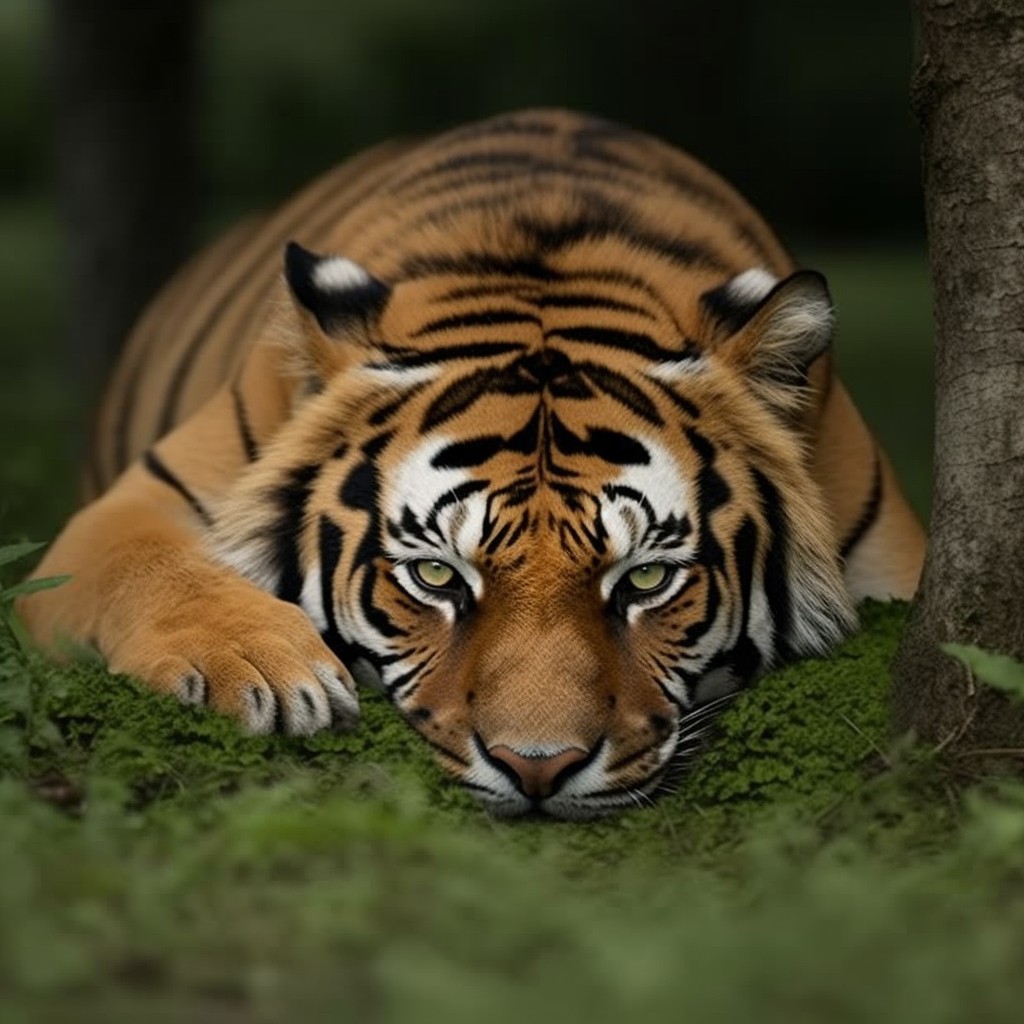
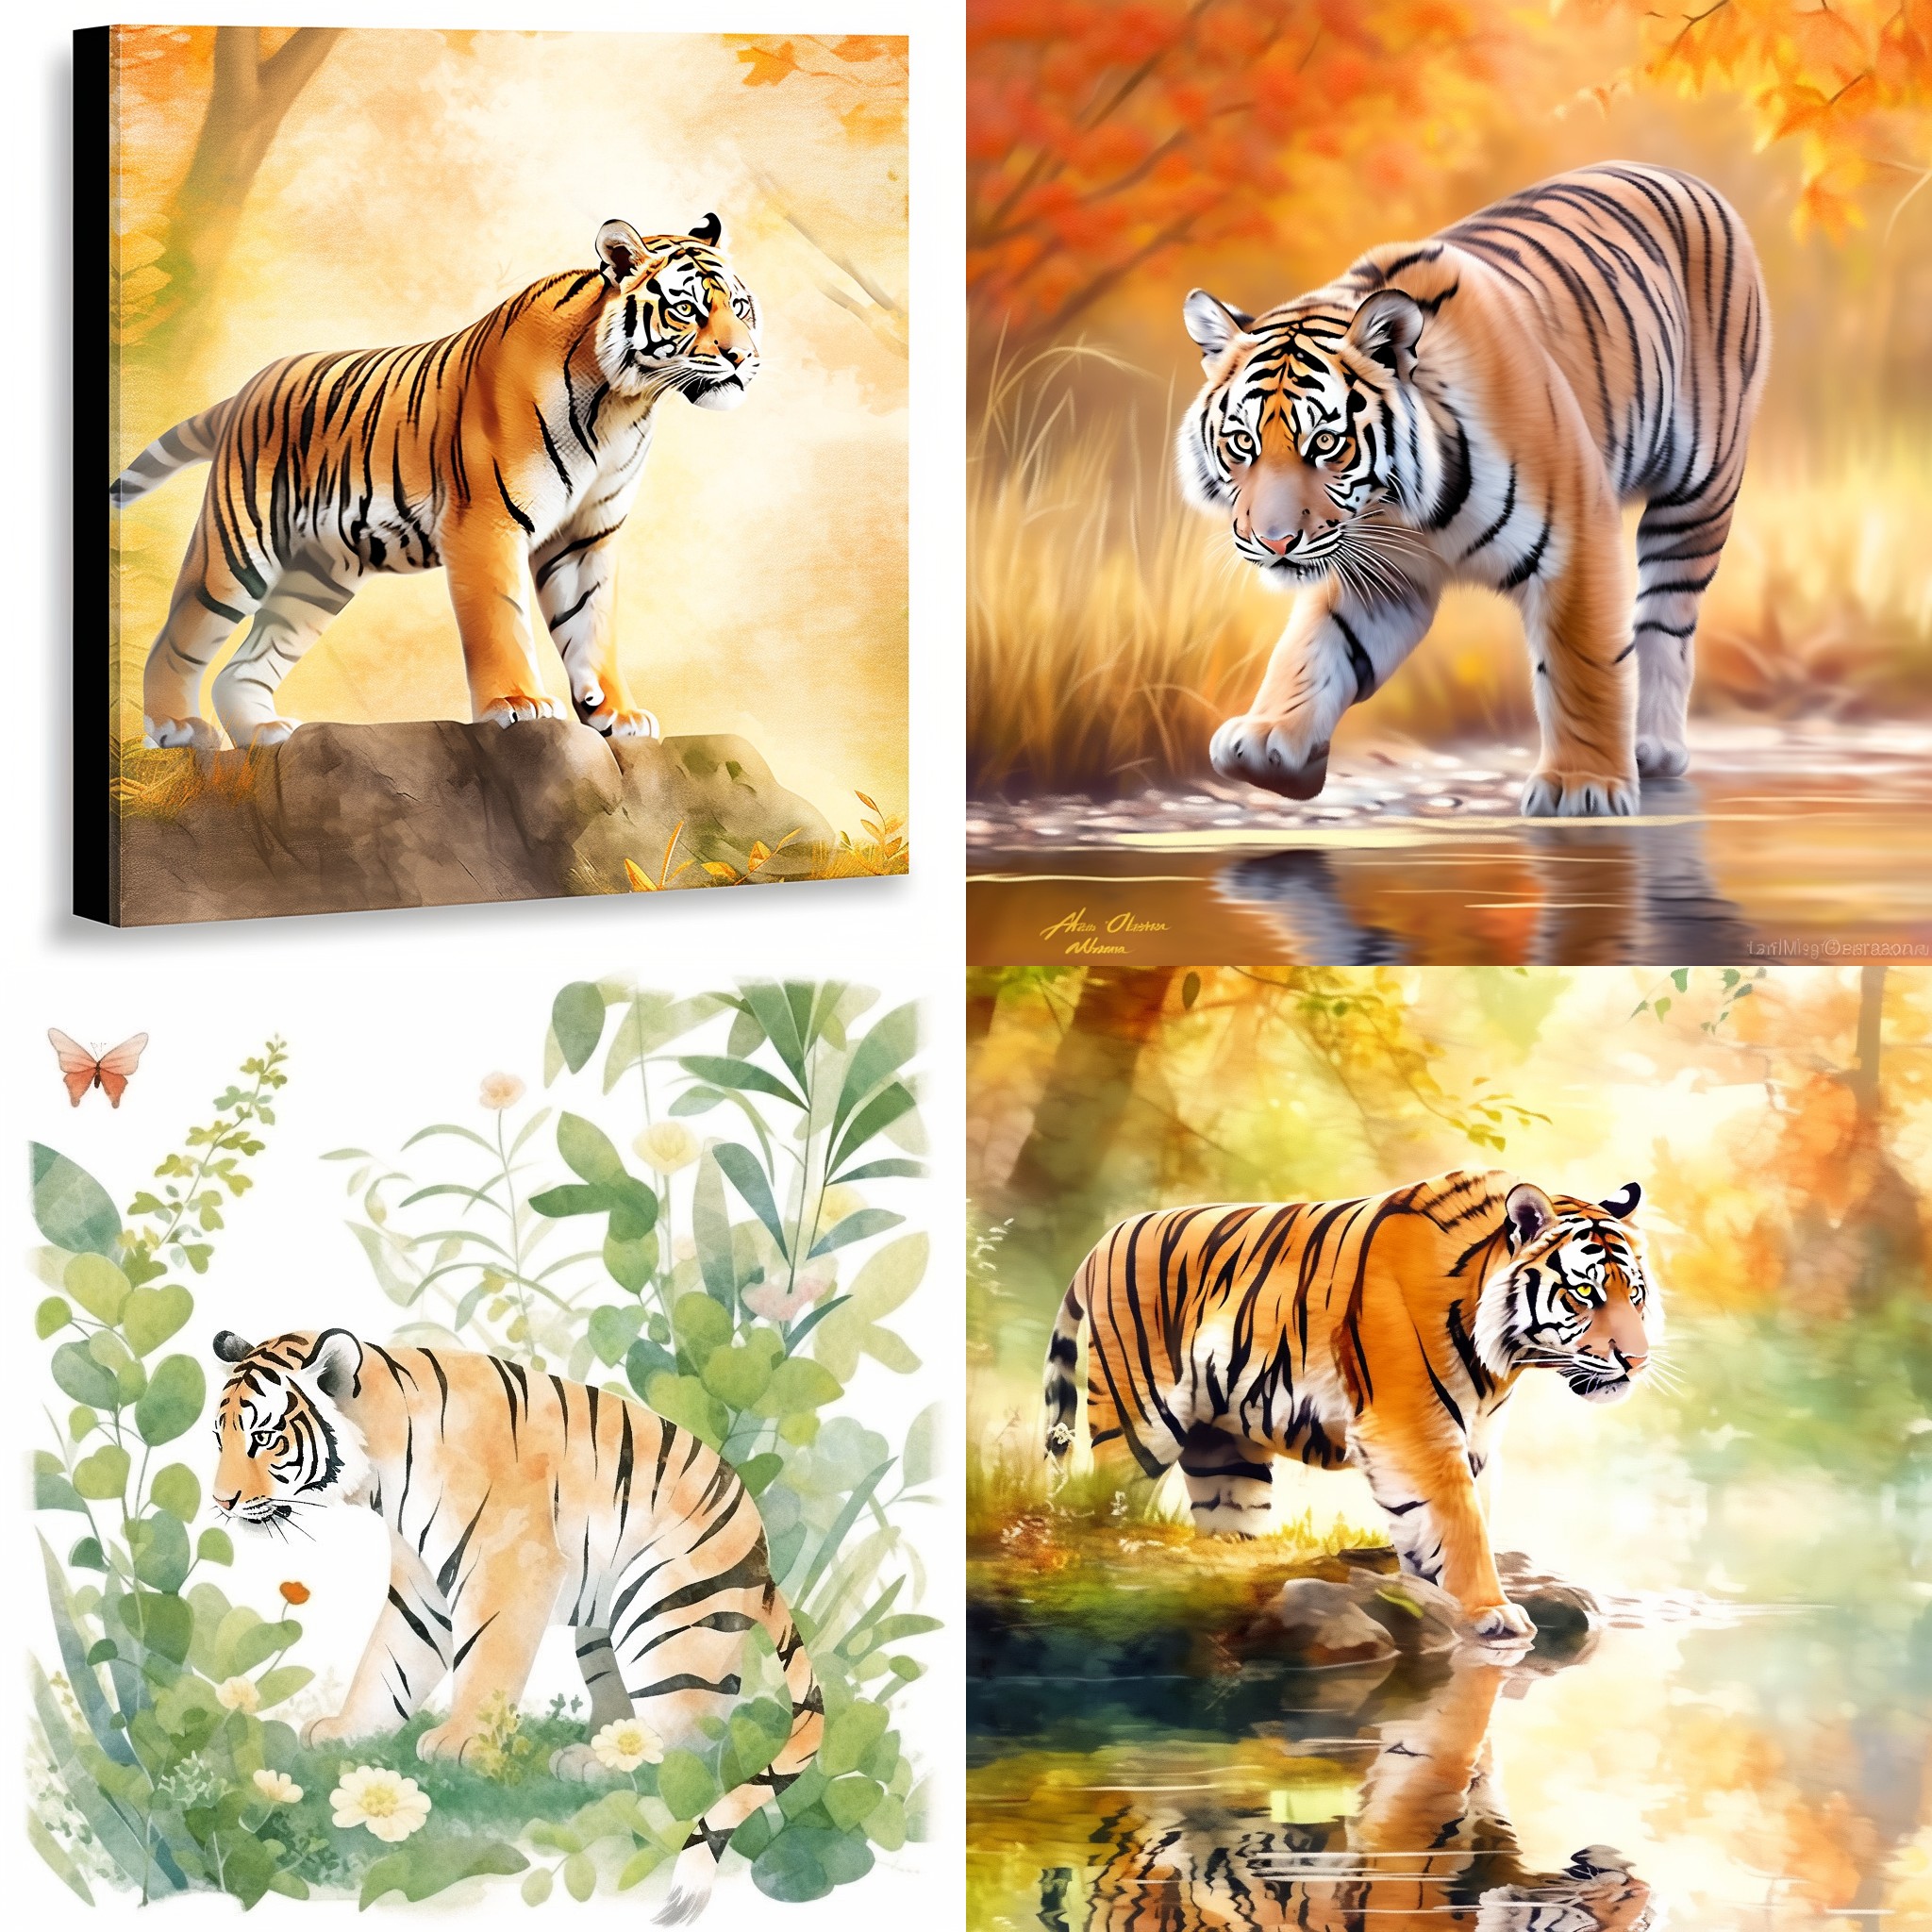
| photo of tiger in natural habitat –w 2000 | photo of tiger in natural habitat –w 3000 |
 |
 |
Version
- The –version or –v parameter is a way to use a different version of the MidJourney algorithm. MidJourney routinely releases new model versions to improve efficiency, coherency, and quality. The latest model is the default, but other models can be used by adding the –version or –v parameter to the end of your prompt.
- Each model version has its own strengths and weaknesses, and may produce different results for the same prompt. For example, the current default model version 5.2 produces more detailed, sharper results with better colors, contrast, and compositions than the previous model version 5.1. However, some users may prefer the stronger default aesthetic of model version 5.1, which makes it easier to use with simple text prompts. more about all the versions here https://docs.midjourney.com/docs/models
- To use the –version or –v parameter, you need to add it to the end of your prompt with a number indicating the model version you want to use. The available model versions are 1, 2, 3, 4, 5, 5.1, and 5.2
- For example, if you want to generate an image of a dragon with the model version 4, you can write: dragon –version 4 or dragon –v 4
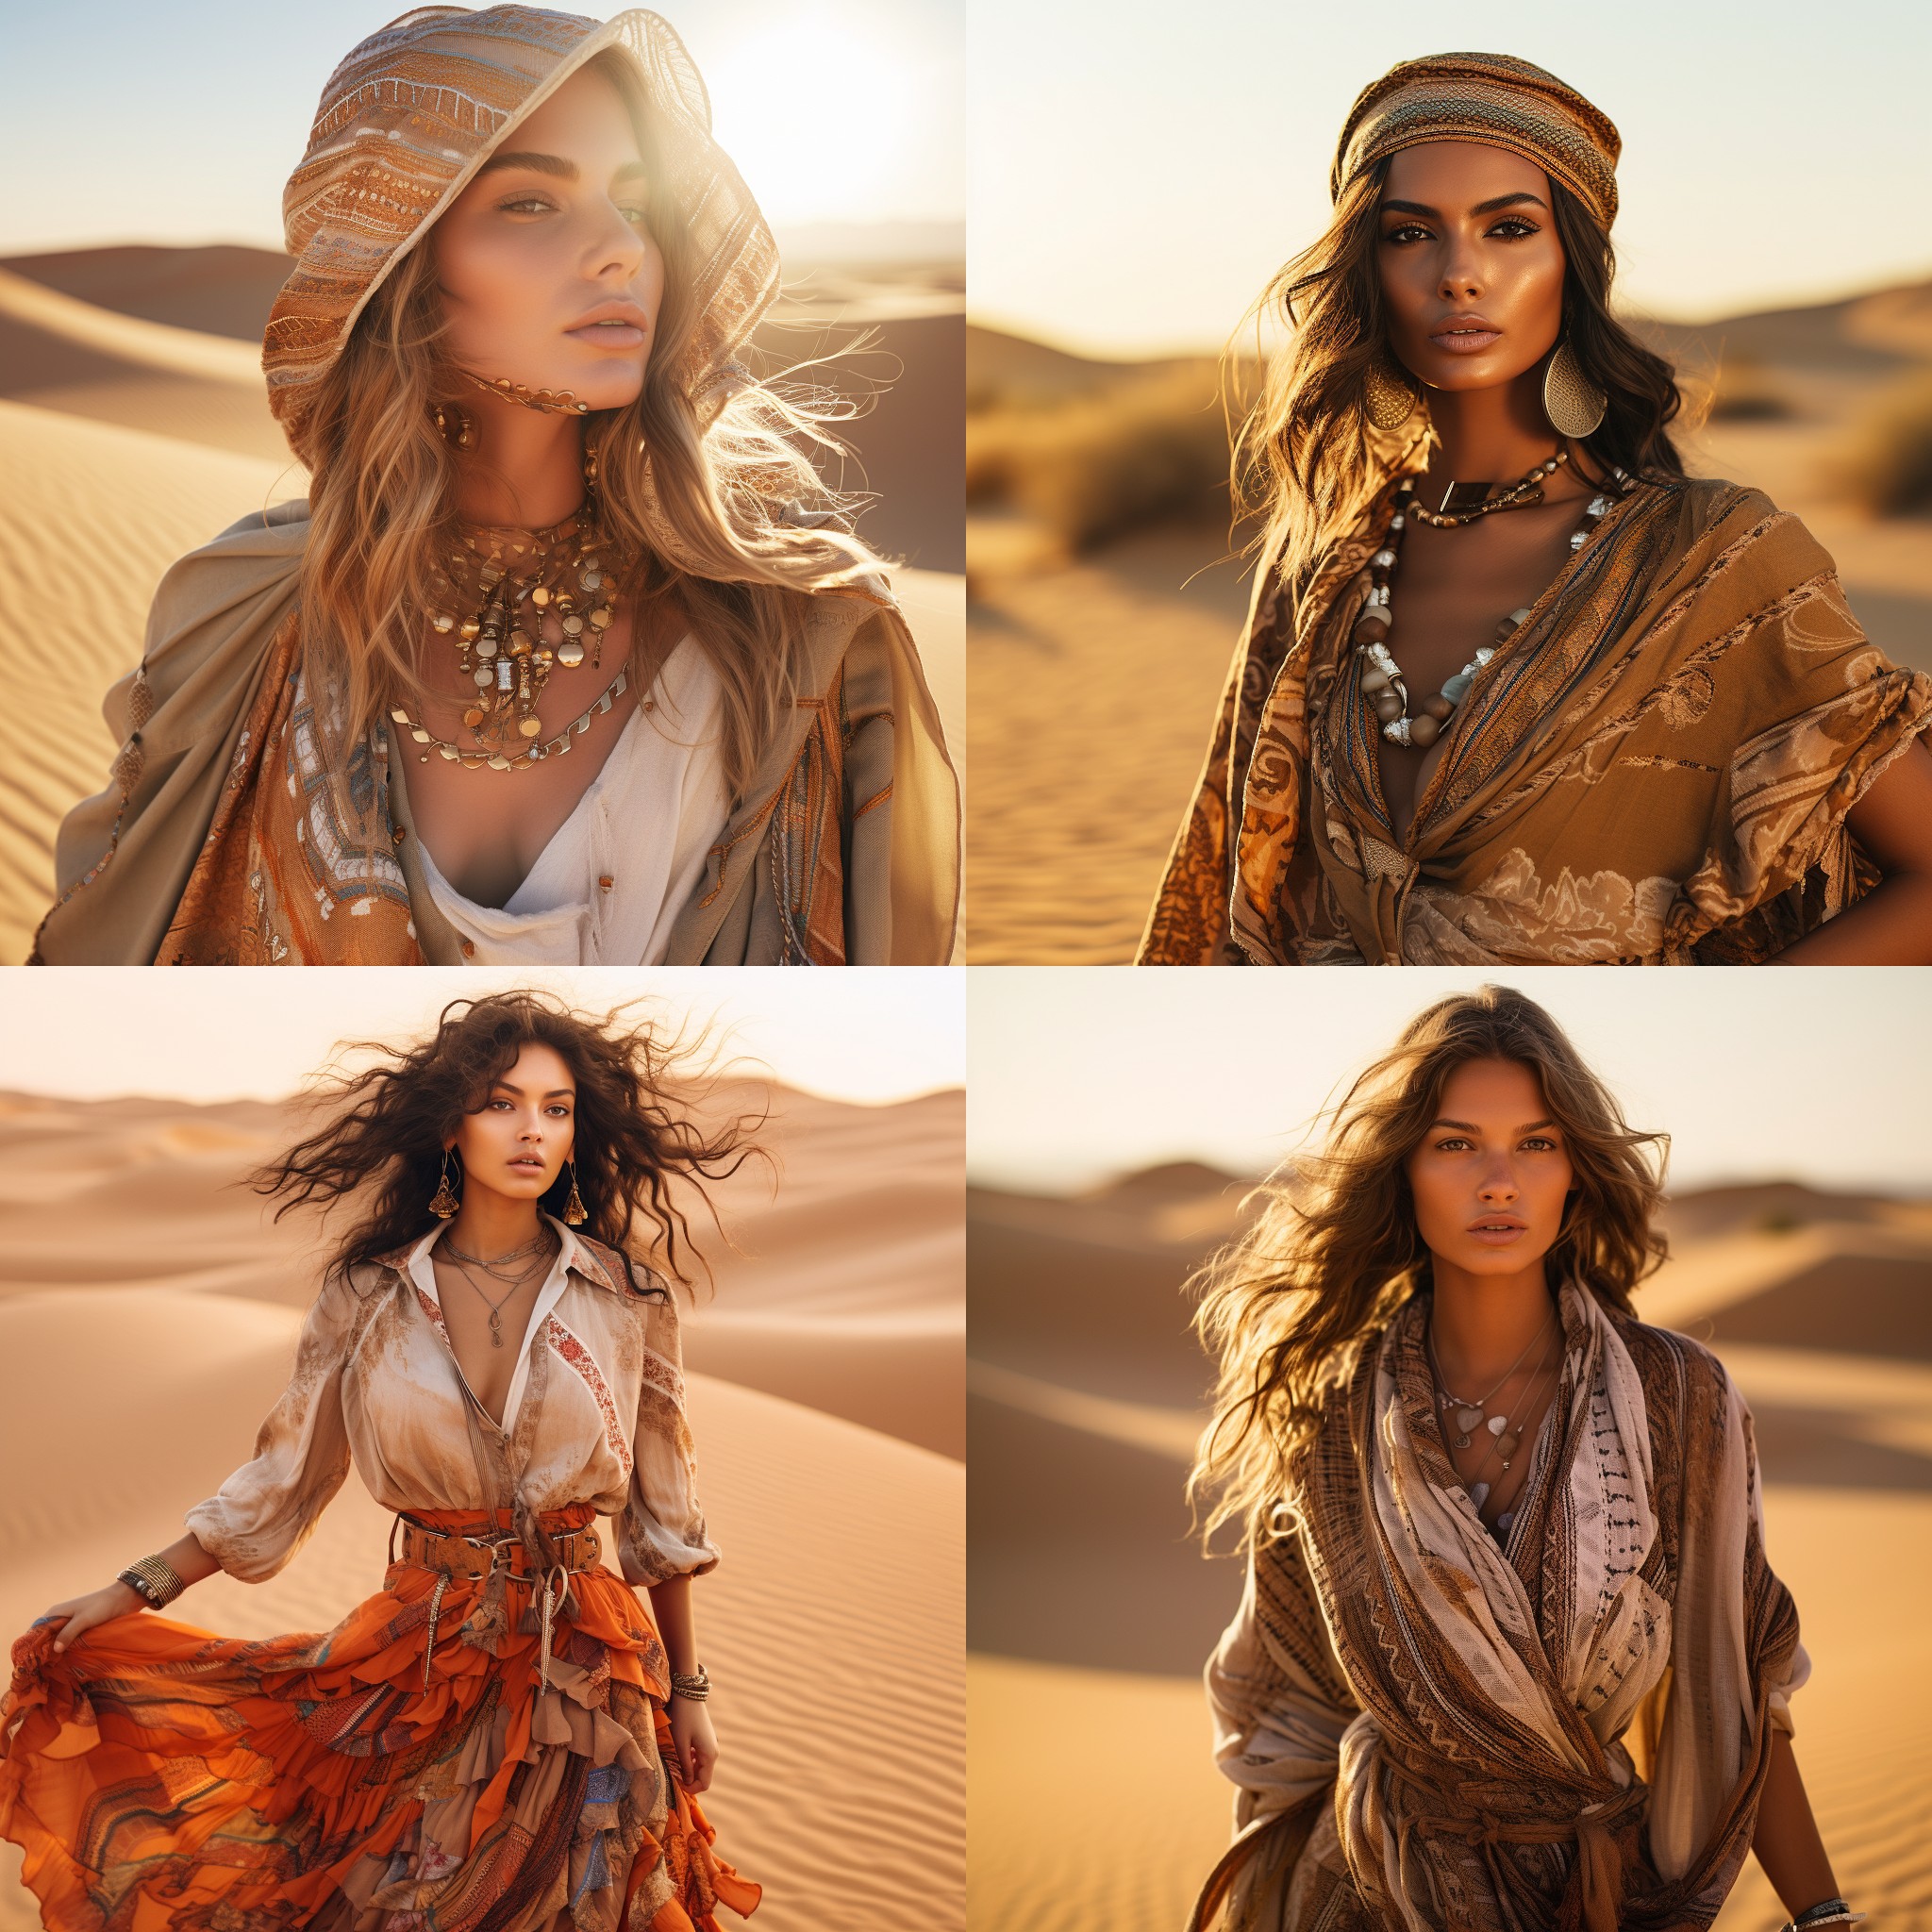
To demonstrate it lets use a bit more advanced prompt:
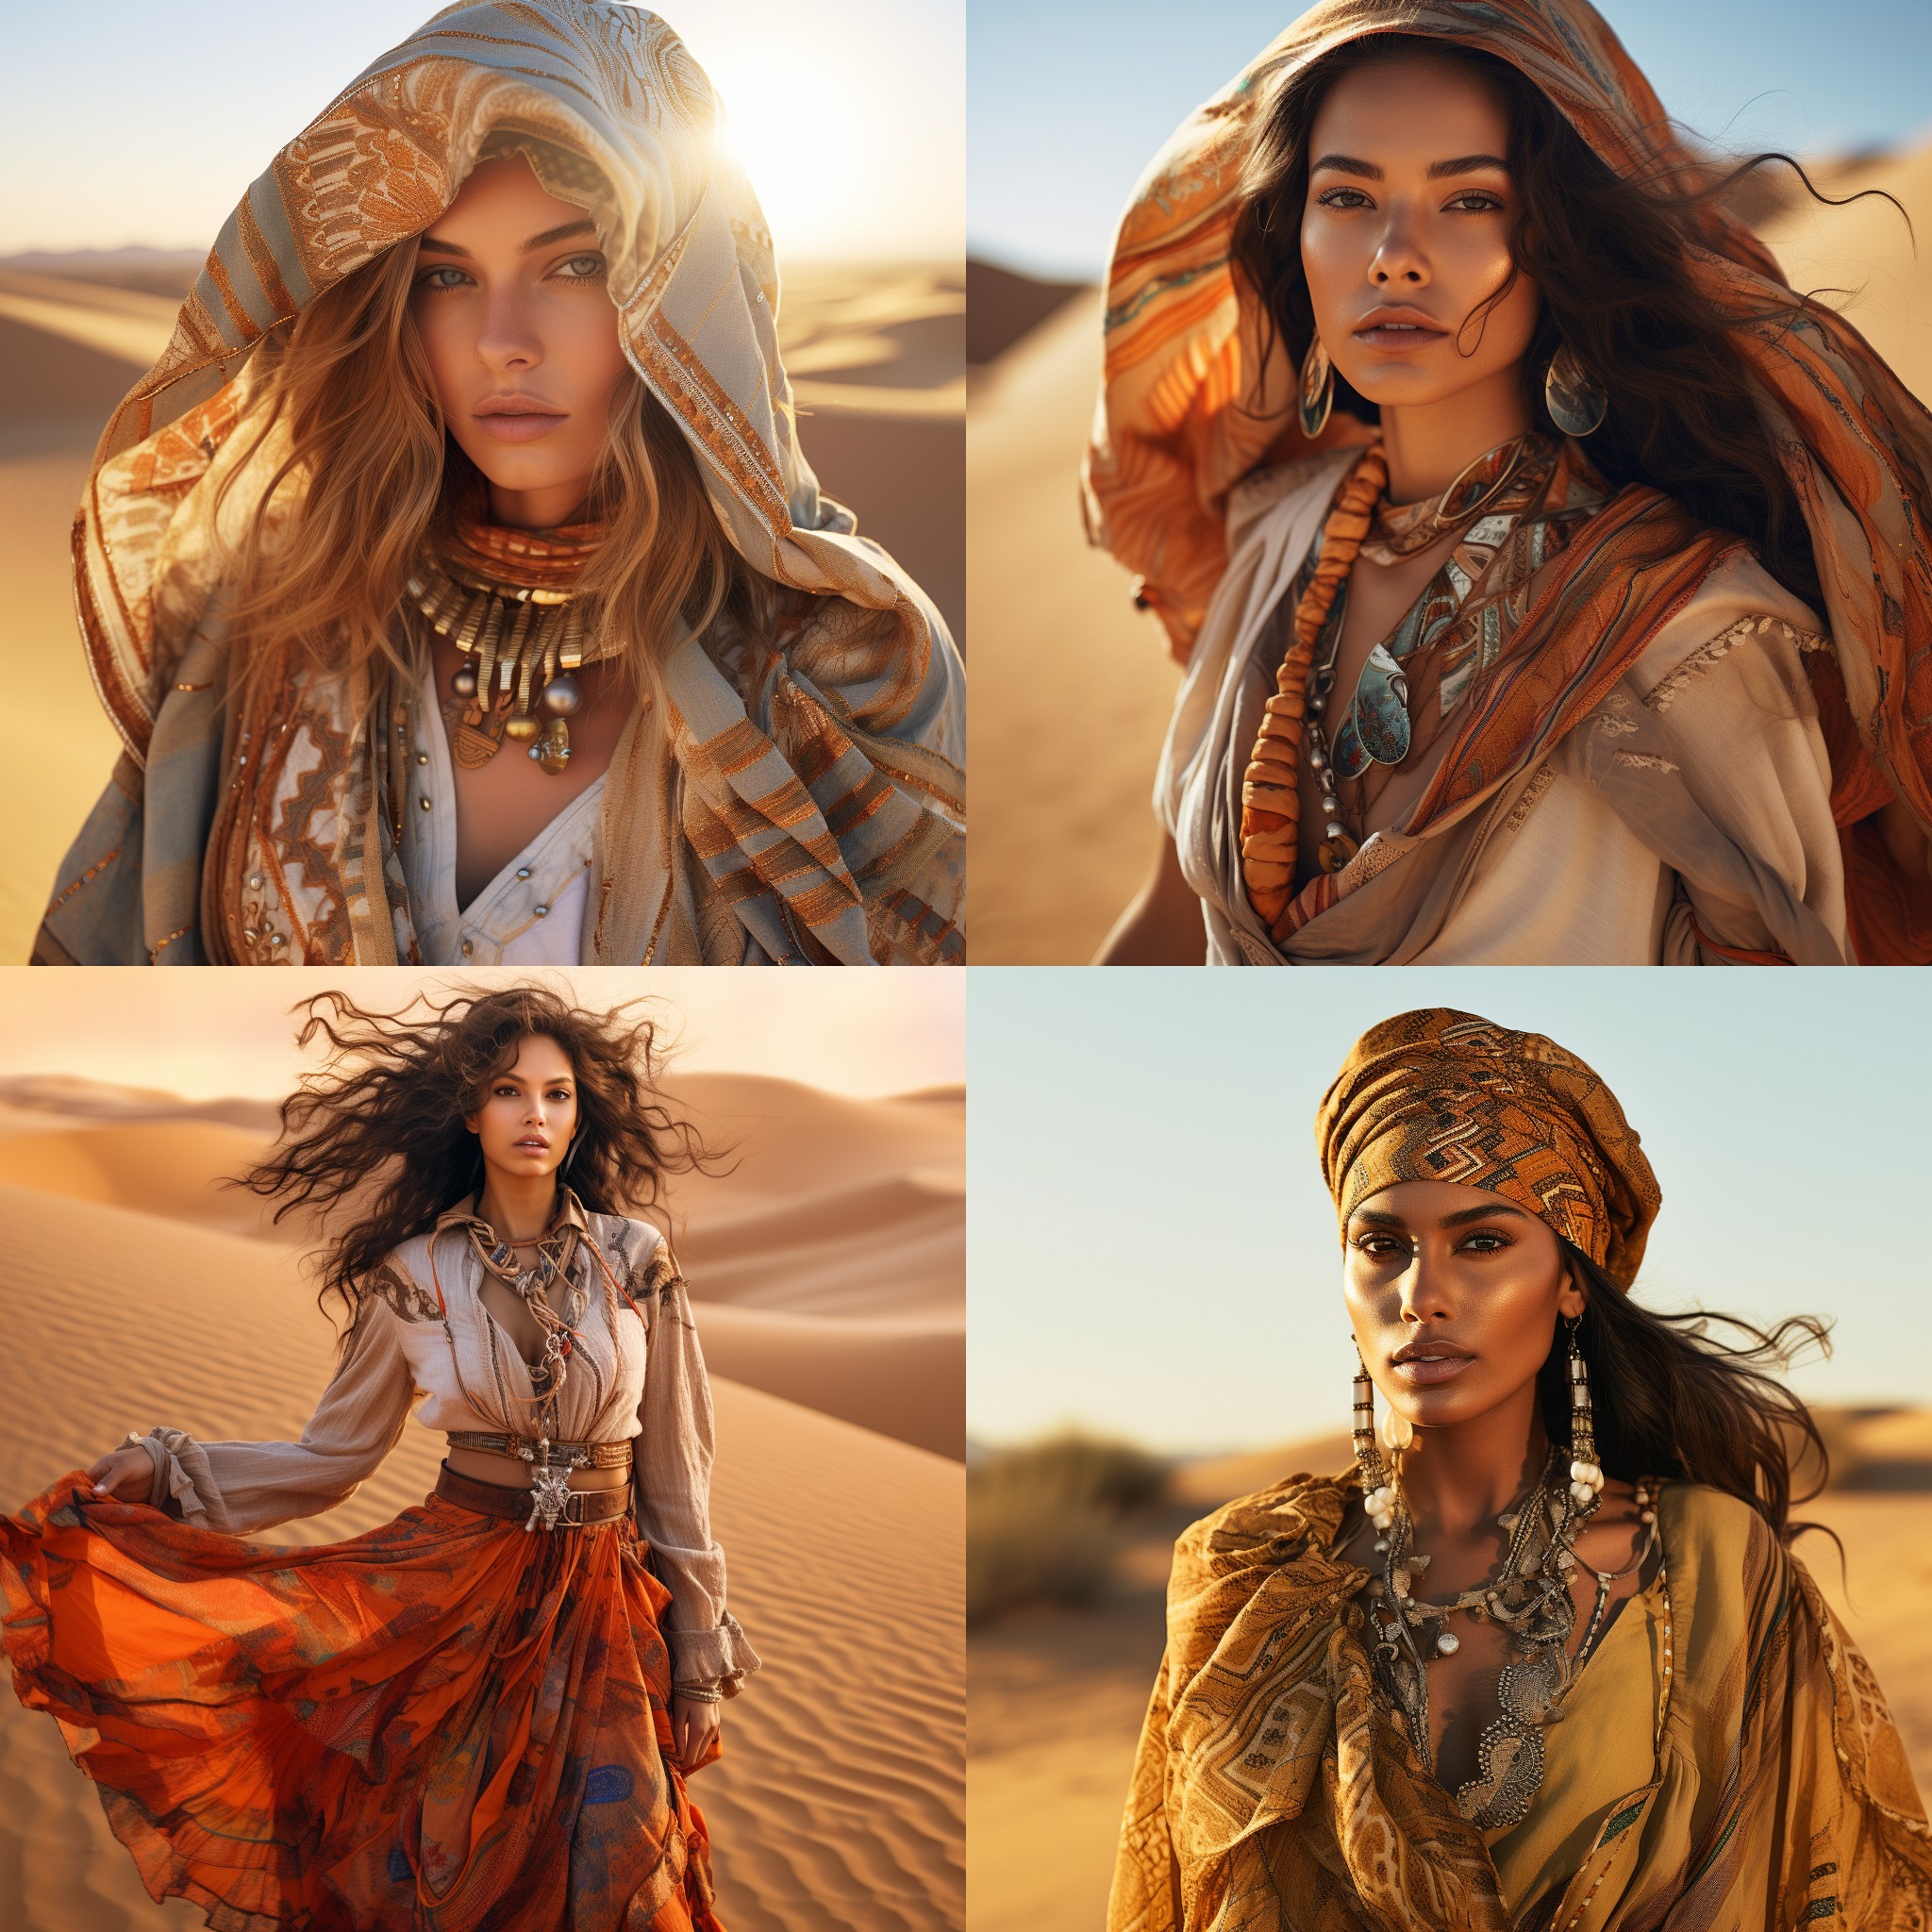
“A woman dressed in detailed desert clothes, shining with desert splendor, bright colors, sand patterns, desert elegance, fashion styles from the desert, soft lighting, desert glow, emphasizing details, fascinating, admirable, unforgettable experiences, fashion meets the desert –seed 12345”
| –v 5.2 | –v 5.1 |
 |
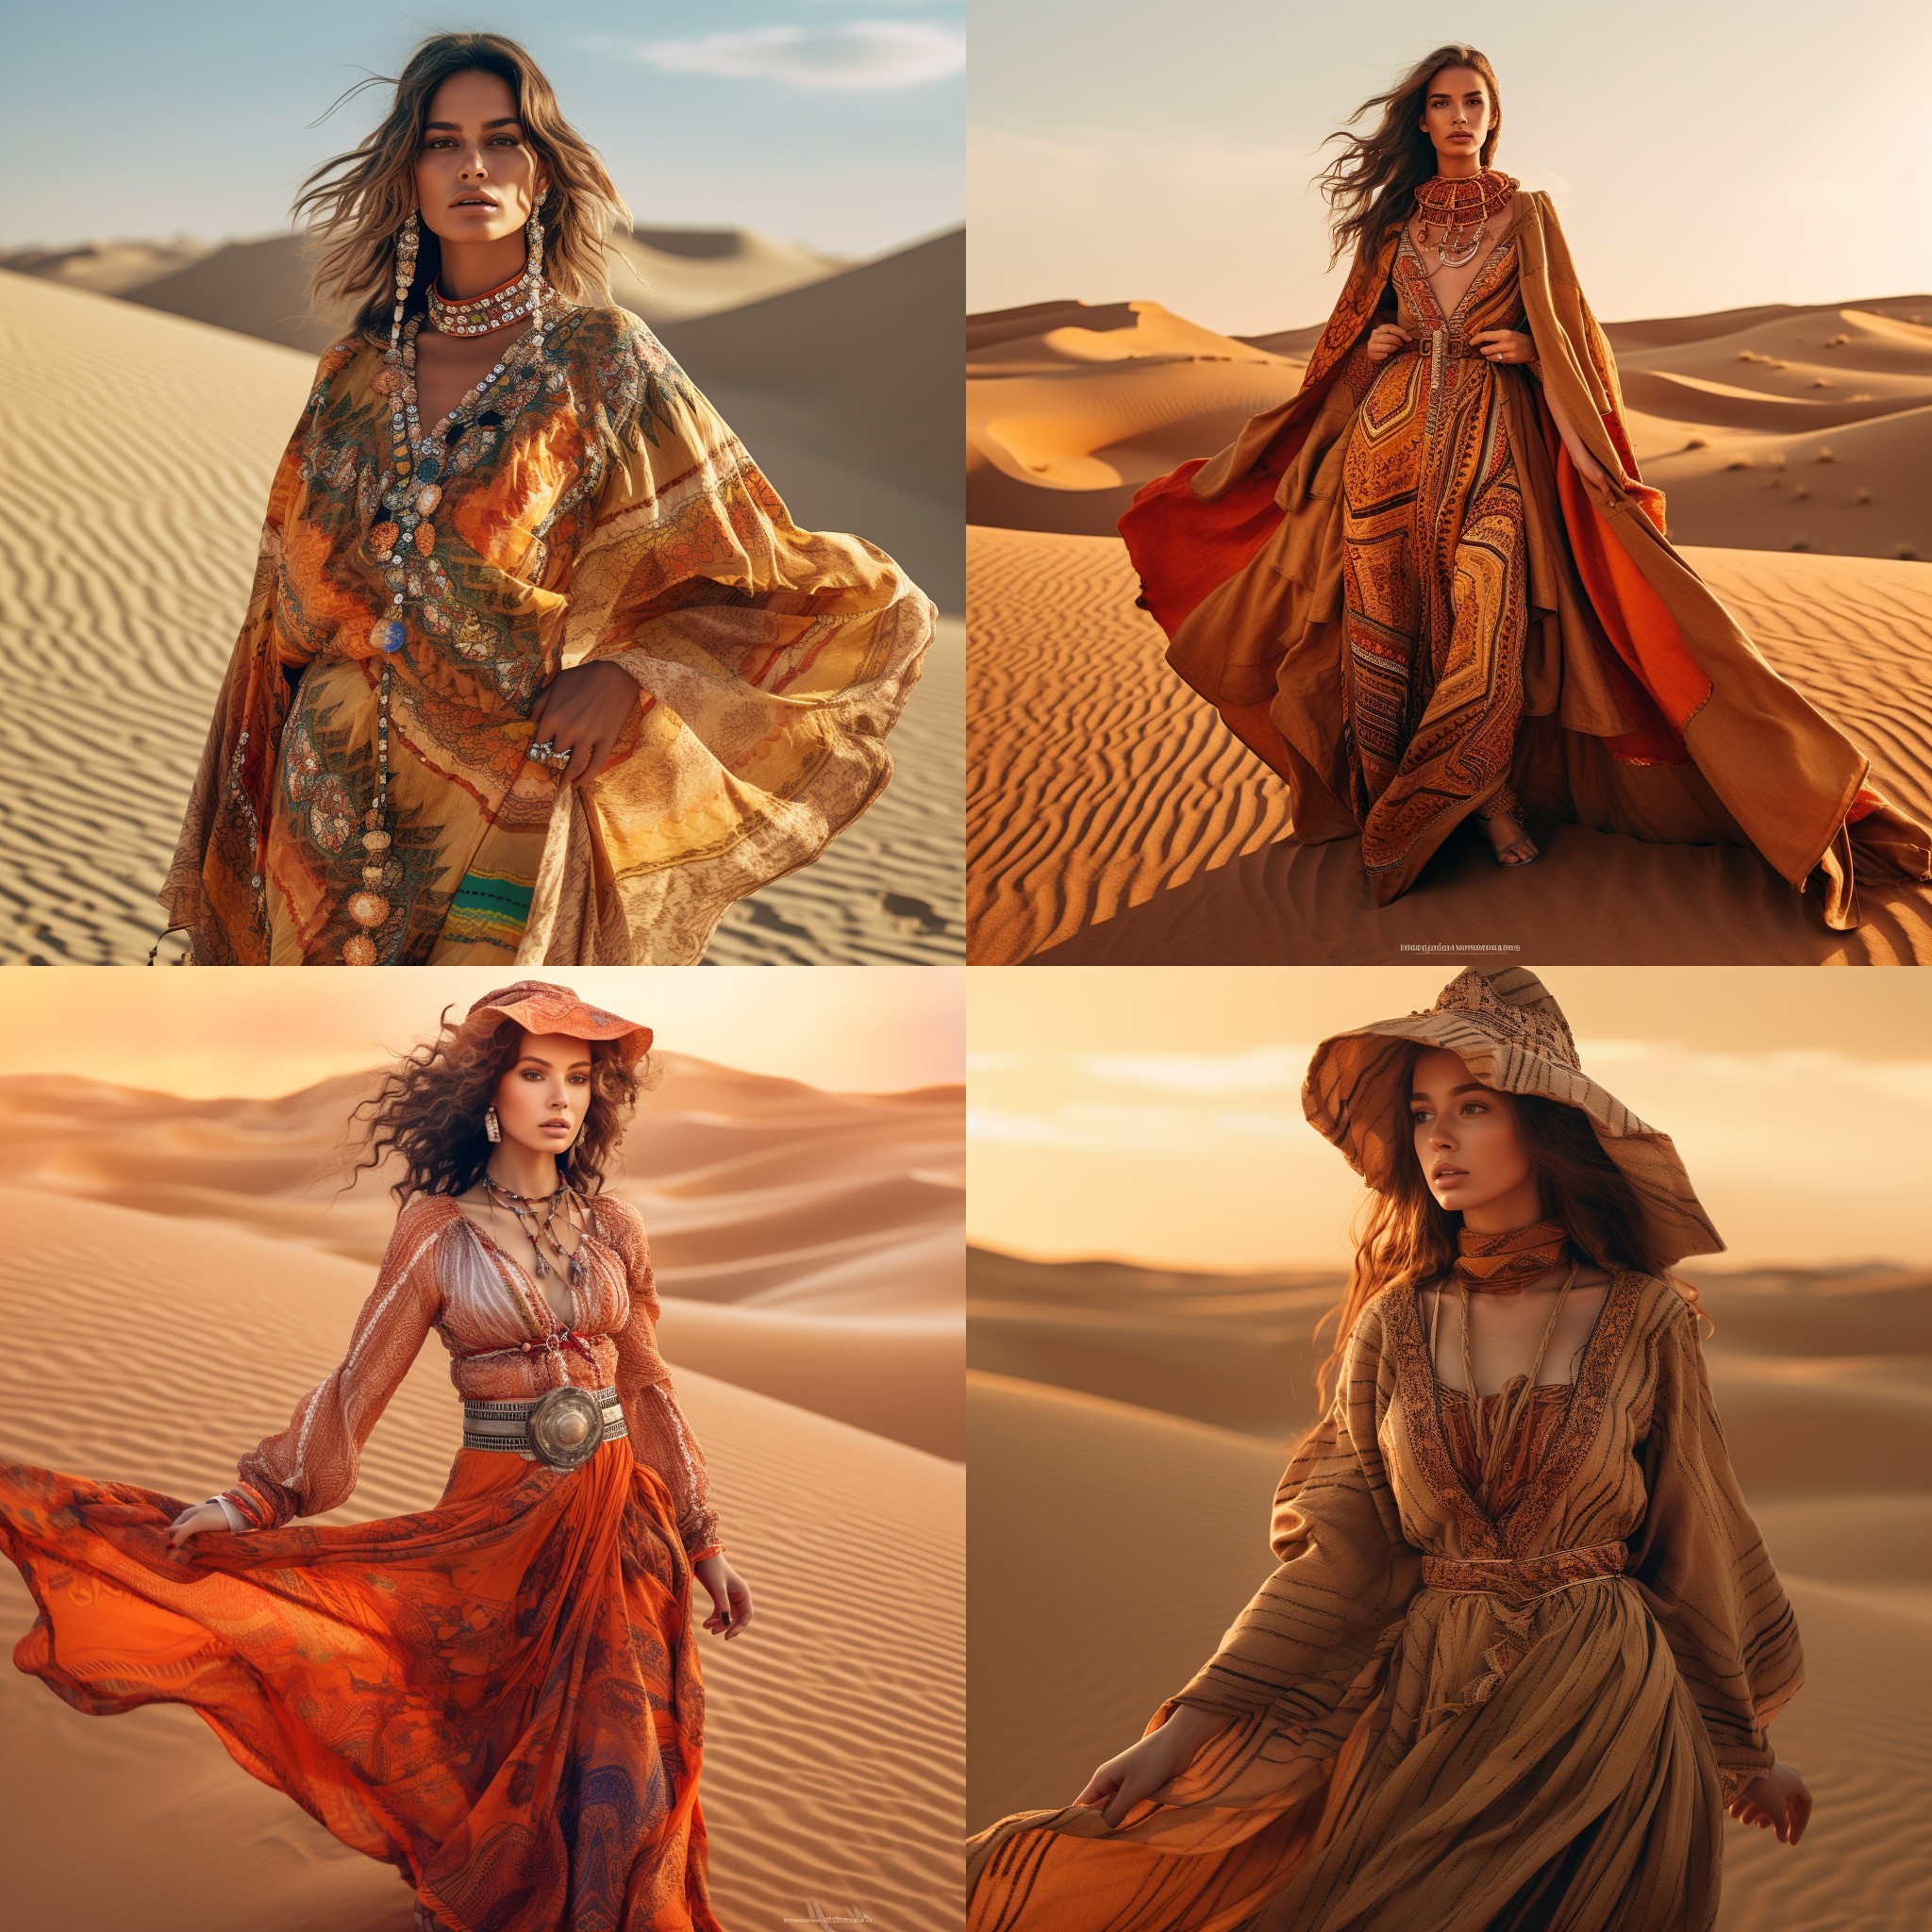 |
| –v 5 | –v 4 |
 |
 |
- Model Versions 5.1 and 5.2 can be fine-tuned with the –style raw parameter to reduce the Midjourney default aesthetic (see paragraph Style for more)
Style
- The –style parameter is a way to change the aesthetic of some MidJourney model versions. Depending on the model version you are using, you can choose from different style options to create more photo-realistic, cinematic, or cute images.
- The available style options are –style cute, –style expressive, –style original, and –style scenic:
- –style cute creates charming and adorable characters, props, and settings that are perfect for slice-of-life, comedy, or romance anime
- –style expressive has a more sophisticated illustrated feeling that suits drama, mystery, or thriller anime.
- –style original uses the original Niji model version 5, which was the default before May 26th, 2023.
- –style scenic makes beautiful backgrounds and cinematic character moments in the context of their fantastical surroundings, ideal for fantasy, sci-fi, or adventure anime.
- If you are using the default model version 5.2 or the previous version 5.1, you can use –style raw to get an alternative model that has less automatic beautification and more accuracy when prompting for specific styles.
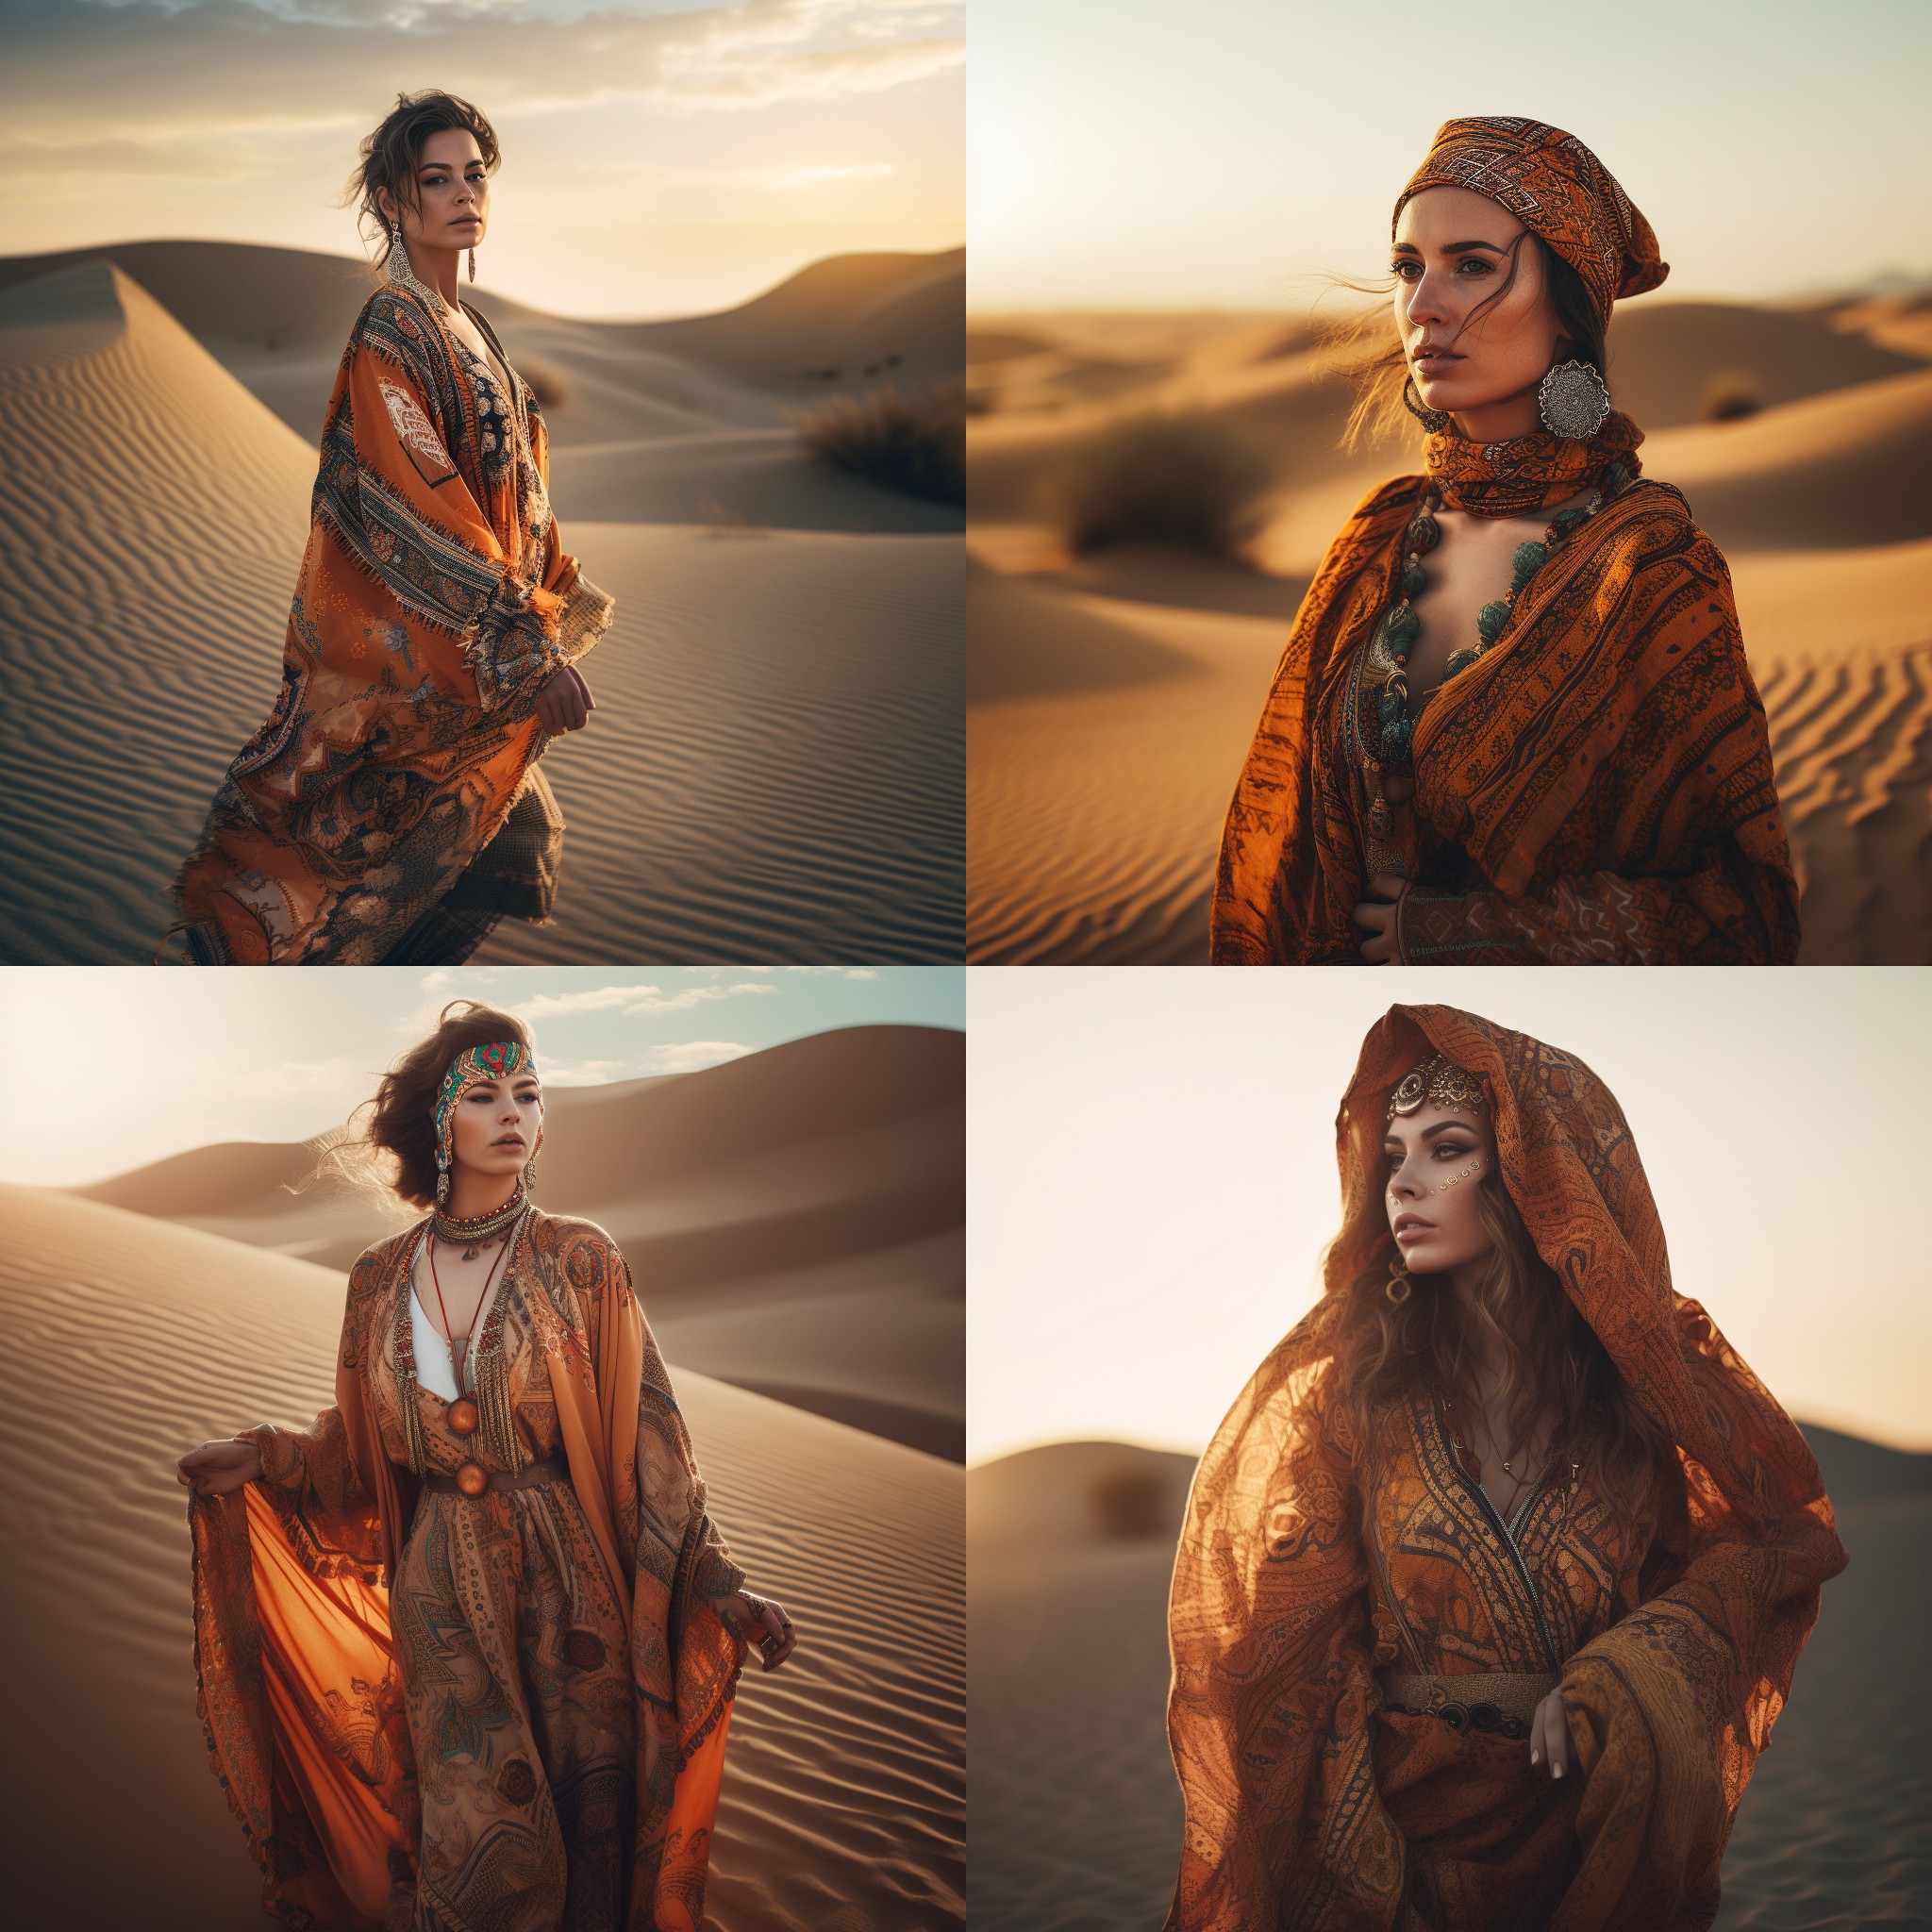
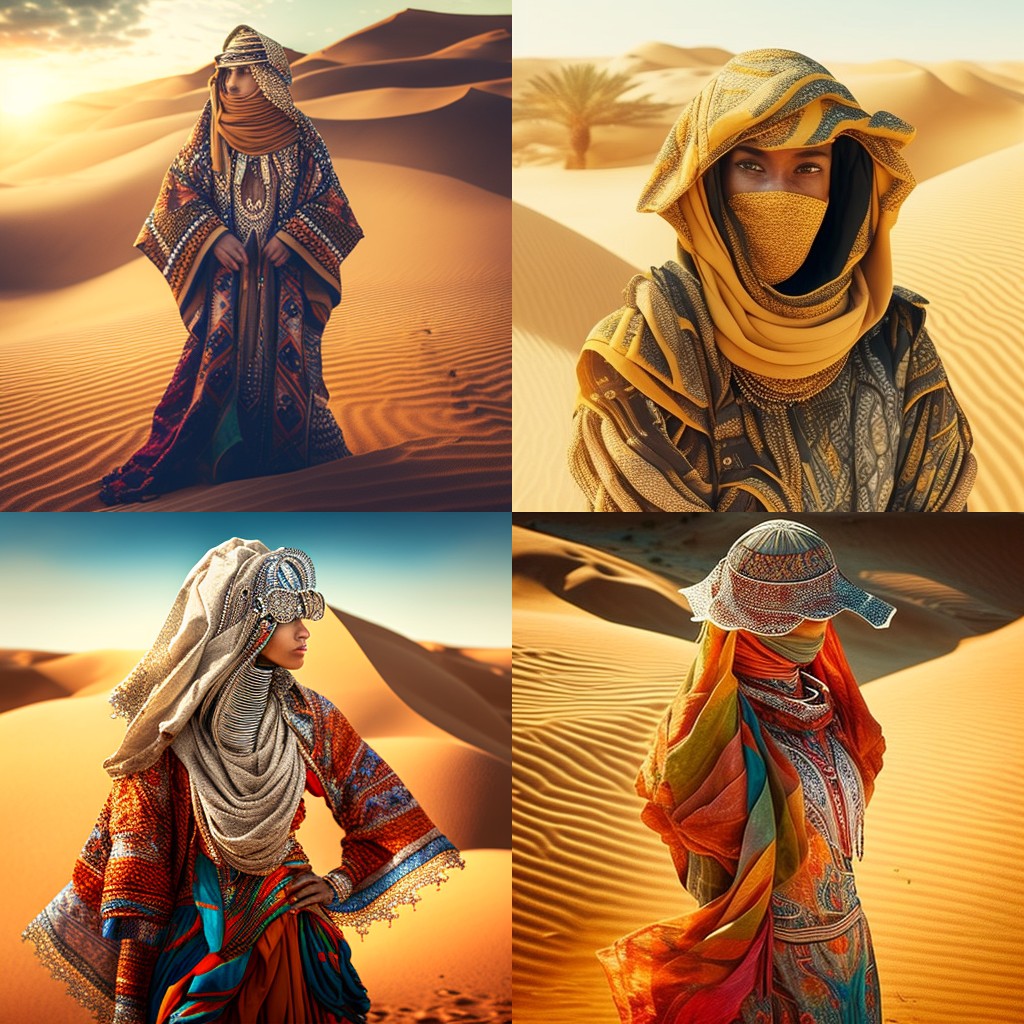
Prompt: “A woman dressed in detailed desert clothes, shining with desert splendor, bright colors, sand patterns, desert elegance, fashion styles from the desert, soft lighting, desert glow, emphasizing details, fascinating, admirable, unforgettable experiences, fashion meets the desert –seed 12345 –style raw”
| –v 5.2 | –v 5.2 –raw |
|
 |
- The Niji model 5 is a special model version in MidJourney that is designed to produce anime and illustrative styles with vastly more knowledge of anime, anime styles, and anime aesthetics. It is a collaboration between MidJourney and Spellbrush, a company that specializes in anime art generation.
- The Niji model 5 can create dynamic and action shots and character-focused compositions that are inspired by popular anime genres and tropes. It can also use different aesthetics with the –style parameter to achieve unique looks.
- To use the Niji model 5, you need to add the –niji 5 parameter to the end of your prompt. Then, you can optionally add the –style parameter with your preferred style option to customize your output. For example, if you want to generate an image of a dragon with the Niji model version 5 and the scenic style, you can write: dragon –niji 5 –style scenic
- More about styles: https://docs.midjourney.com/docs/style
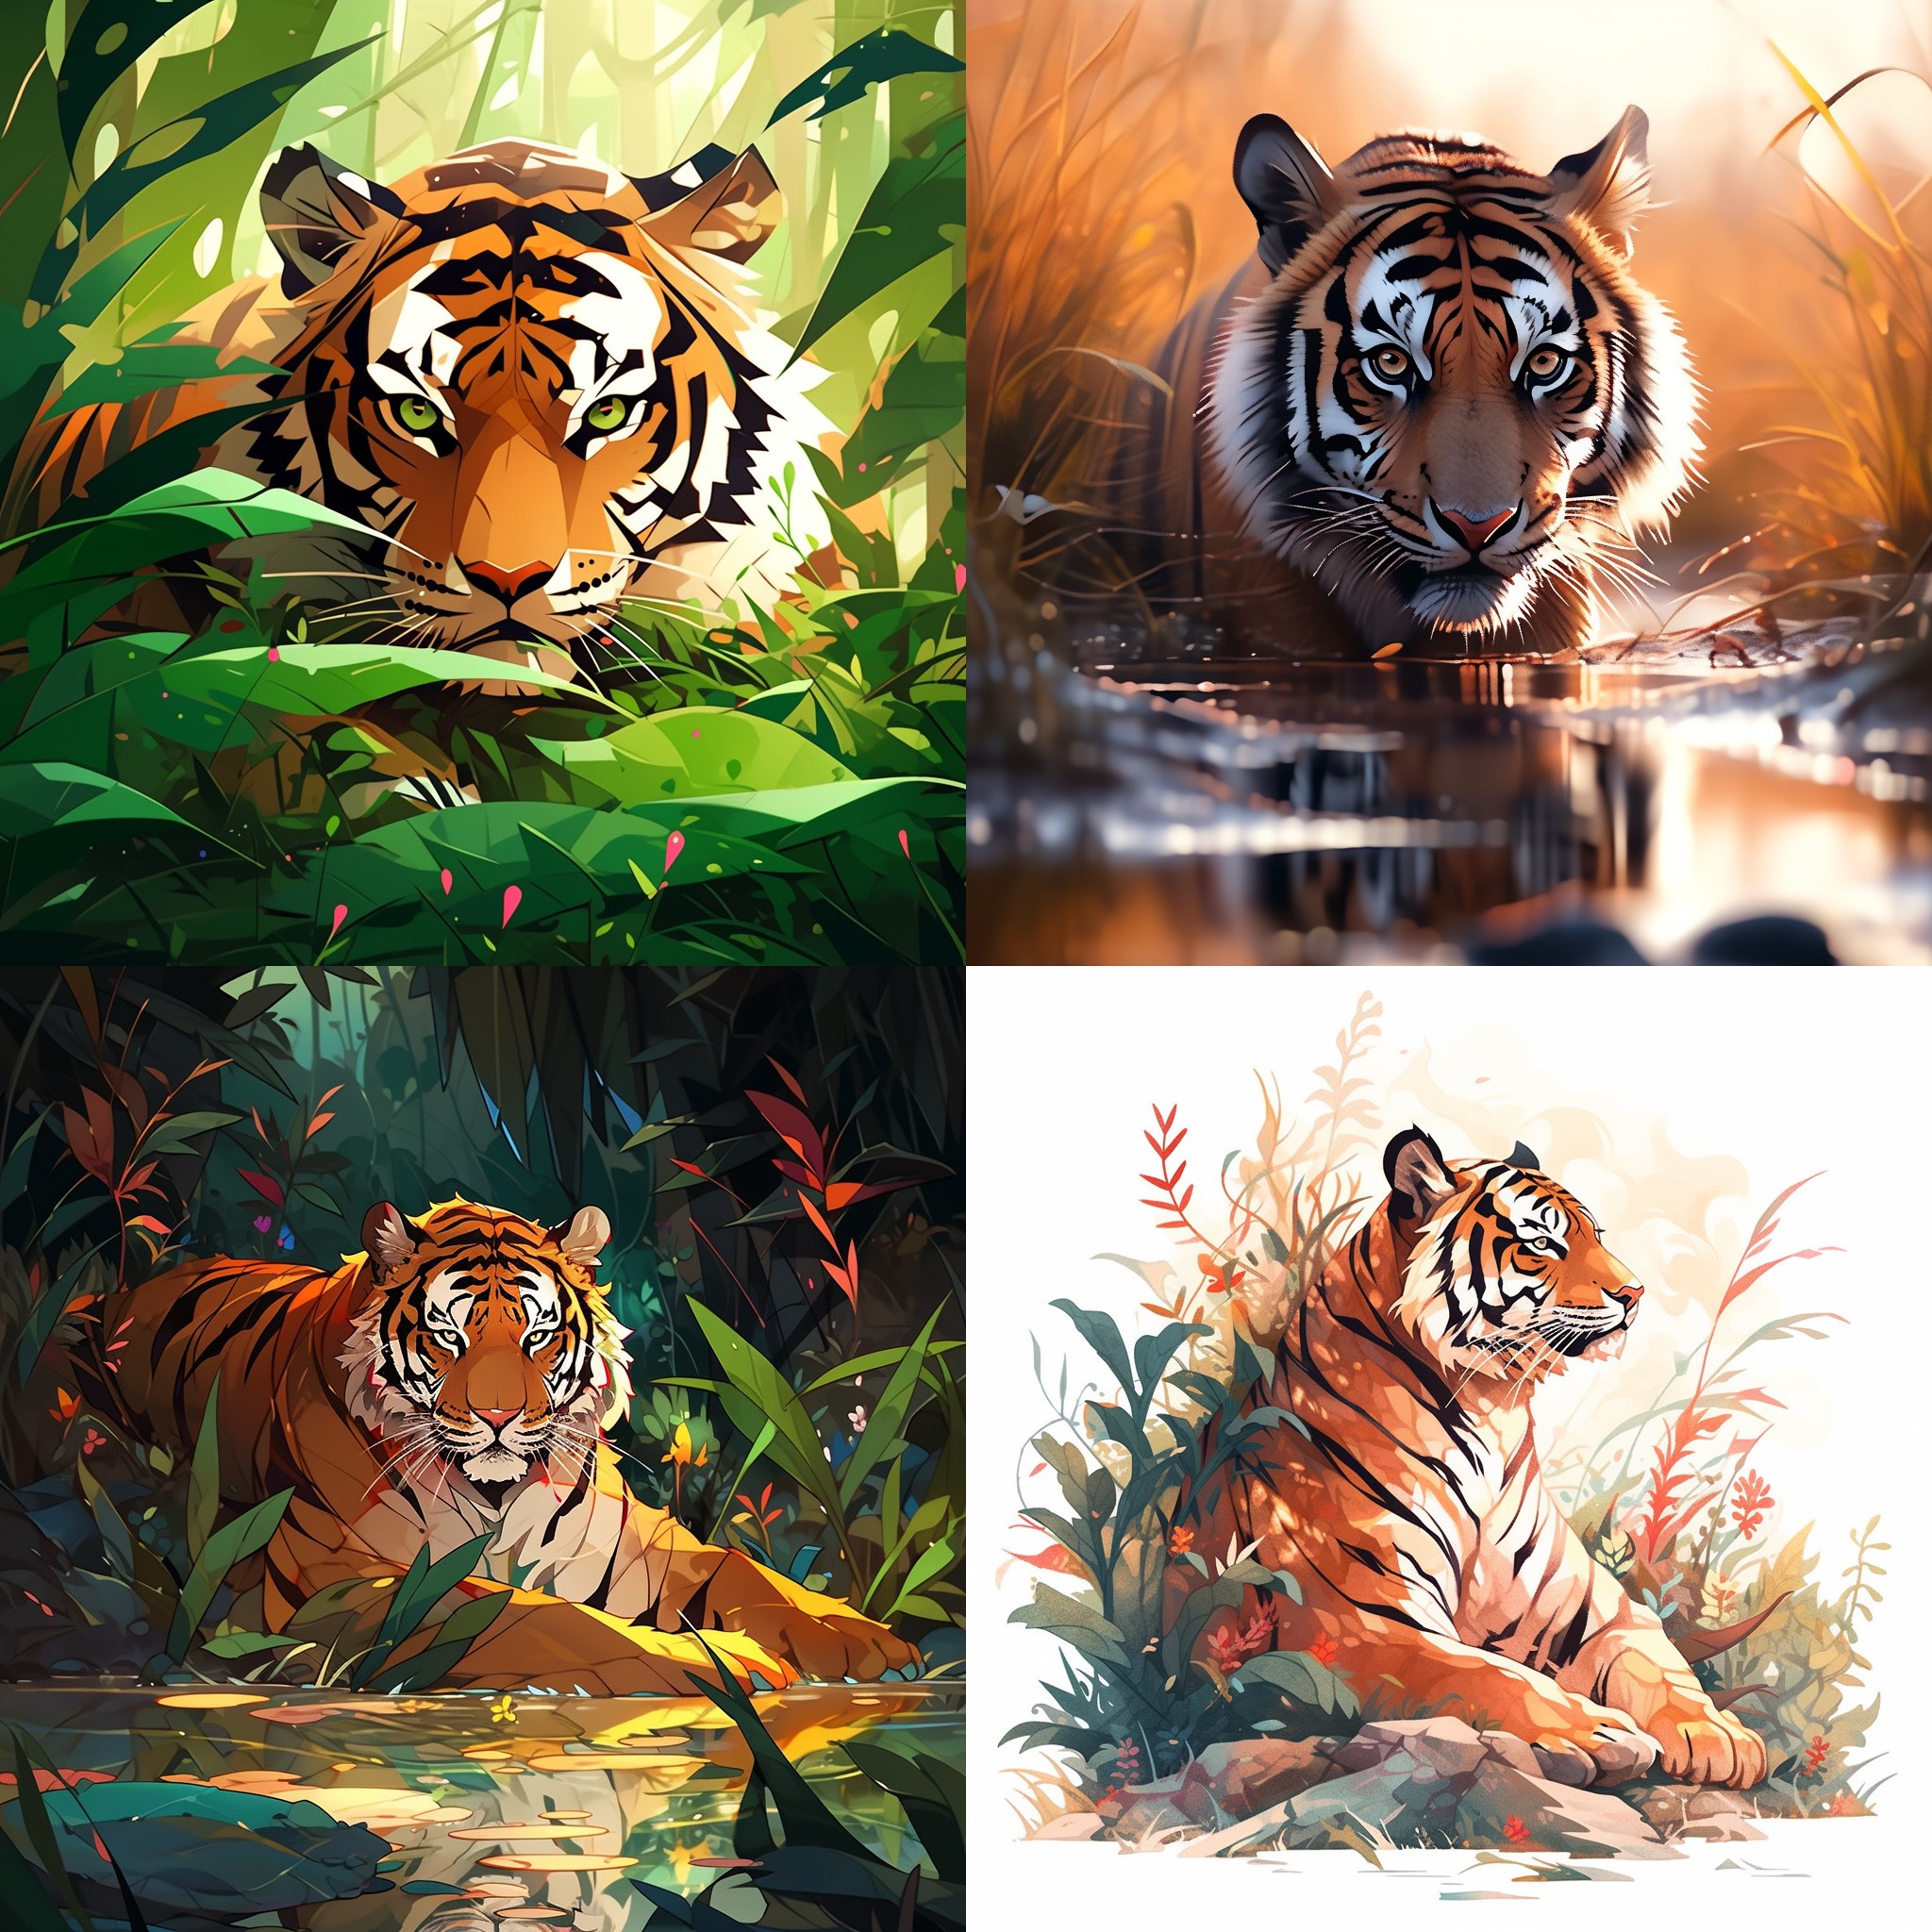
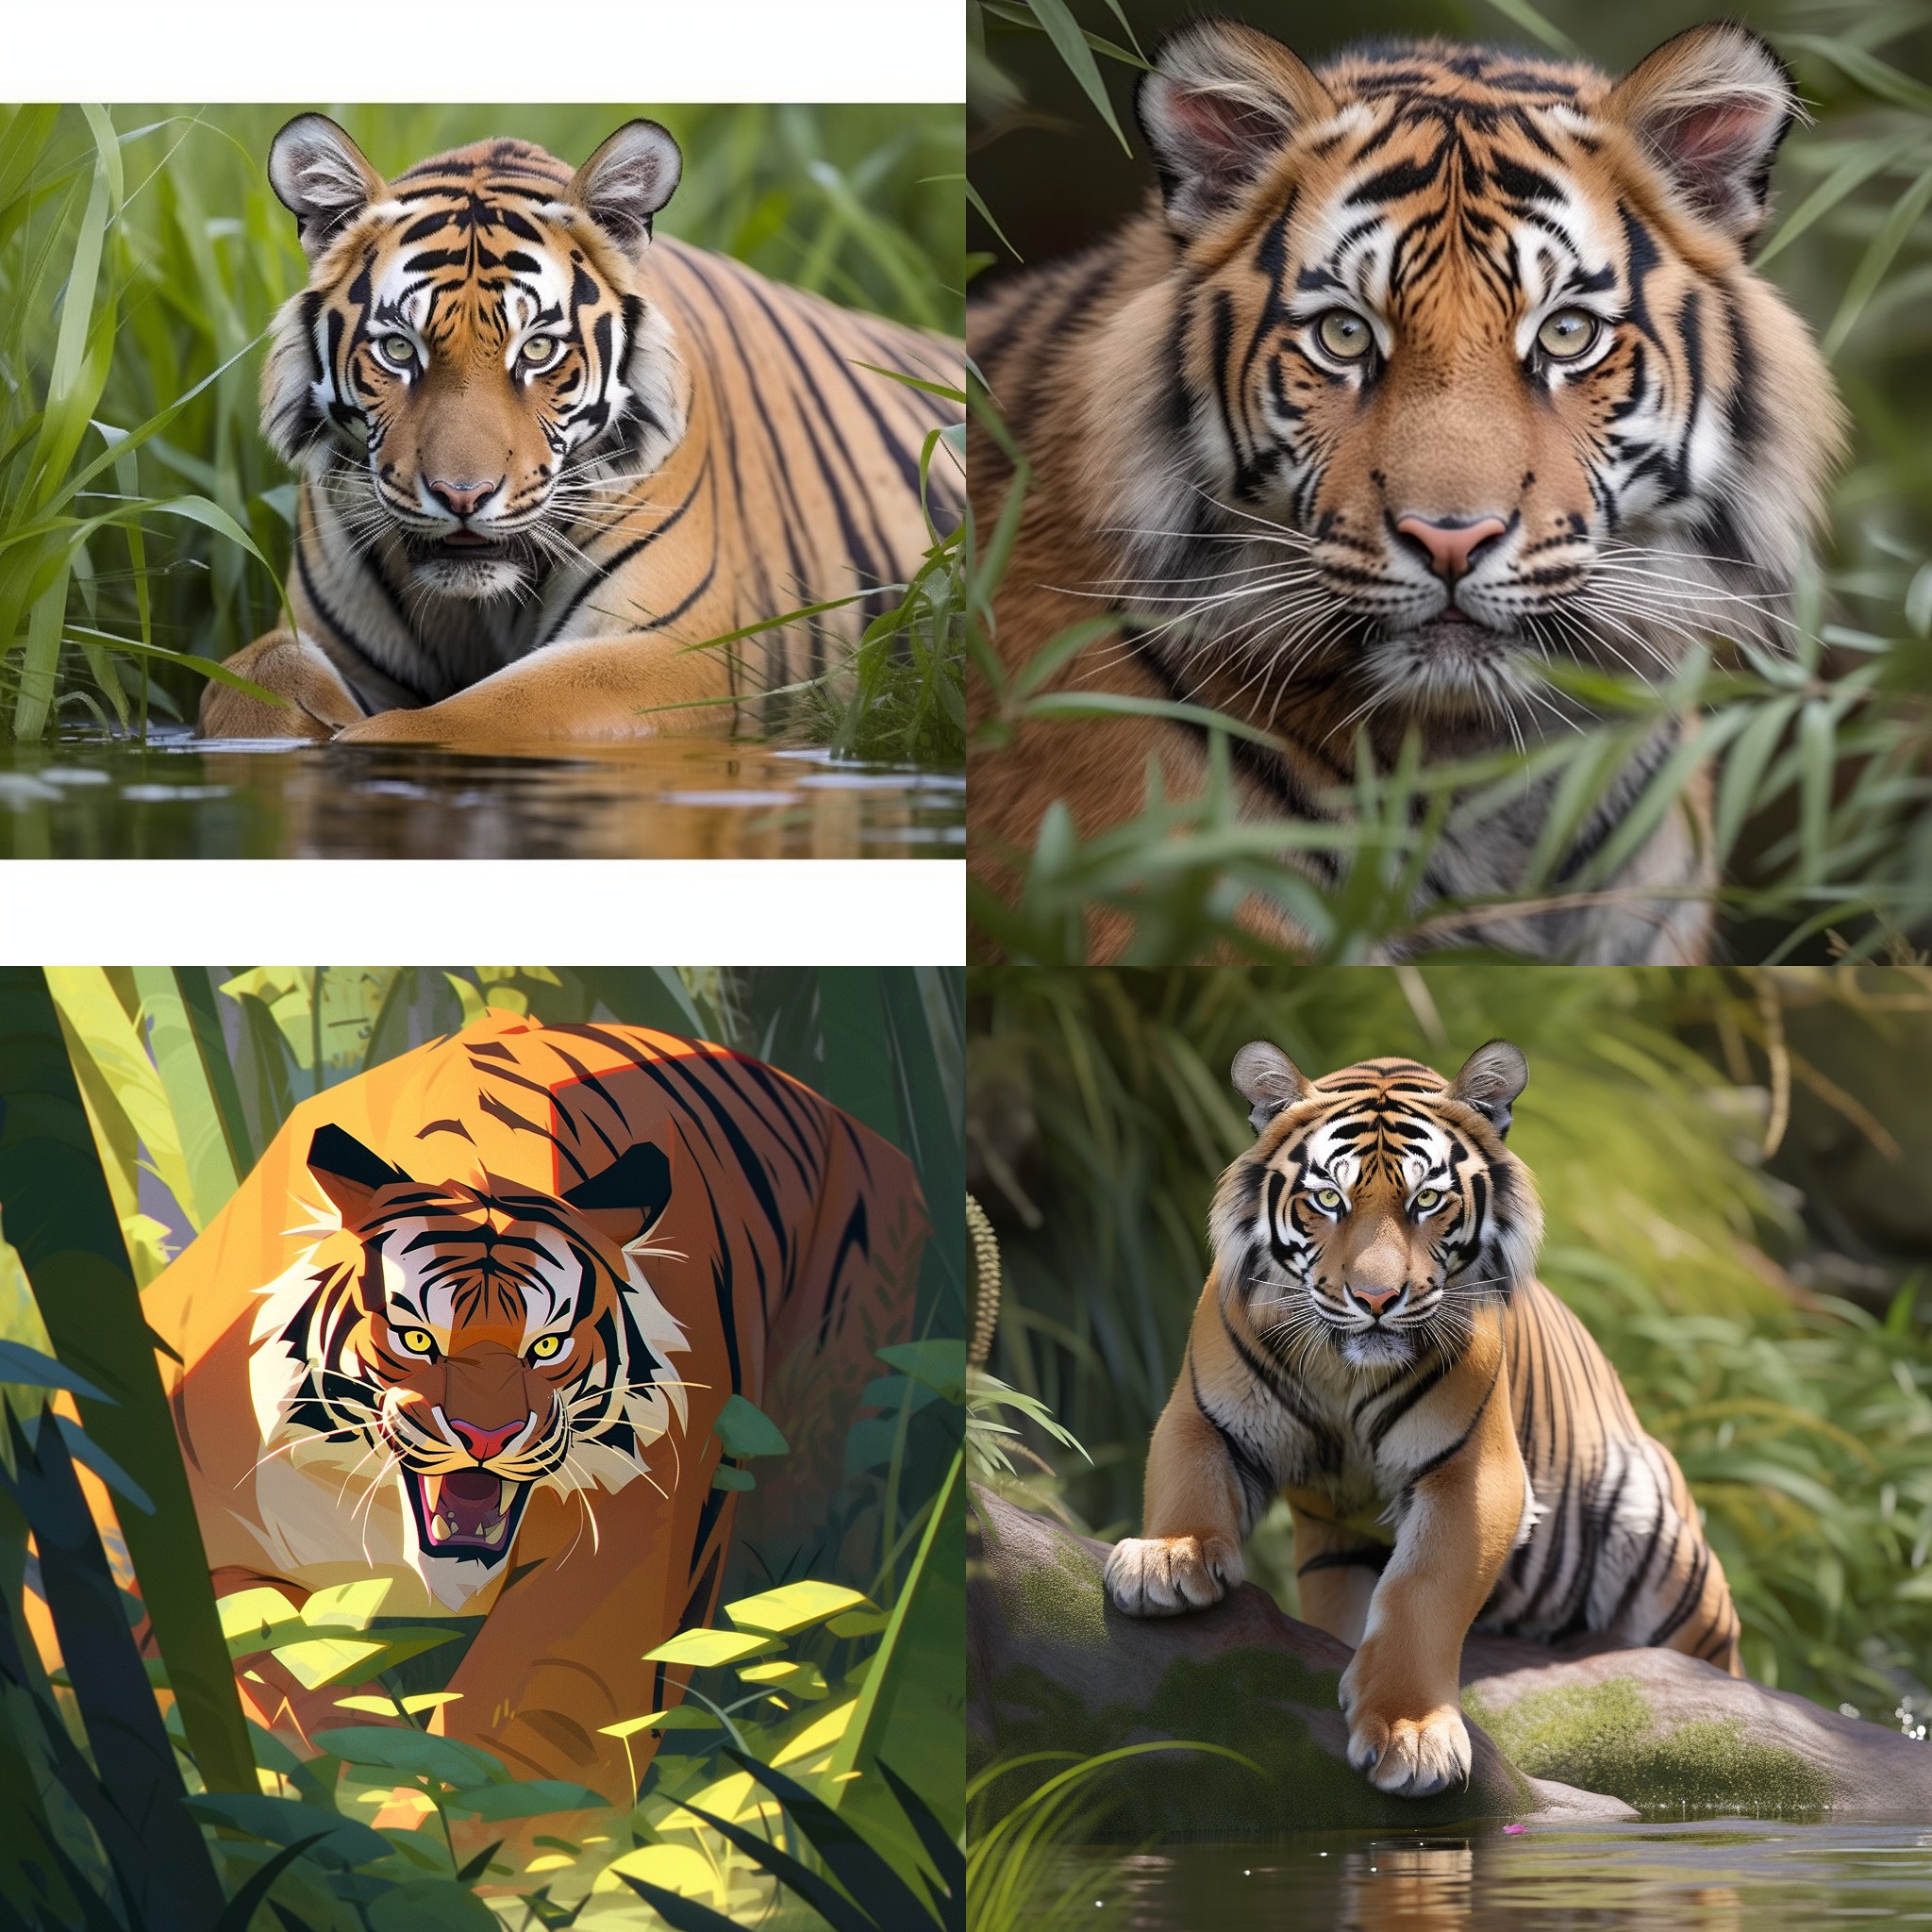
Lets run our previous prompt through all the options: “photo of tiger in natural habitat –seed 200000 –niji 5 –style [XXXX]”
| default –niji 5 | –style original |
 |
 |
| –style expressive | –style scenic |
 |
 |
| –style cute | |
 |
|
Stylize
- The –stylize or –s parameter is a way to control how artistic MidJourney’s AI should be when generating images. The parameter ranges from 0 to 1000 for most model versions, except for version 3, which ranges from 625 to 60000. The default value is 100 for versions 4, 5, 5.1, and 5.2, and 2500 for version 3.
- The –stylize parameter affects the color, composition, and form of the images. Lower values will lead to stricter adherence to the words in your prompt, while higher values will result in more opinionated images that may deviate from your prompt.
- The –stylize parameter is different from the –style parameter, which allows you to switch between different presets for certain model versions.. The –style parameter is an algorithm modifier, while the –stylize parameter is a style modifier. You can use both parameters together to fine-tune your images.
- More about –stlize parameter at: https://docs.midjourney.com/docs/stylize
Lets test a prompt: “close up of a young woman in a dimly lit, monochromatic colorful candid scene with artificial, exaggerated shadows, set in a minimalist, industrial environment –s [XXXX]”
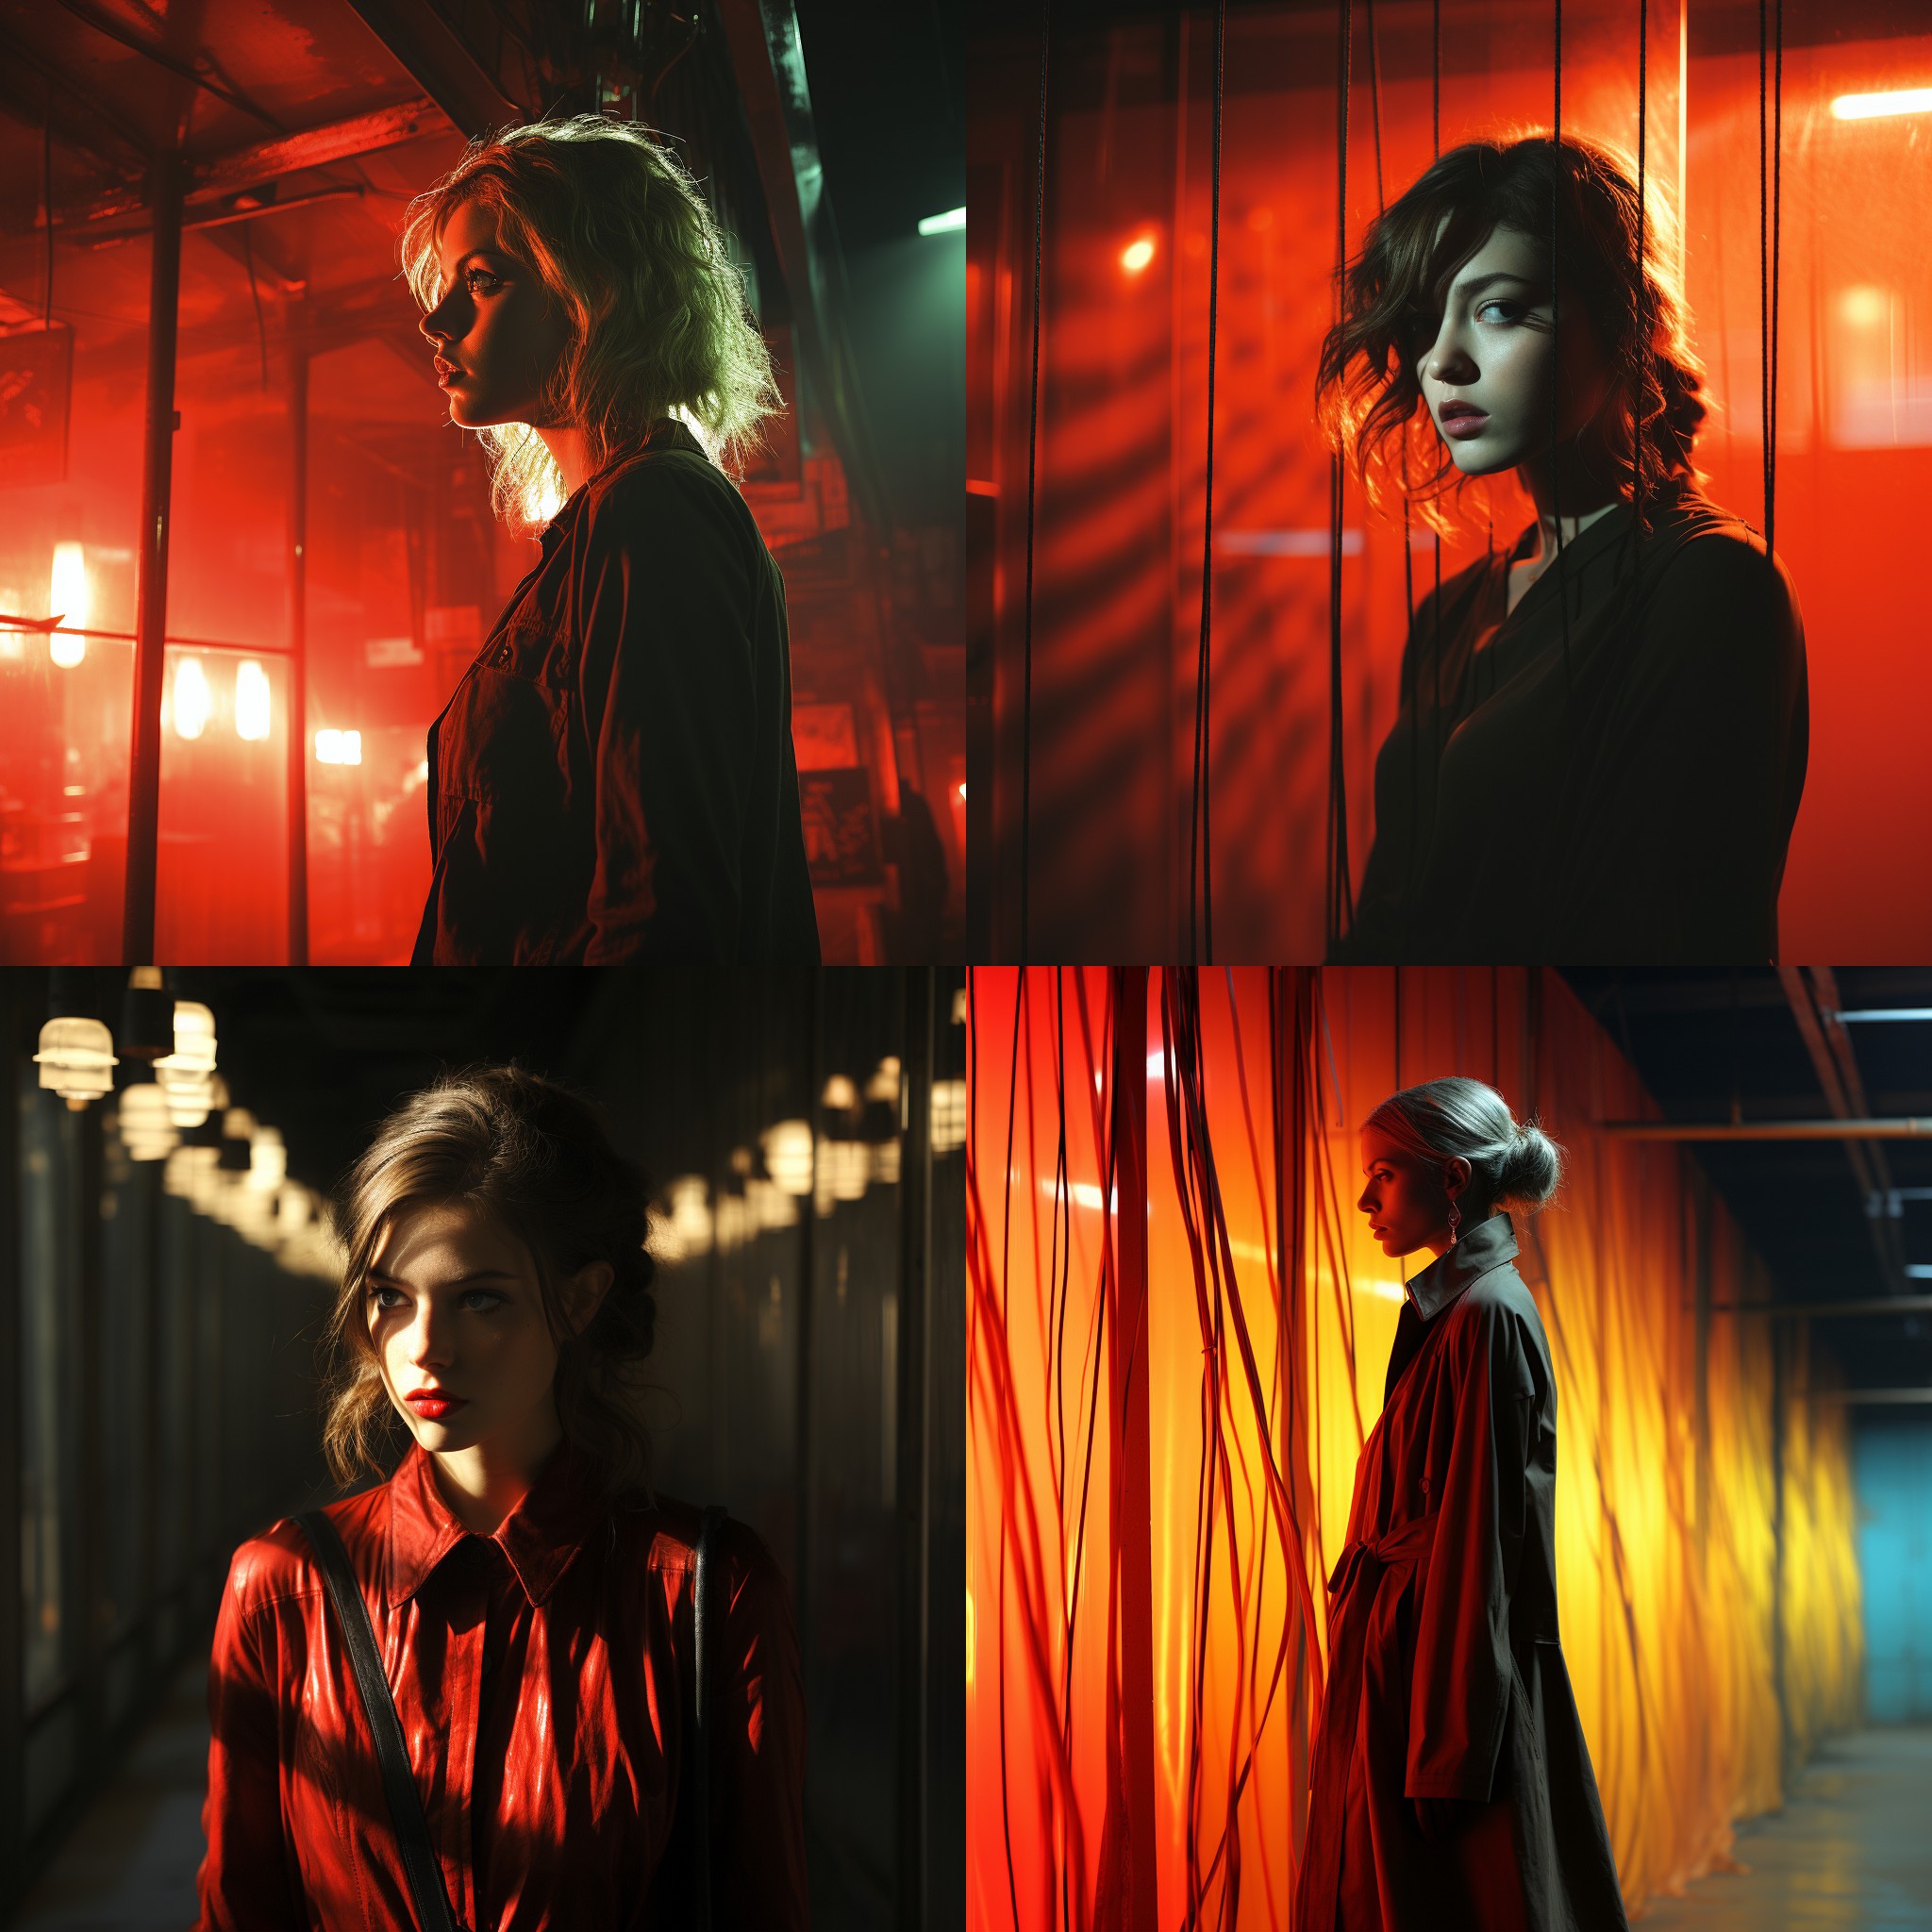
| –s 0 | –s 300 |
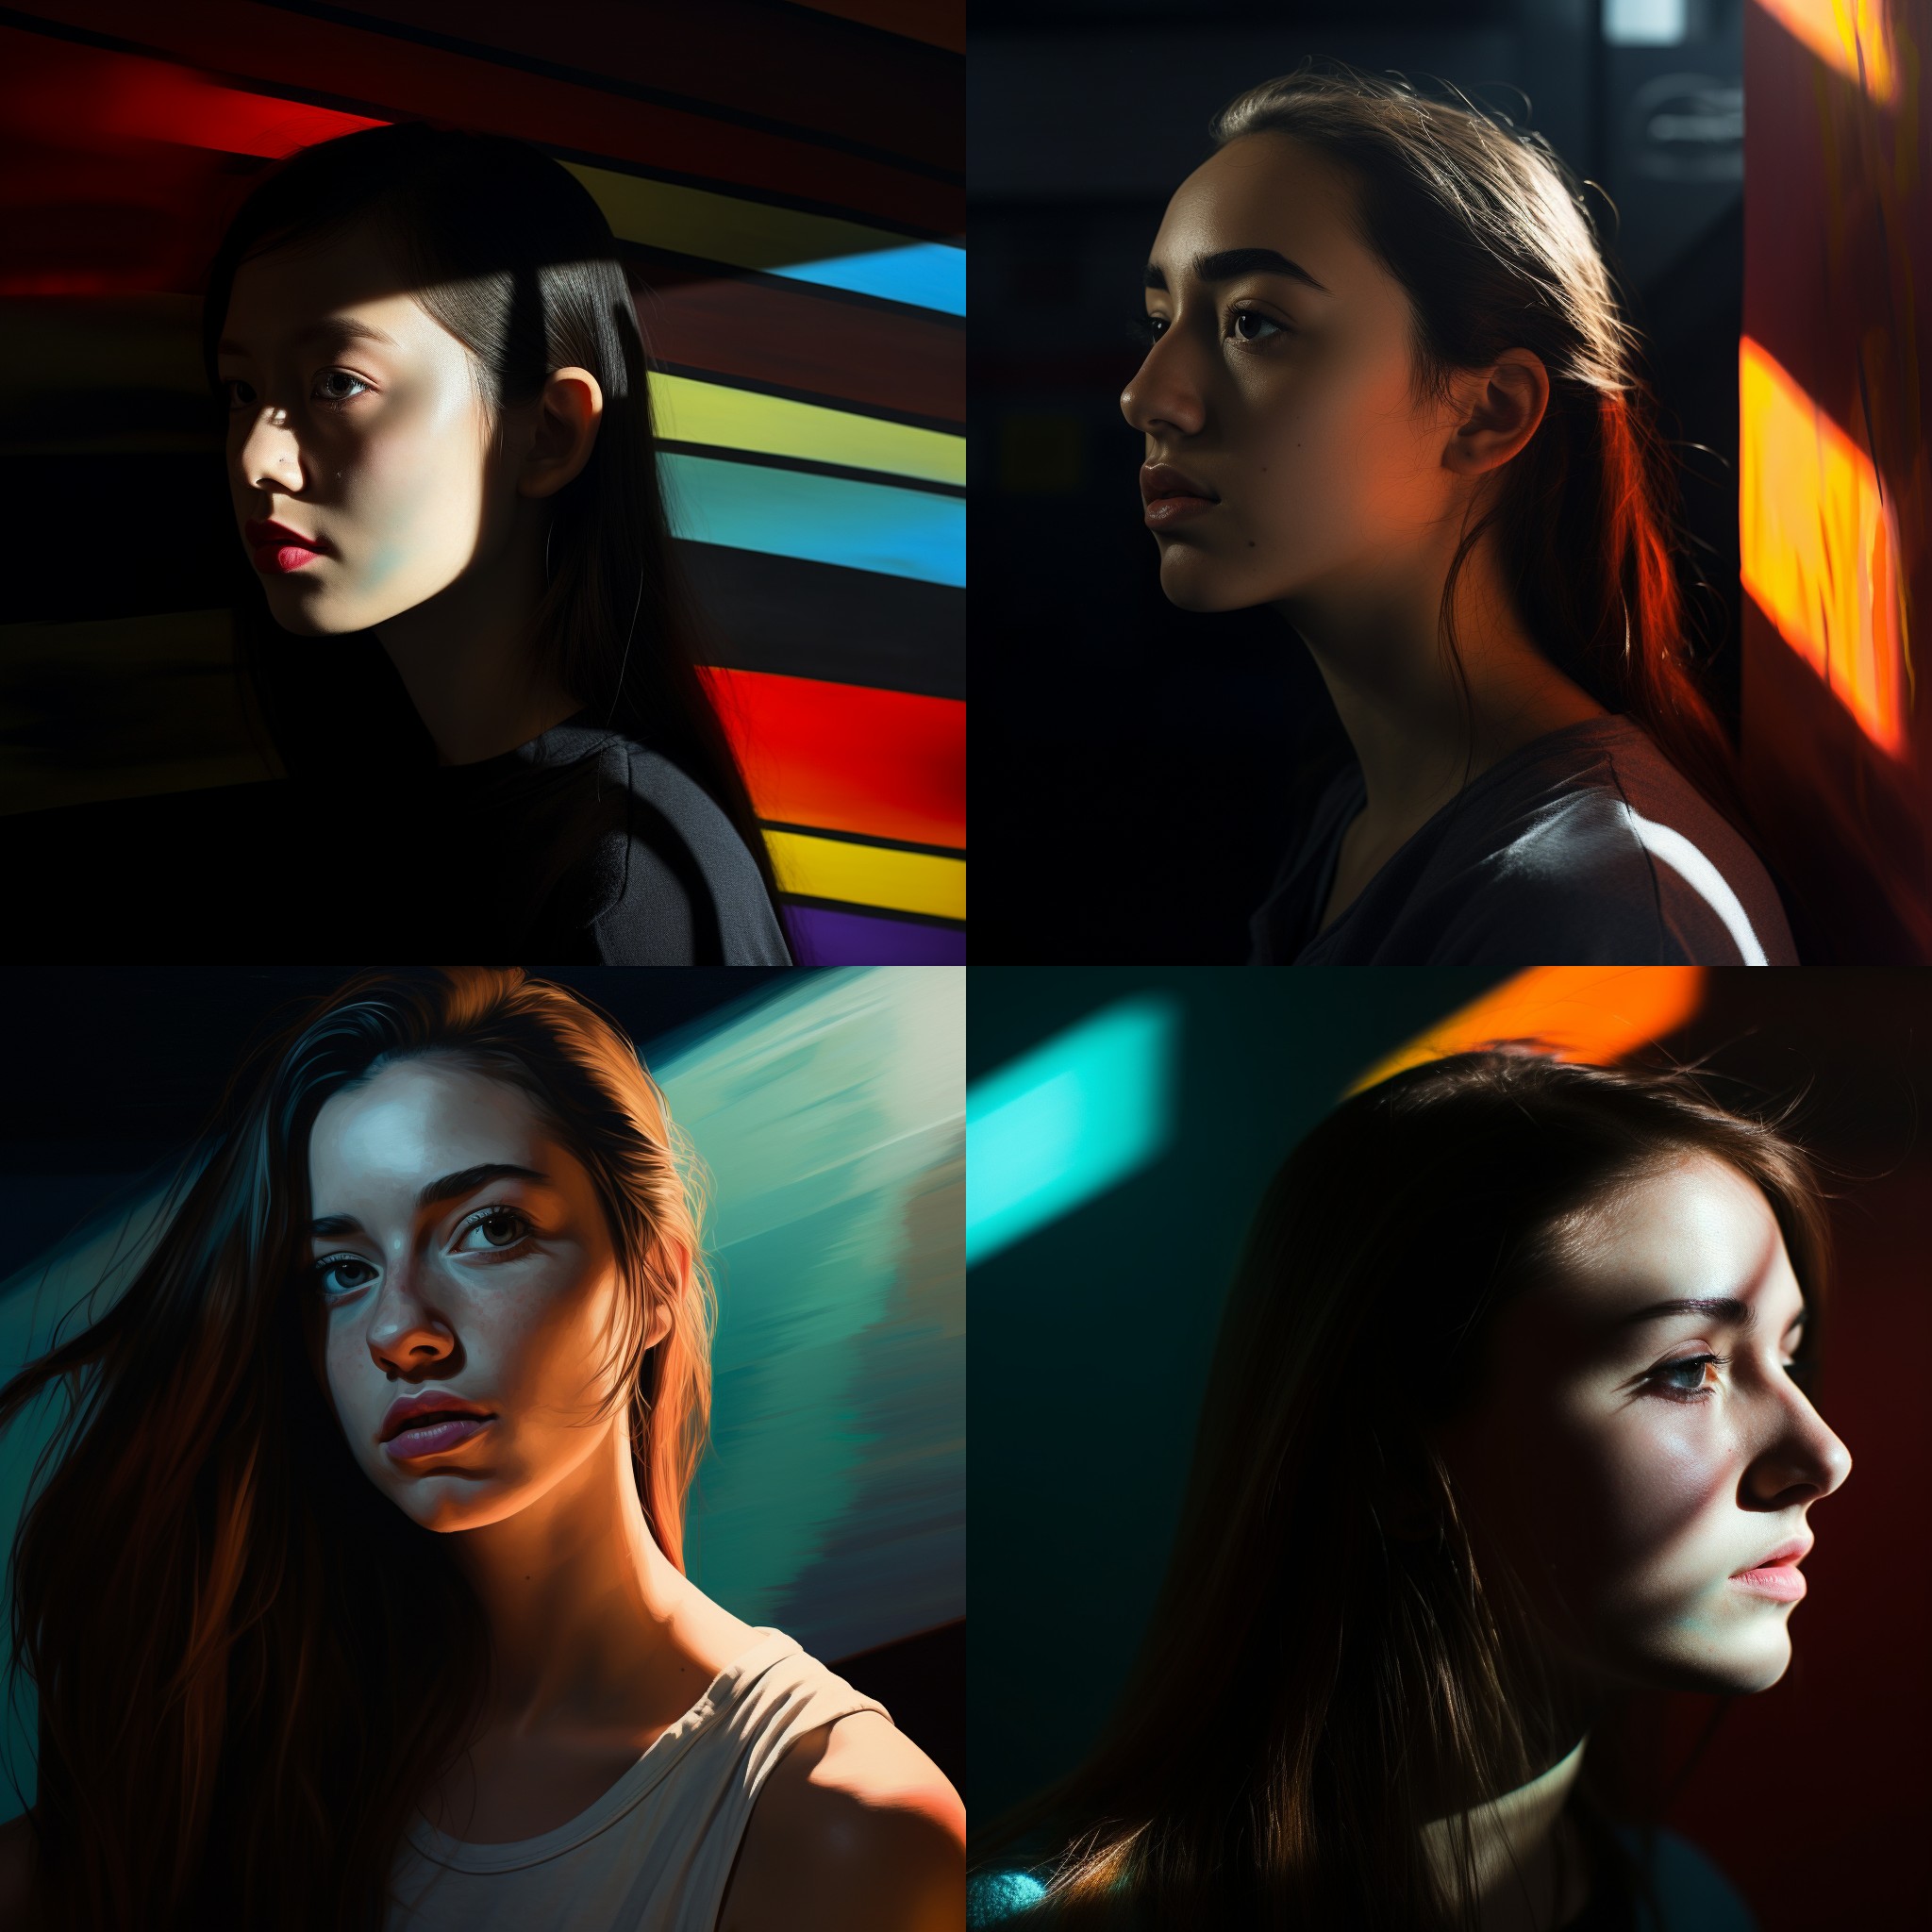 |
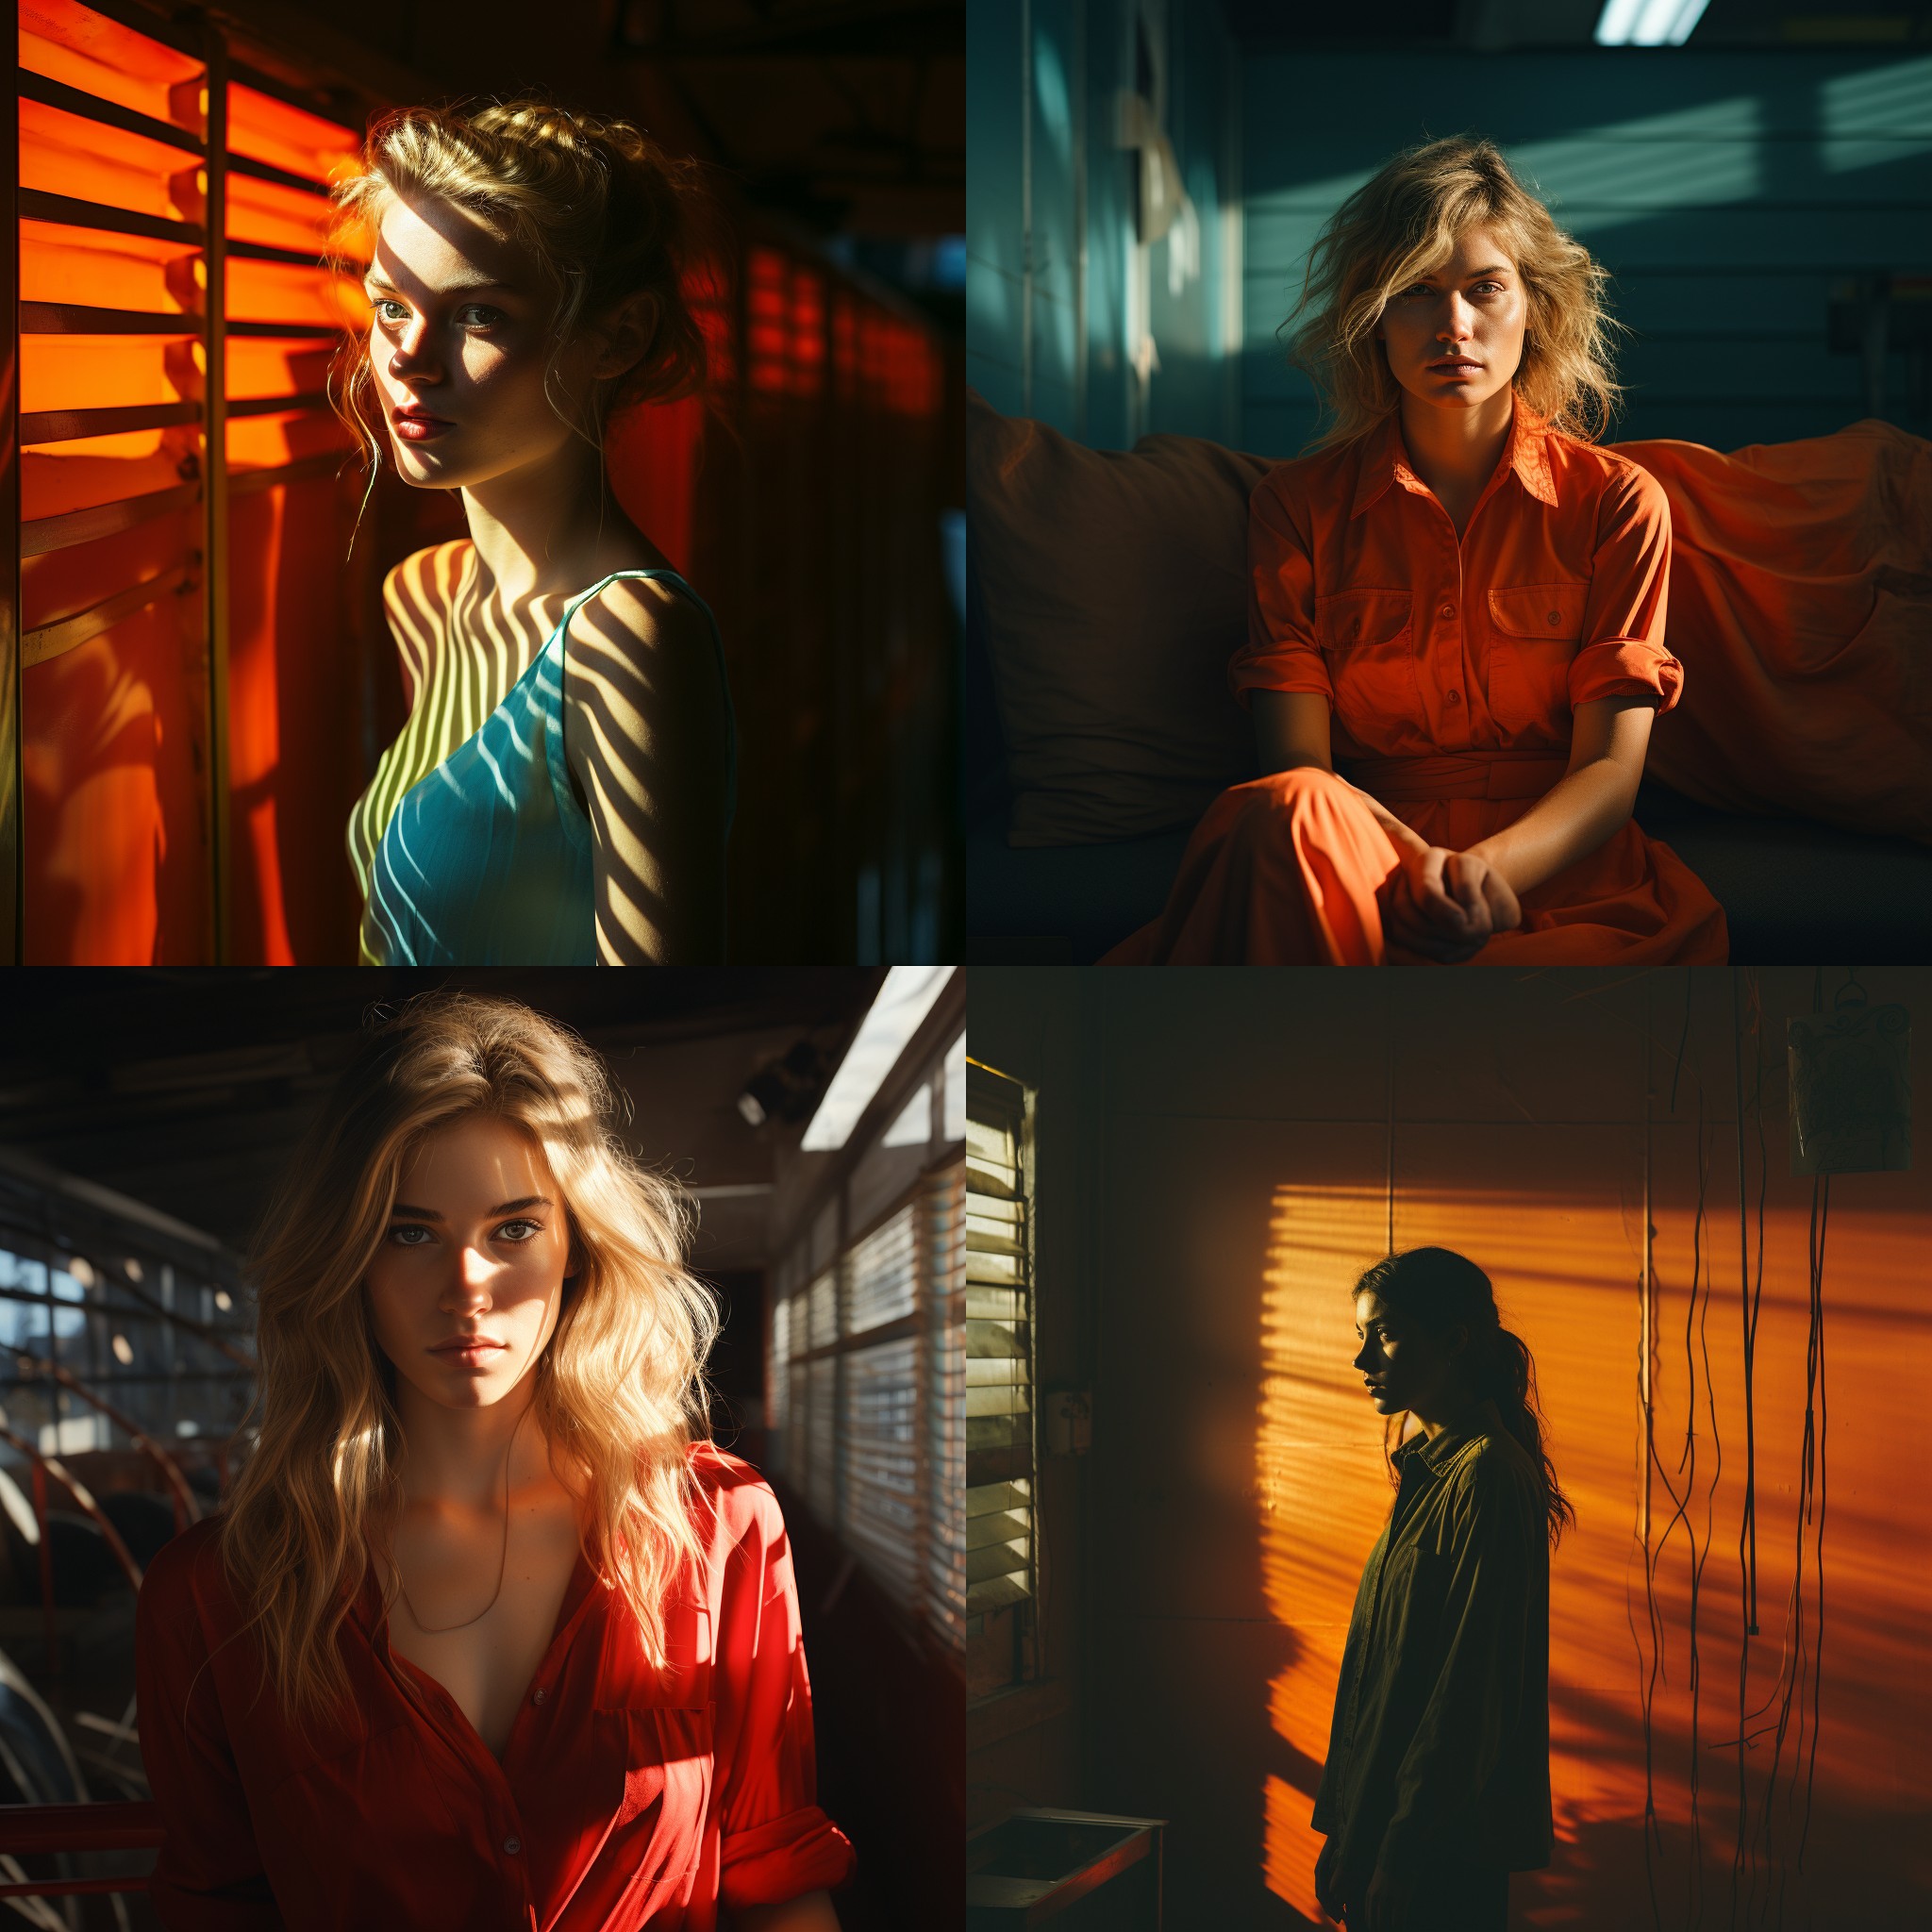 |
| –s 650 | –s 1000 |
 |
 |
Tile
- The –tile parameter in Midjourney is used to generate images that can be used as repeating tiles to create seamless patterns for fabrics, wallpapers, textures, and other purposes. The –tile parameter works with model versions 1, 2, 3, 5, 5.1, and 5.2. It does not work with model version 4 and Niji. The –tile parameter only generates a single tile, so you need to use another tool to repeat the tile and create a pattern.
- You can add the –tile parameter to the end of your prompt, for example: /imagine prompt blue and white floral pattern, vintage style –tile
- This will generate an image of a blue and white floral pattern that can be used as a tile. You can also use other parameters with the –tile parameter, such as –chaos, –stylize, –quality, –seed, etc.
- More at: https://docs.midjourney.com/docs/tile
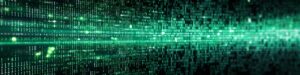
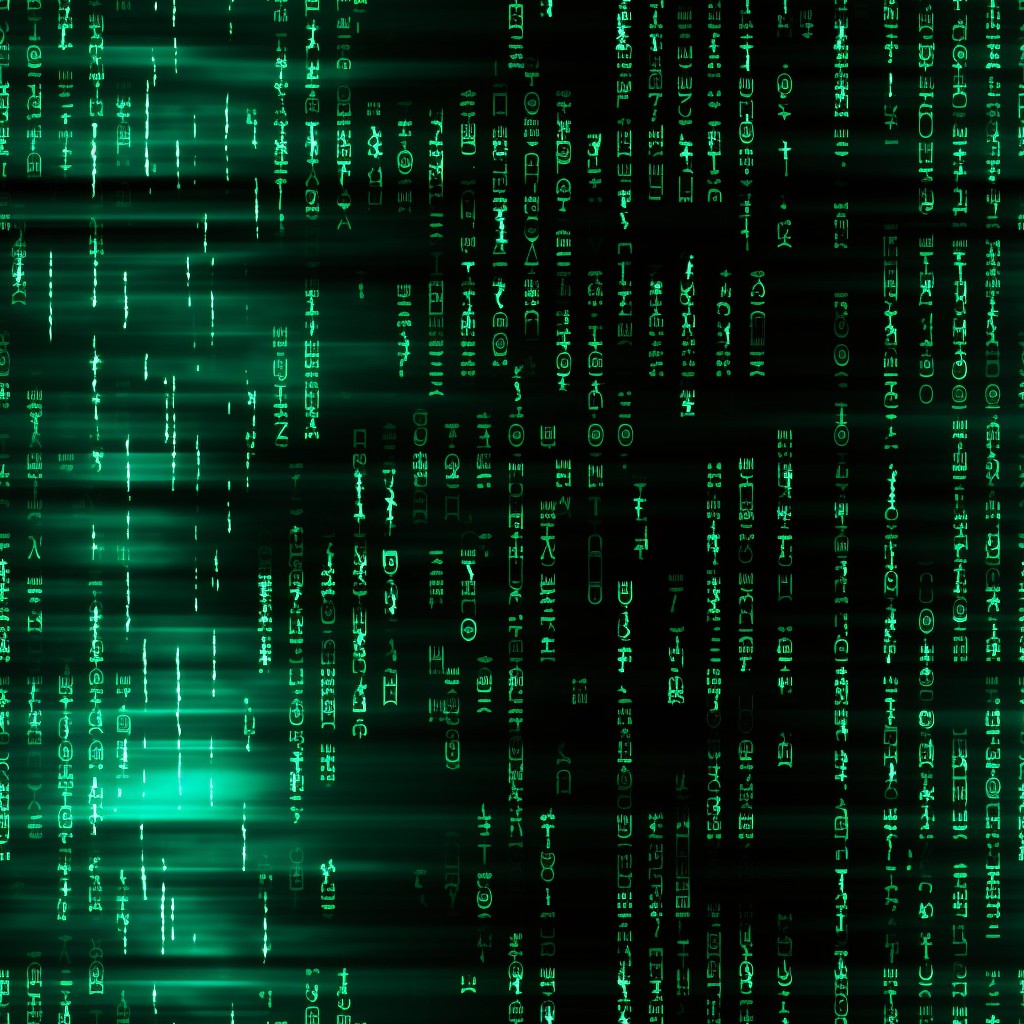
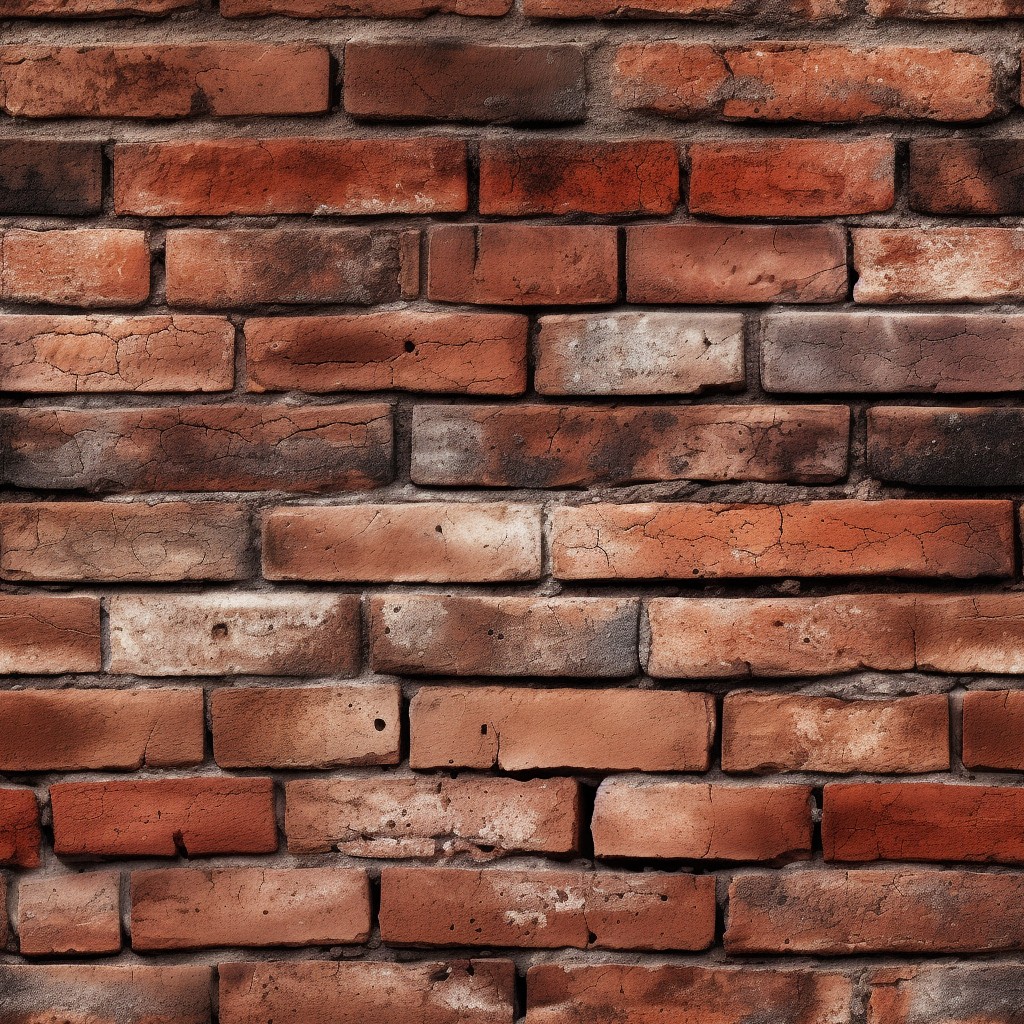
| the binary code background in matrix style –tile | brick wall –tile |
 |
 |
Seeds
- The –seed parameter in Midjourney is used to specify the random number that is generated for each image. The random number determines the initial image grid that is created from a field of visual noise, like television static. The image grid is then modified by the prompt and other parameters to produce the final image. If you use the same seed number and prompt, you will get similar final images.
- The –seed parameter accepts whole numbers between 0 and 4294967295.
- You can add the –seed parameter to the end of your prompt, for example: /imagine “cute cat –seed 1234567”
- You can use the same seed number and prompt as the original image, and optionally change some other parameters to tweak the image. This way, you can recreate the image or make some variations of it.
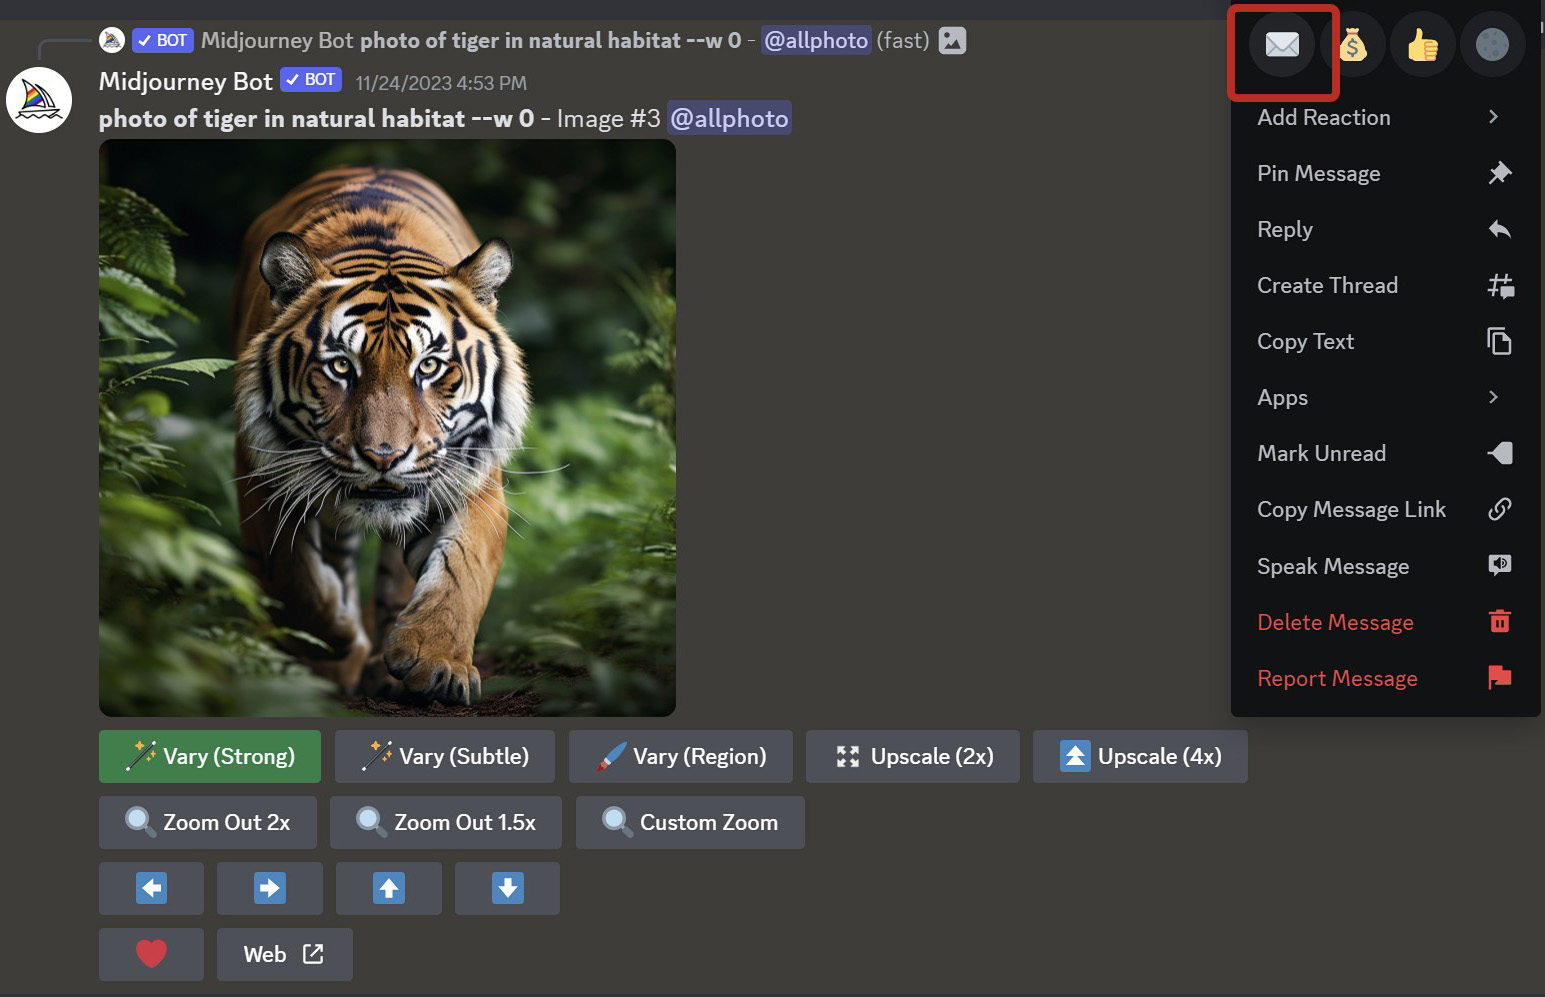
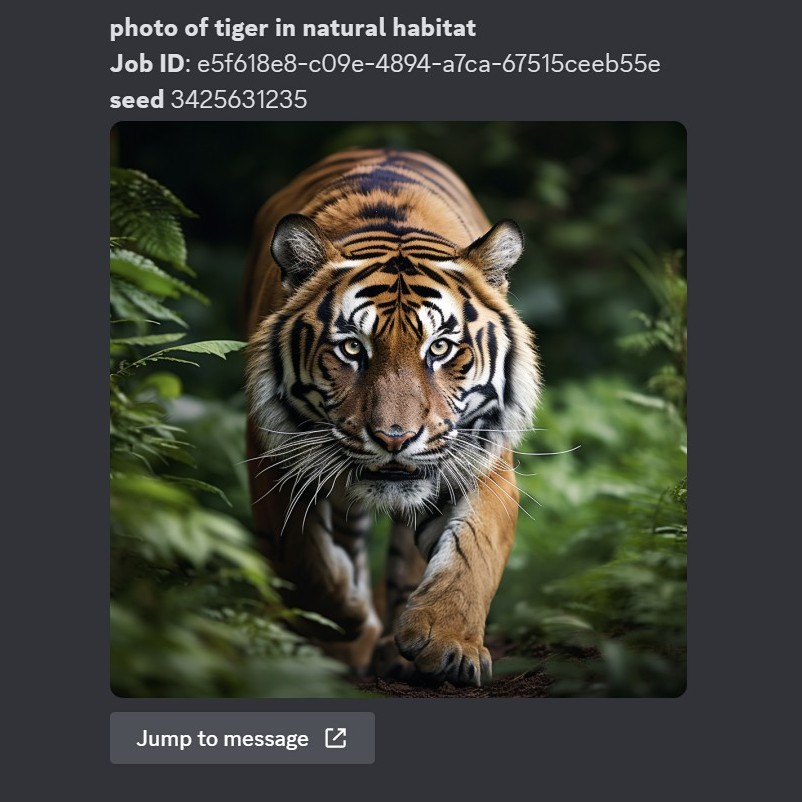
- You can also find the seed number of an existing image by reacting with an envelope emoji to the job in Discord, or by using the /show command with the job ID
More about –seed at: https://docs.midjourney.com/docs/seeds
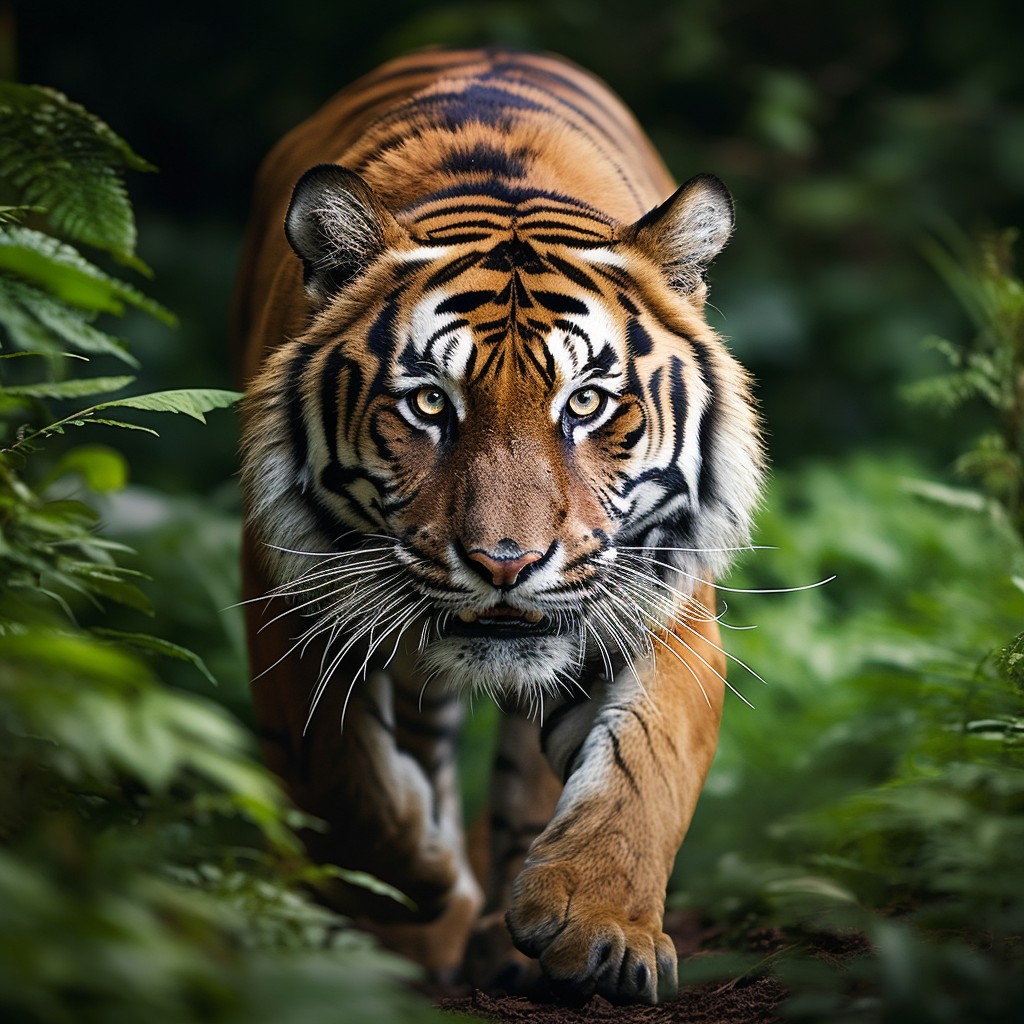
| Original image: photo of tiger in natural habitat –w 0 | Find seed (react with an envelope emoji) |
 |
 |
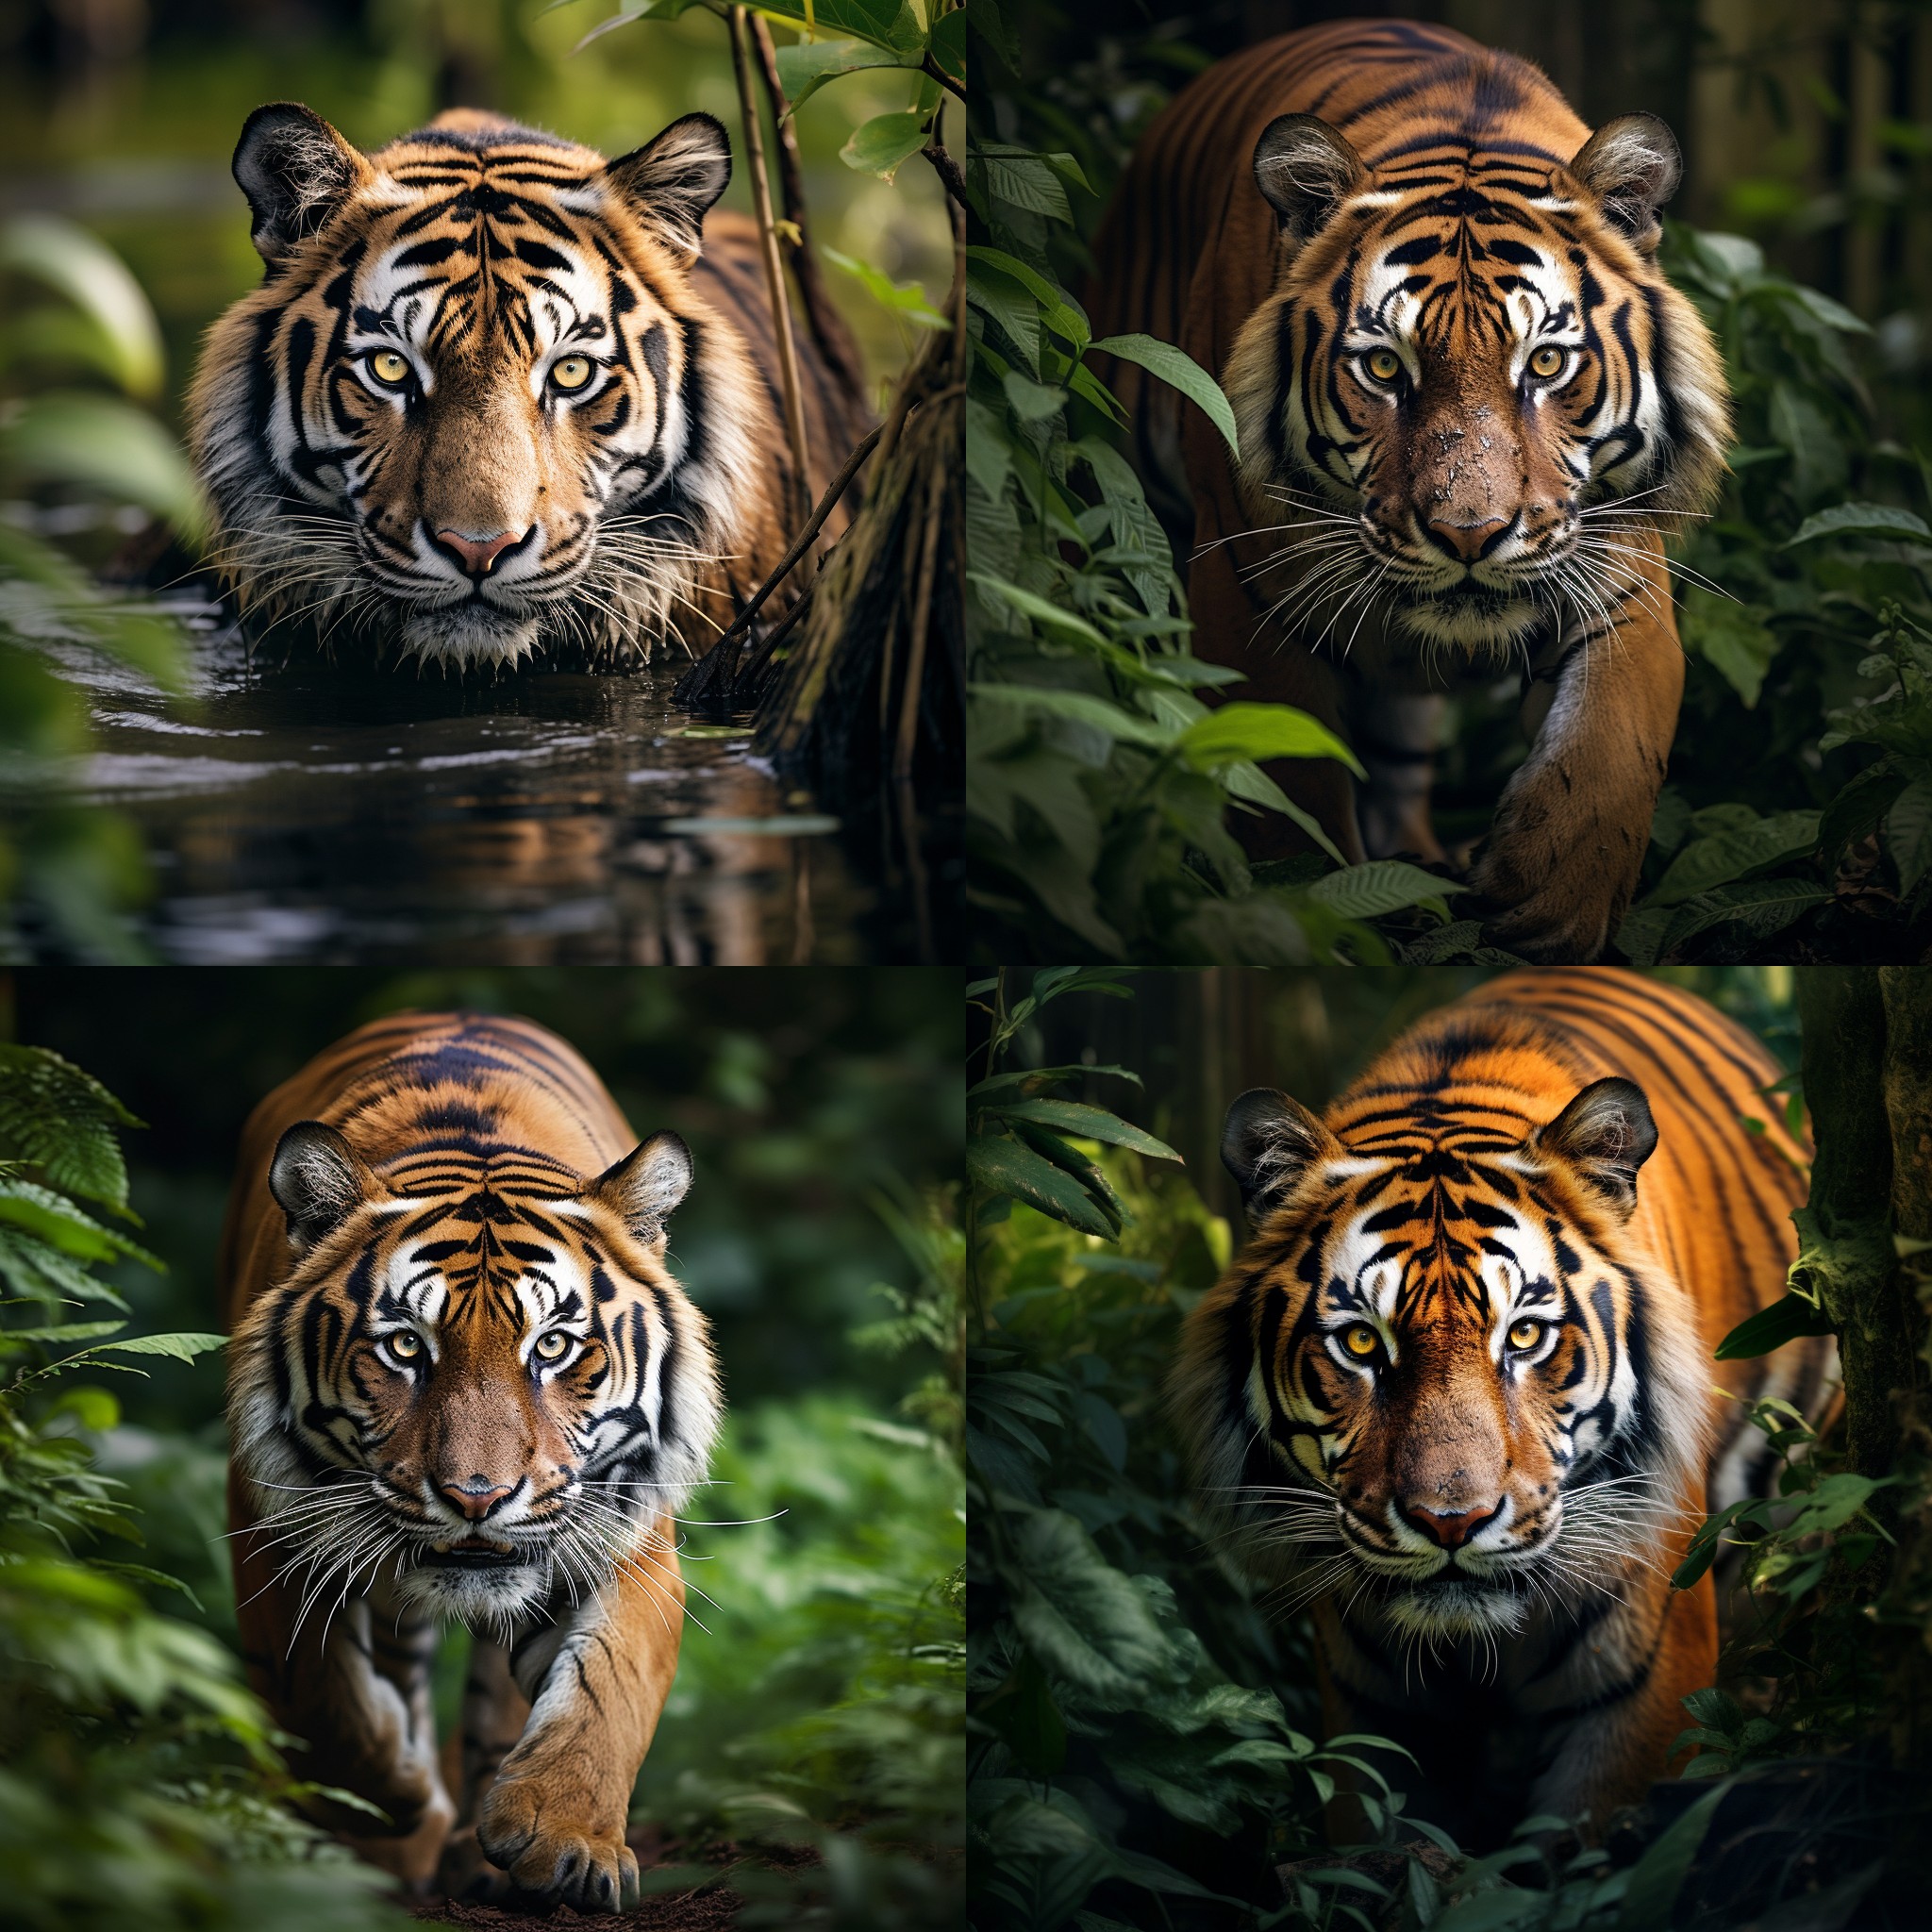
| Find seed number | photo of tiger in natural habitat –w 0 –seed 3425631235 |
 |
 |
Tools
Image generation
When you use the /imagine command to generate an image from a text prompt, Midjourney will send you a grid of four low-resolution images based on your prompt. Under each image grid, you will see some buttons that you can use to modify or improve the image.
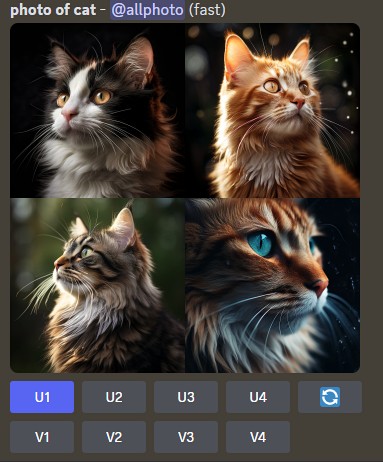
- U1, U2, U3, U4: These buttons separate an image from the image grid, allowing you to easily download that image or use additional tools like Zoom Out, or Pan.
- V1, V2, V3, V4: These buttons create incremental variations of the selected grid image. Creating a variation generates a new image grid similar to the chosen image’s overall style and composition.
- The regenerate button allows you to generate a new image grid from the same text prompt, using a different random seed. This can help you explore more possibilities and variations for your image.
When you click a button you will see more buttons that you can use to modify or improve the image in Discord.
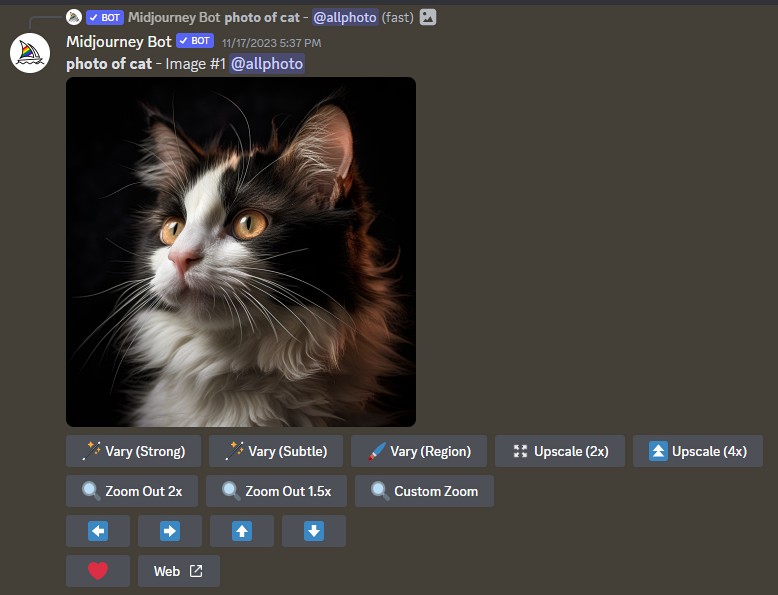
Vary
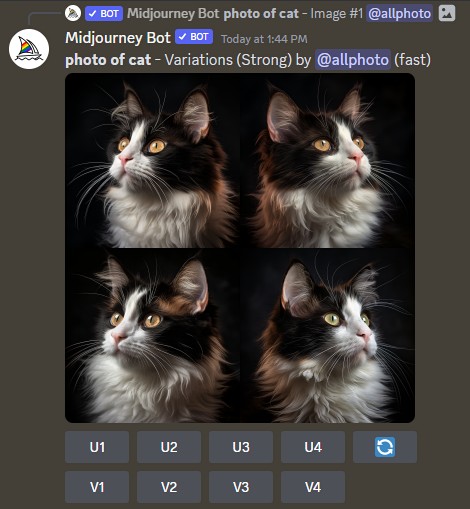
- Vary (Strong): This button allows you to create a strong variation of the selected image, which means that the image will change significantly in terms of style, composition, or content.
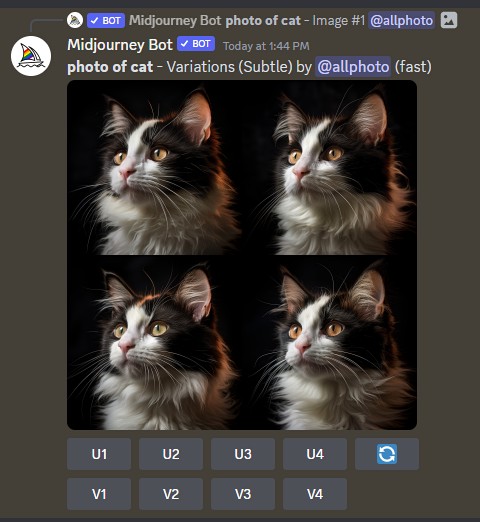
- Vary (Subtle): This button allows you to create a subtle variation of the selected image, which means that the image will change slightly in terms of colour, lighting, or detail.
- More https://docs.midjourney.com/docs/variations
| Vary (Strong) | Vary (Subtle) |
 |
 |
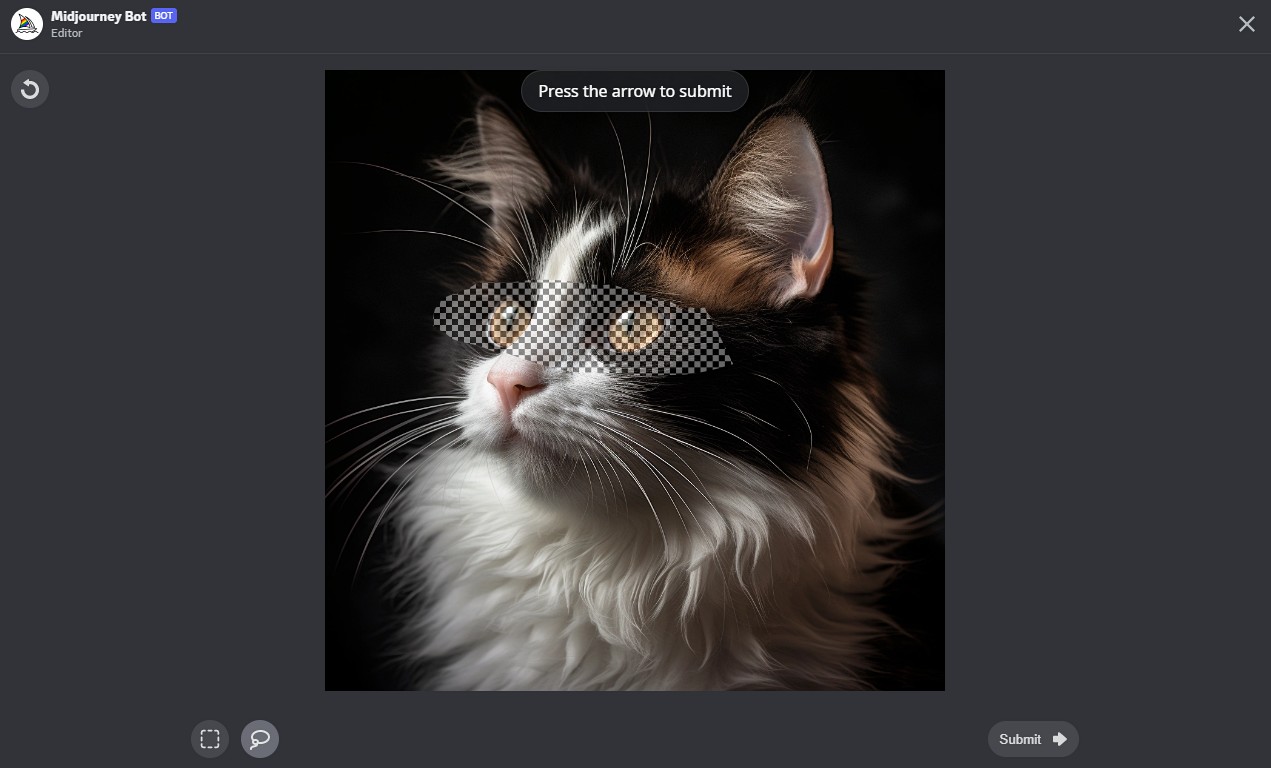
- Vary (Region): This button allows you to change a specific part of the image.
(more: https://docs.midjourney.com/docs/vary-region)
Vary + Remix
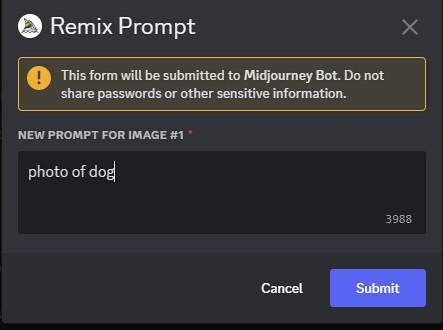
- Remix is a feature in Mid Journey that allows you to explore endless creative possibilities in image generation. With Remix mode, you can make changes to subjects, lighting, add or remove elements, and adjust parameters without sacrificing the core similarity of your pre-generated Midjourney images.
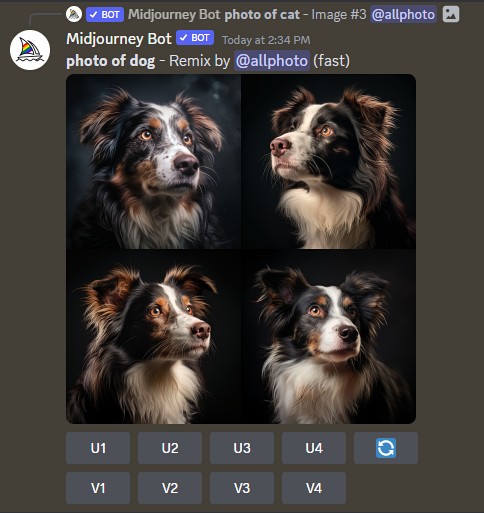
- To use Remix mode, you need to activate it first by typing /settings in the Midjourney chat and clicking on the Remix mode button. Once activated, you can change the prompt, model version, or parameters between variations. For example, if you generate an image with the prompt “a cat wearing a hat”, you can then click on the “vary (strong)” button and change the prompt to “a dog wearing a hat”. Midjourney will then generate a new image based on the original composition, but with a dog instead of a cat.
- more: https://docs.midjourney.com/docs/remix
| Change “photo of cat” to “photo of dog” |
Vary (Subtle) |
 |
 |
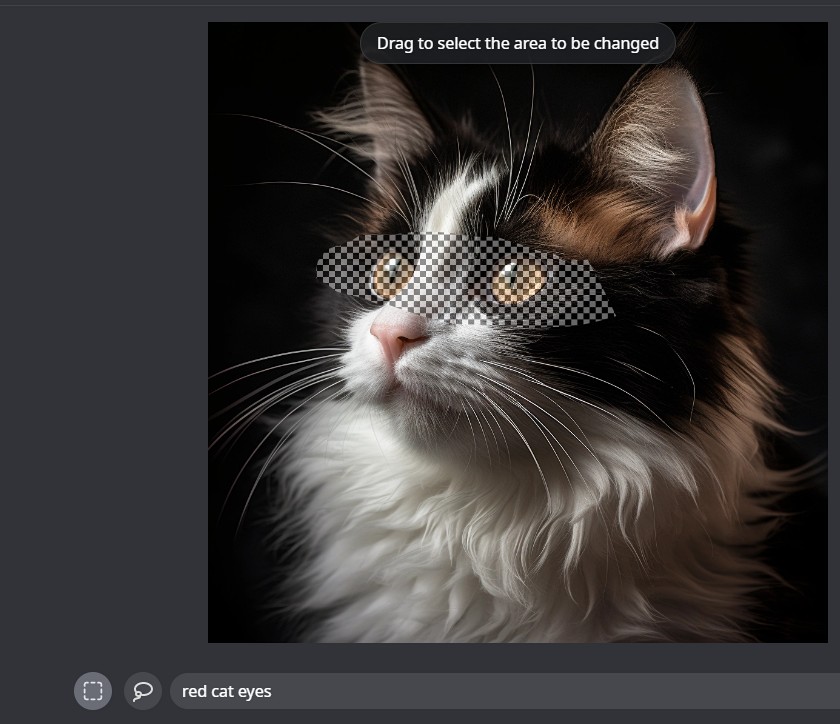
- In remix mode you can use Vary (Region): This button allows you to change a specific part of the image by providing new/amended prompt
- more: https://docs.midjourney.com/docs/vary-region-remix
| Prompt: red cat eyes | outcome |
 |
 |
Upscale
- Upscale (2x): This button allows you to increase the resolution and quality of the selected image by two times.
- Upscale (4x): This button allows you to increase the resolution and quality of the selected image by four times.
- Upscaler is a tool that can increase the resolution and quality of an image generated by the MidJourney AI model. It uses a deep learning algorithm that can add more details and sharpness to the original image.
- See examples below or at https://docs.midjourney.com/docs/upscalers.
| Original 1024×1024 | Upscaled 2x (1024×1024 cut off) |
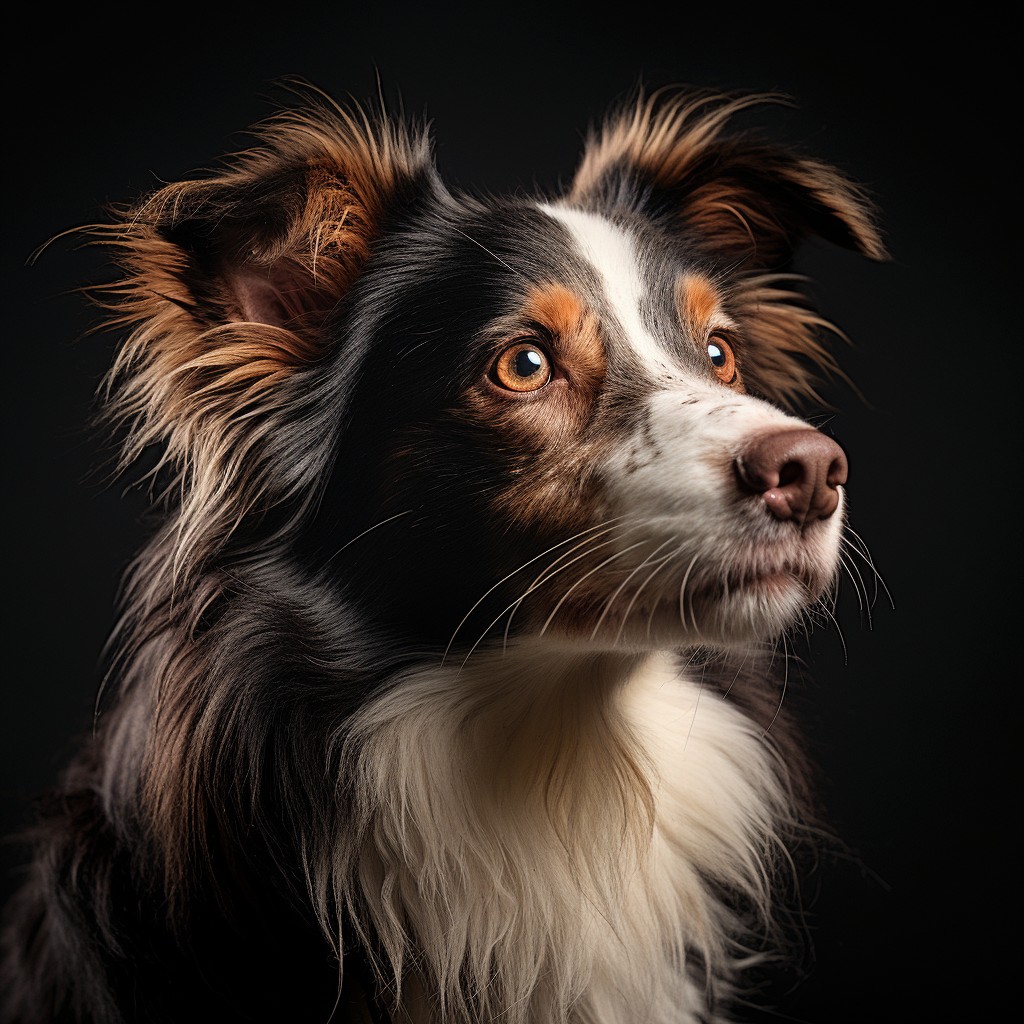 |
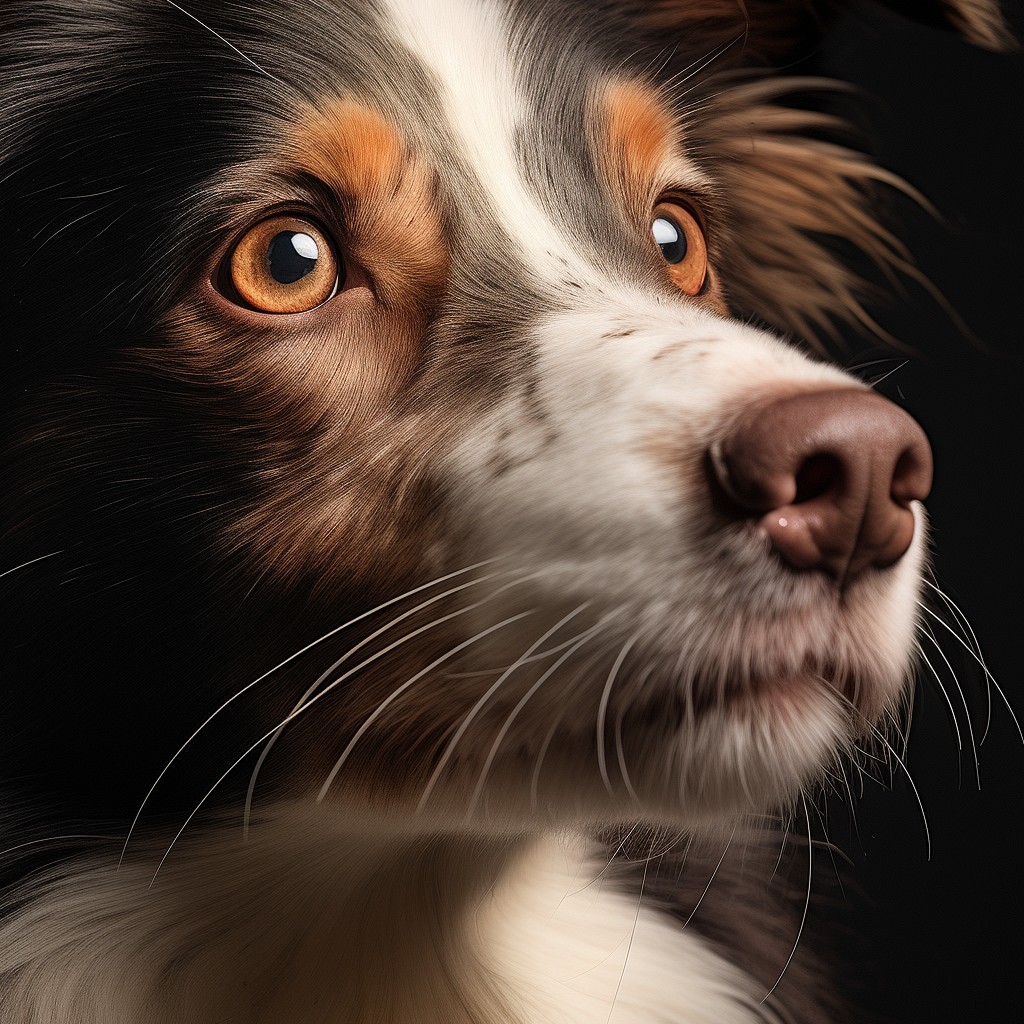 |
| Upscaled 4x (1024×1024 cut off) | |
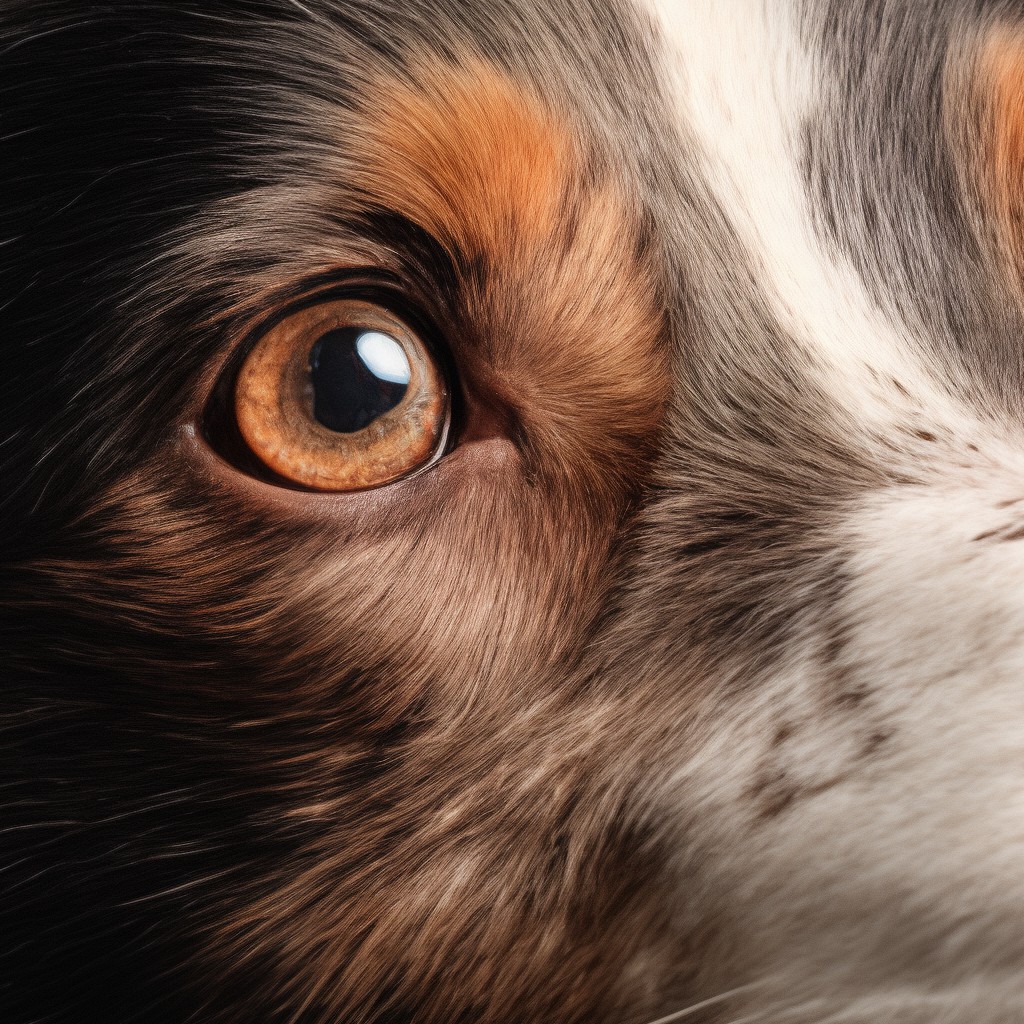 |
|
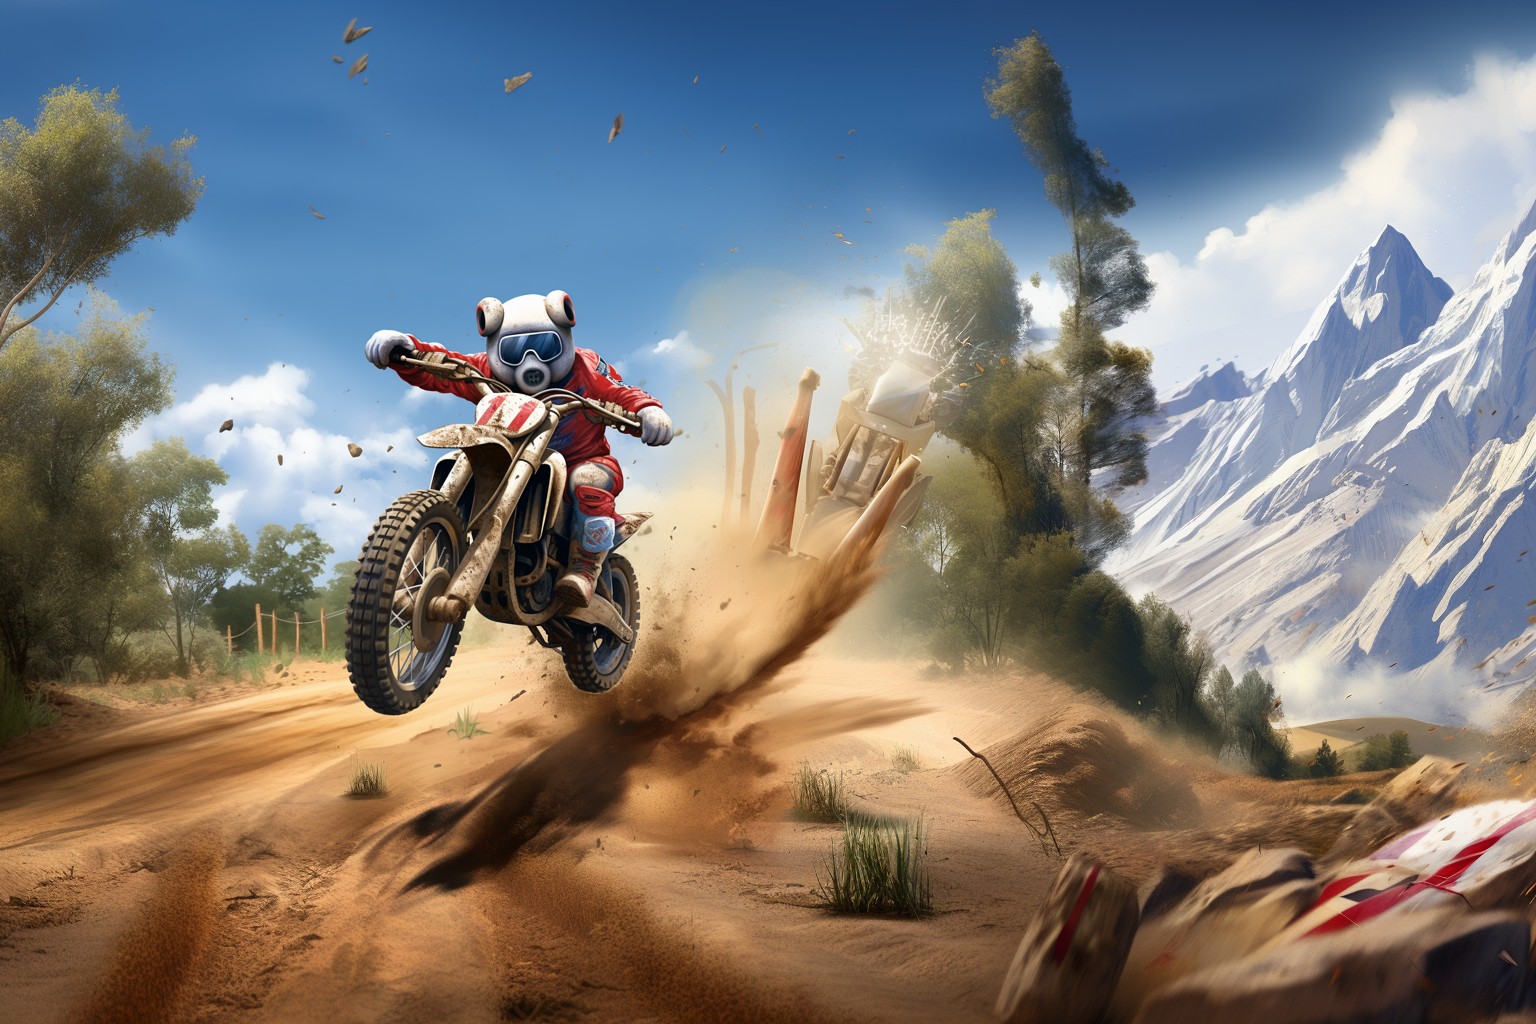
Zoom
- Zoom Out 2x: This button allows you to zoom out the selected image by two times, which means that the image will show more of the surrounding area.
- Zoom Out 1.5x: This button allows you to zoom out the selected image by 1.5 times, which means that the image will show more of the surrounding area
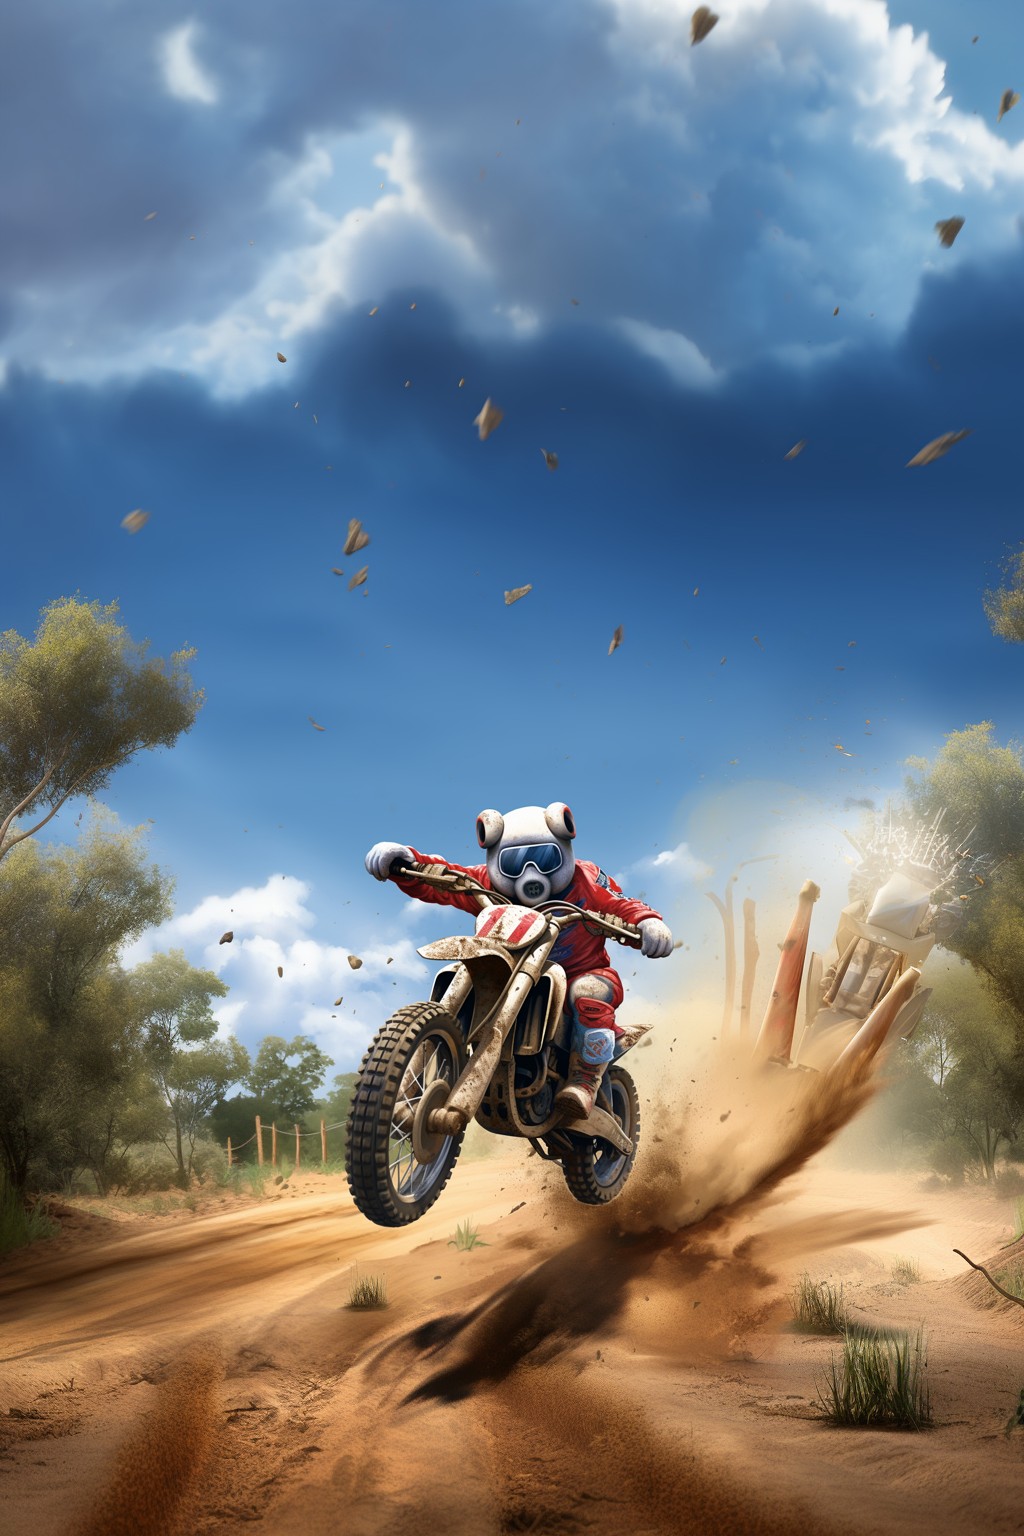
- Custom Zoom: This button allows you to zoom in or out the selected image by a custom factor, which means that you can specify how much you want to zoom in or out the image. The value for –zoom must be between 1.0 and 2.0. You can also change aspect ratio of output by using –ar argument.
- More: https://docs.midjourney.com/docs/zoom-out
| Original | Zoom out 2x |
 |
 |
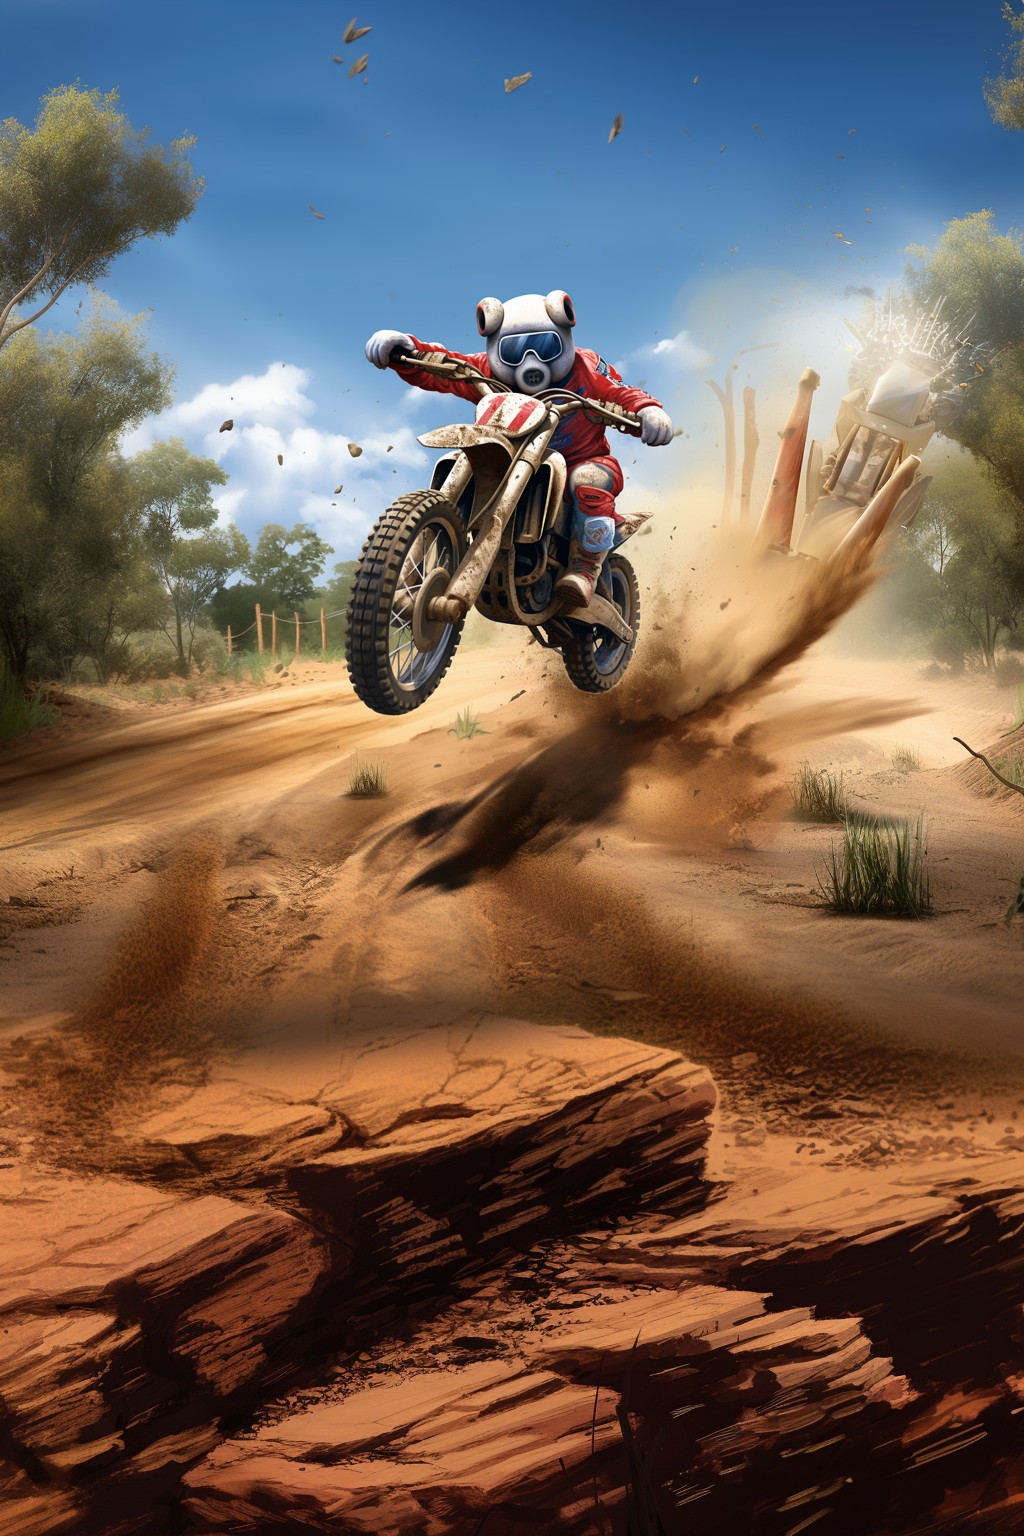
| Custom Zoom Out –ar 16:9 –zoom 2 | Custom Zoom Out –ar 2:3 –zoom 2 |
 |
 |
Pan
- Pan: This button allows you to move the selected image in any direction, which means that you can change the position of the image within the frame.
- more: https://docs.midjourney.com/docs/pan
Lets take the original image from last paragraph and test it: left, right, up and down.
| Pan Left | Pan Right |
 |
 |
| Pan Up | Pan Down |
 |
 |
Multi Prompts
- Multi prompts are a way of using Midjourney to generate images that combine multiple concepts or ideas. You can use multi prompts by adding a double colon (::) between the parts of your prompt that you want Midjourney to consider separately.
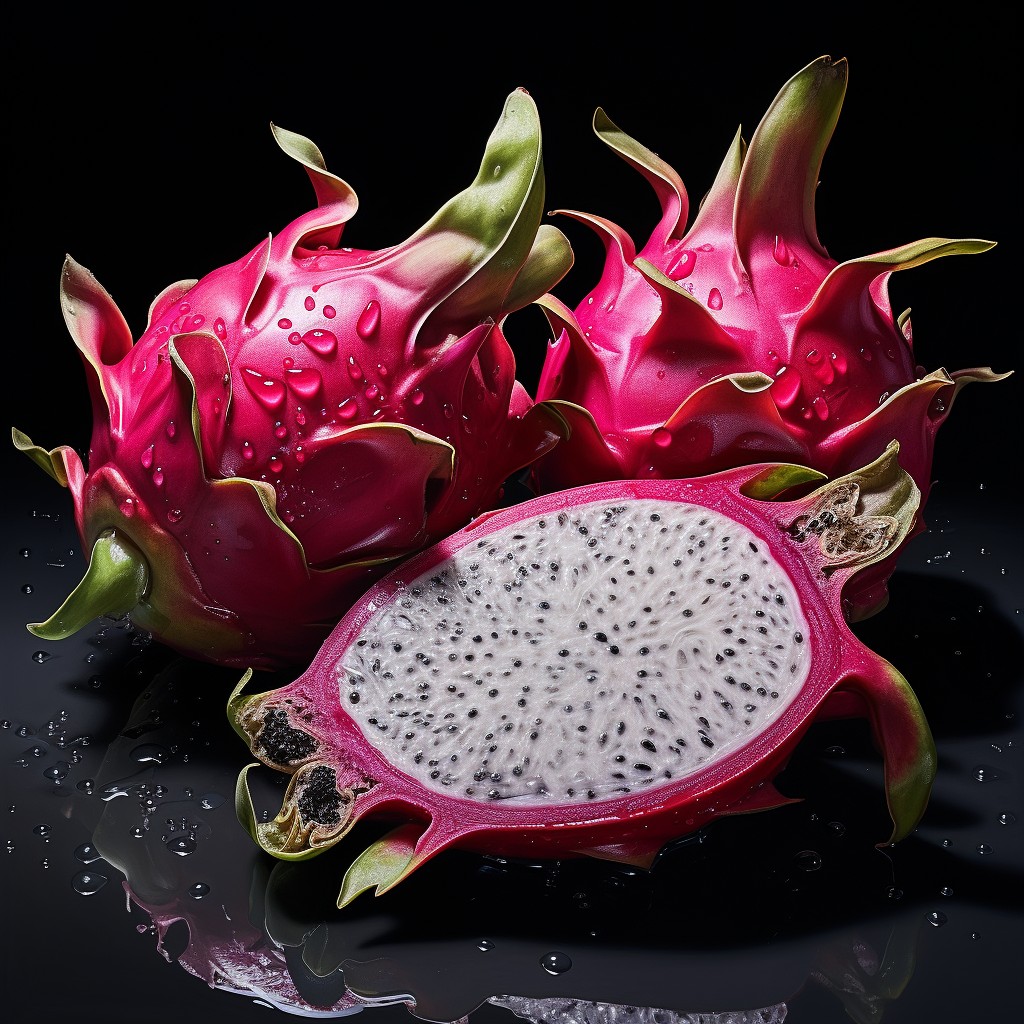
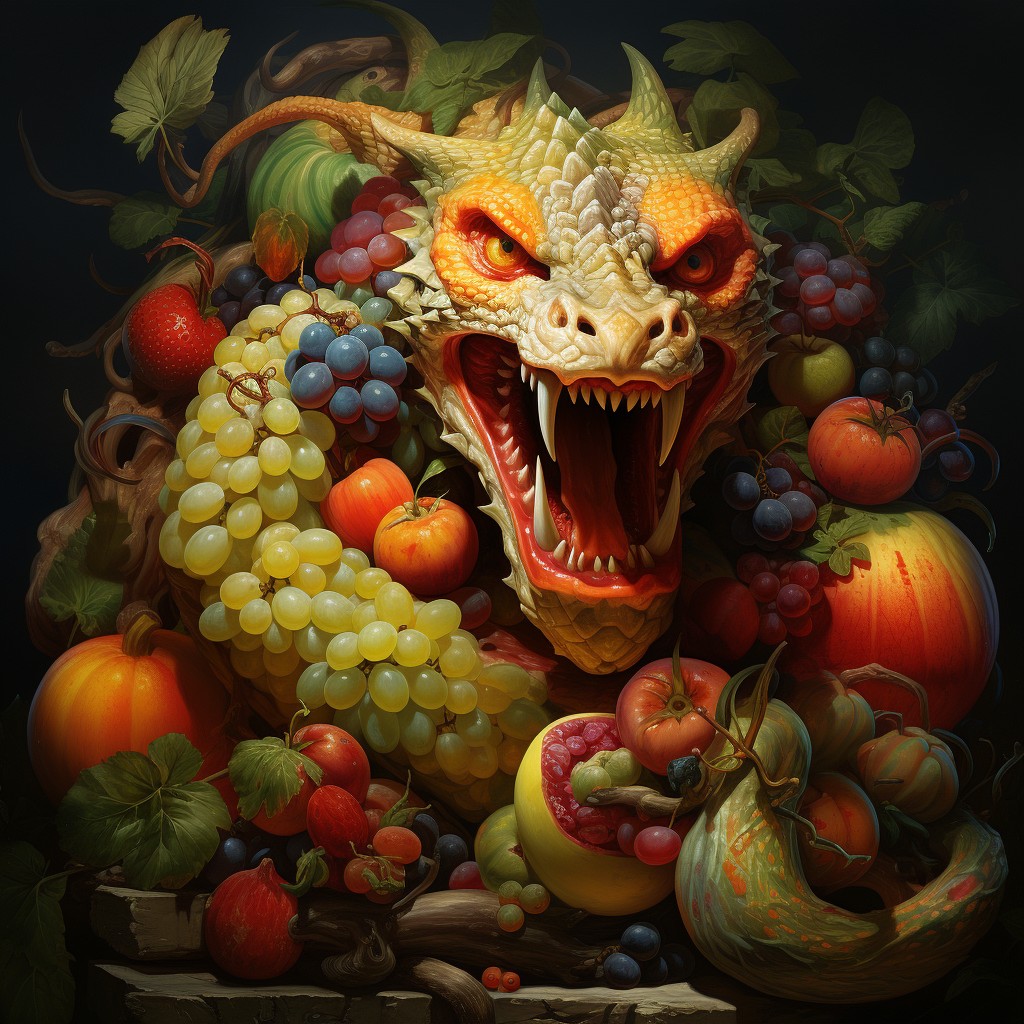
- For example, if you want to create an image of a dragon that is made of fruits, you can use the prompt: /imagine prompt dragon:: fruits. This will tell Midjourney to imagine a dragon and fruits as separate concepts, and then blend them together to create the final image.
| dragon fruit | dragon:: fruit |
 |
 |
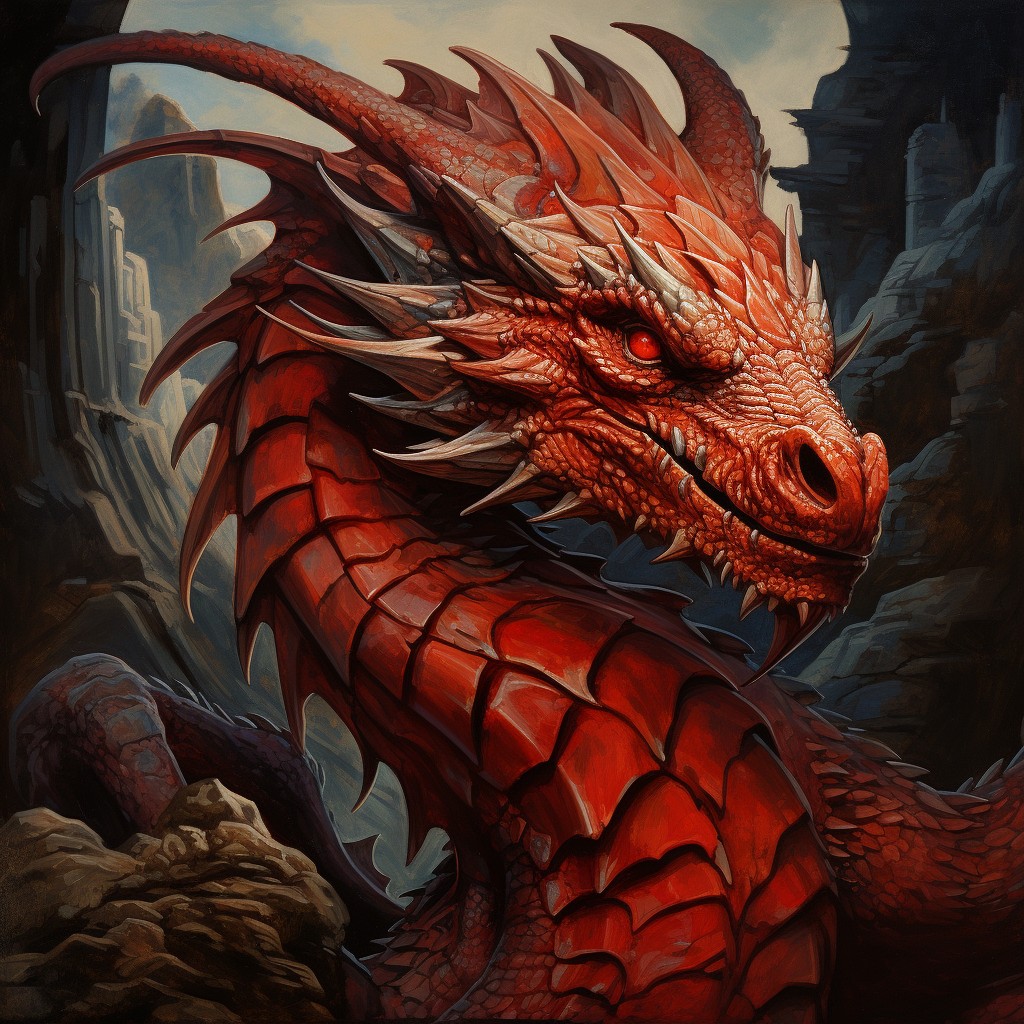
- You can also use multi prompts to assign different weights or importance to each part of your prompt, by adding a number after the double colon, for example: dragon::2 metal::1 strawberries::3
| dragon metal strawberries | dragon::3 metal::2 strawberries::1 |
 |
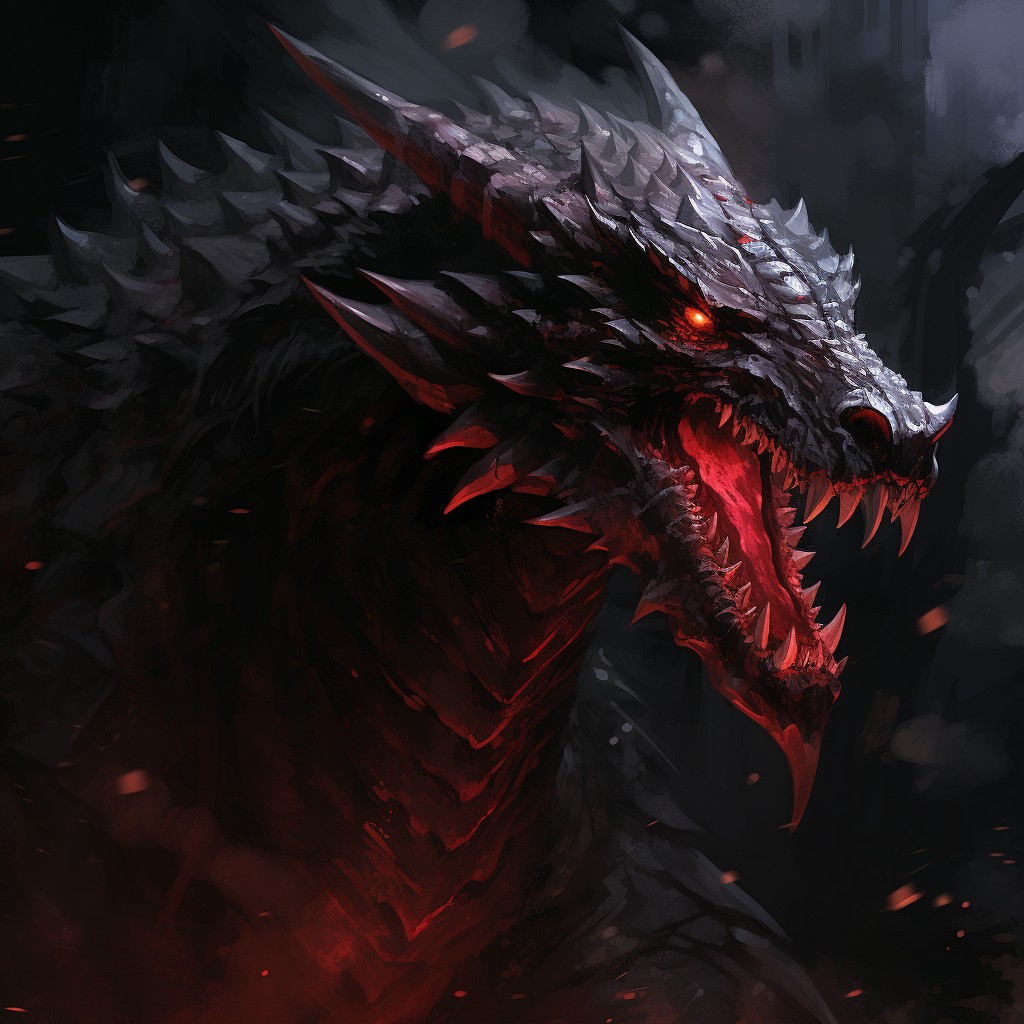 |
| dragon::3 metal::1 strawberries::1 | ragon::2 metal::1 strawberries::3 |
 |
 |
- Weights are normalised in Midjourney by dividing each weight by the sum of all the weights in the prompt. This ensures that the total weight is always 1, regardless of the absolute values of the weights. For example, if the prompt is: /imagine dragon::2 metal::1 strawberries::1 => the weights are 2, 1, and 1 for dragon, metal, and strawberries respectively. The sum of the weights is 4, so the normalised weights are 0.5, 0.25, and 0.25. This means that Midjourney will give equal importance to metal and strawberries, and twice as much to dragon. Normalising the weights helps Midjourney to balance the different parts of the prompt and avoid generating images that are too dominated by one element.
- You can use multi prompts with any model version of Midjourney, and with any other parameters that you want to add to your prompt.
- More information: https://docs.midjourney.com/docs/multi-prompts
Commands
Blend
The /blend command in Midjourney is a way to create a new image by combining the concepts and aesthetics of two to five existing images. You can use this command to generate novel and creative images that blend different styles, themes, or elements. Here are the steps to use the /blend command in Midjourney:
- Type `/blend` in the Midjourney Discord channel and press enter. You will see a prompt to upload two images. You can drag and drop images from your computer or phone, or use the upload button to browse your files.
- If you want to add more images, you can use the optional/options field and select image3, image4, or image5. You can blend up to five images with this command. If you want to use more than five images, you can use the /imagine command and paste the public URLs of the images in a row.
- You can also use the optional dimensions field to choose the aspect ratio of the blended image. The default is square (1:1), but you can also select portrait (2:3) or landscape (3:2). The aspect ratio you choose will override any aspect ratio specified in a custom suffix.
- If you want to add a custom suffix to your prompt, you can type it at the end of the /blend command. A custom suffix is a text that modifies the output of the command, such as `–ar 2:3`, or `–niji`. You can use multiple custom suffixes separated by spaces.
- More at: https://docs.midjourney.com/docs/blend-1
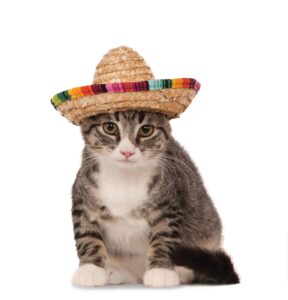
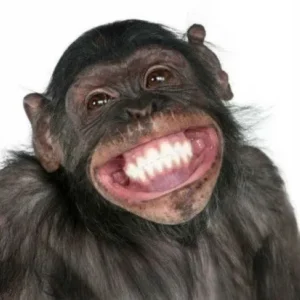
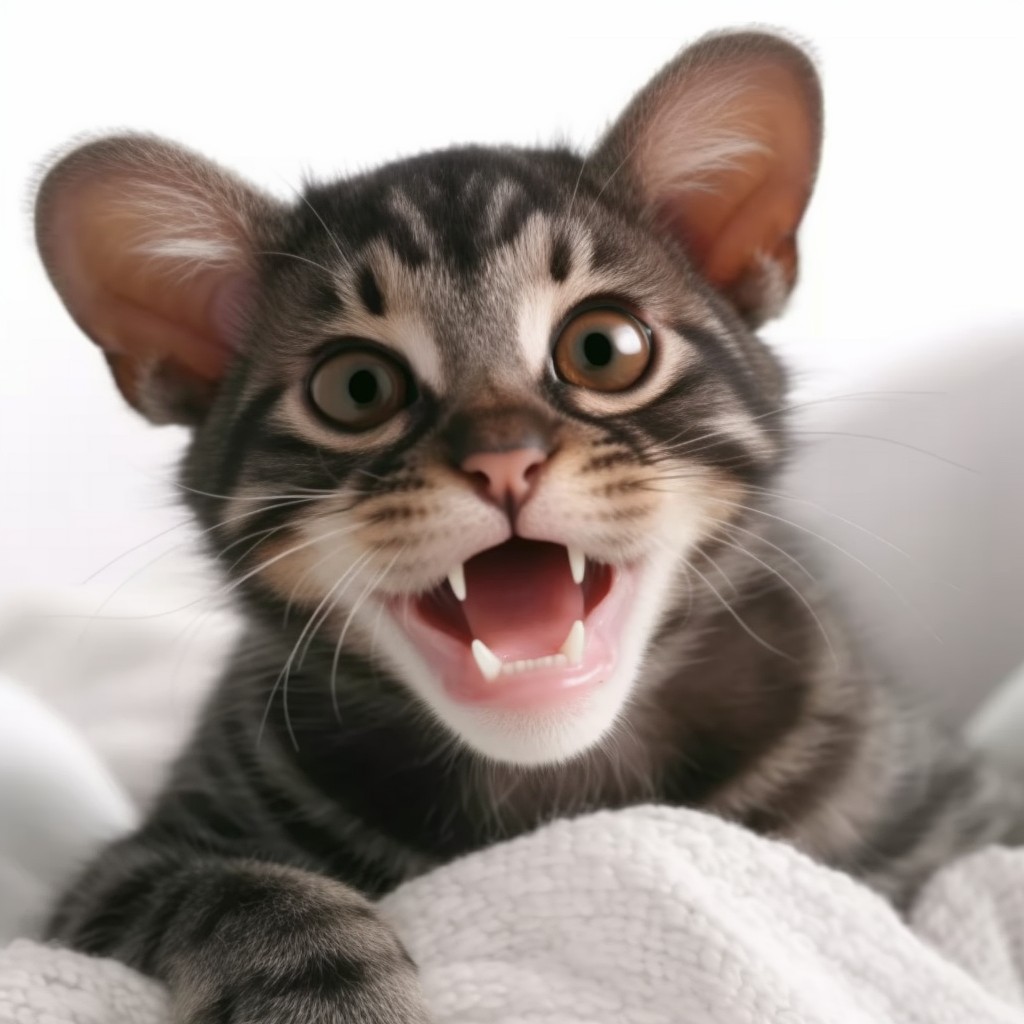
| image 1 | image 2 |
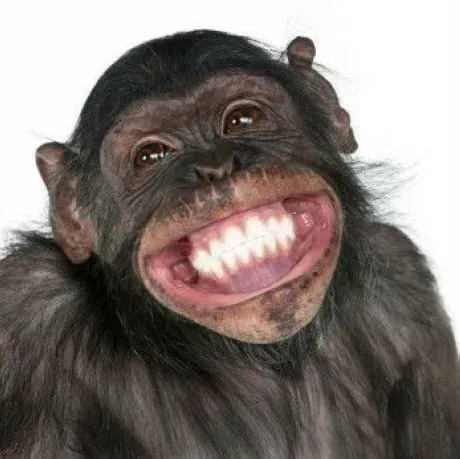 |
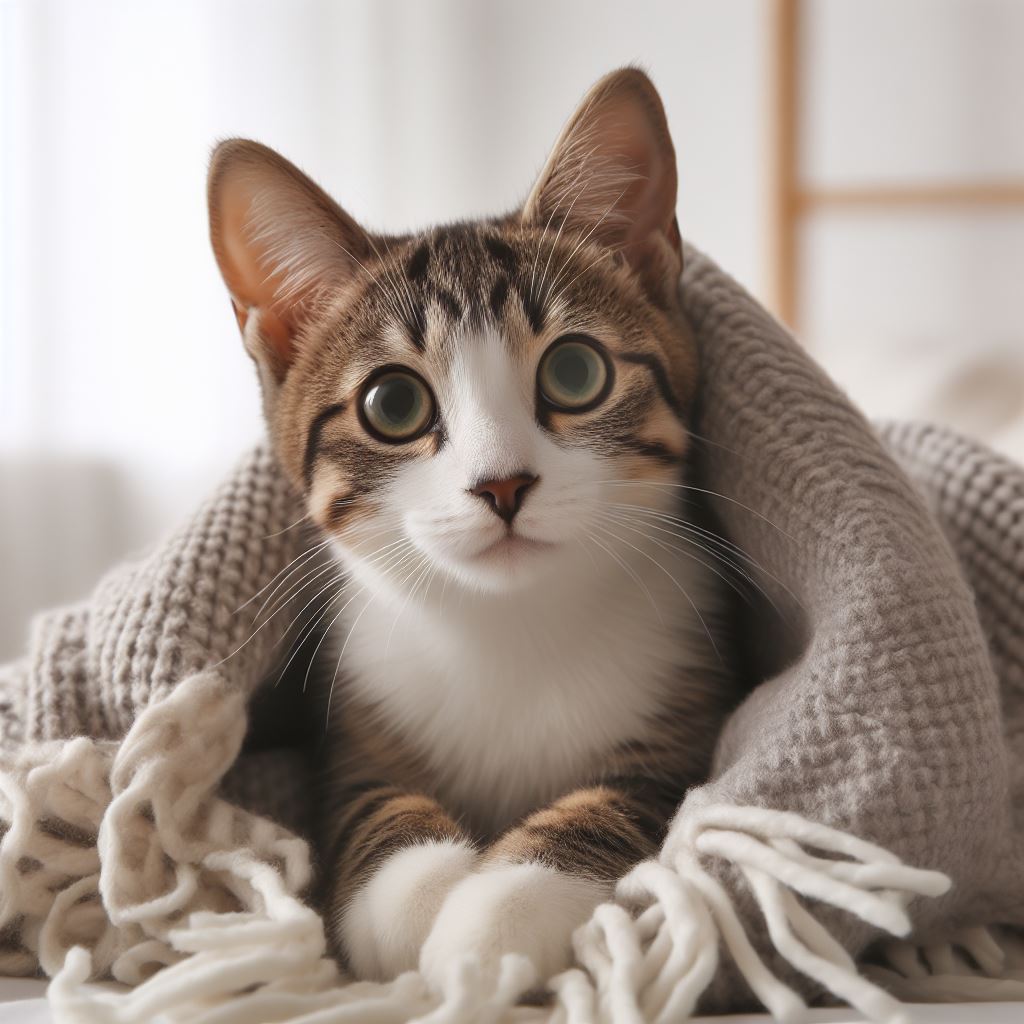 |
| 2 images blended together without any prompt (cat, chimpanzee,) | |
 |
|
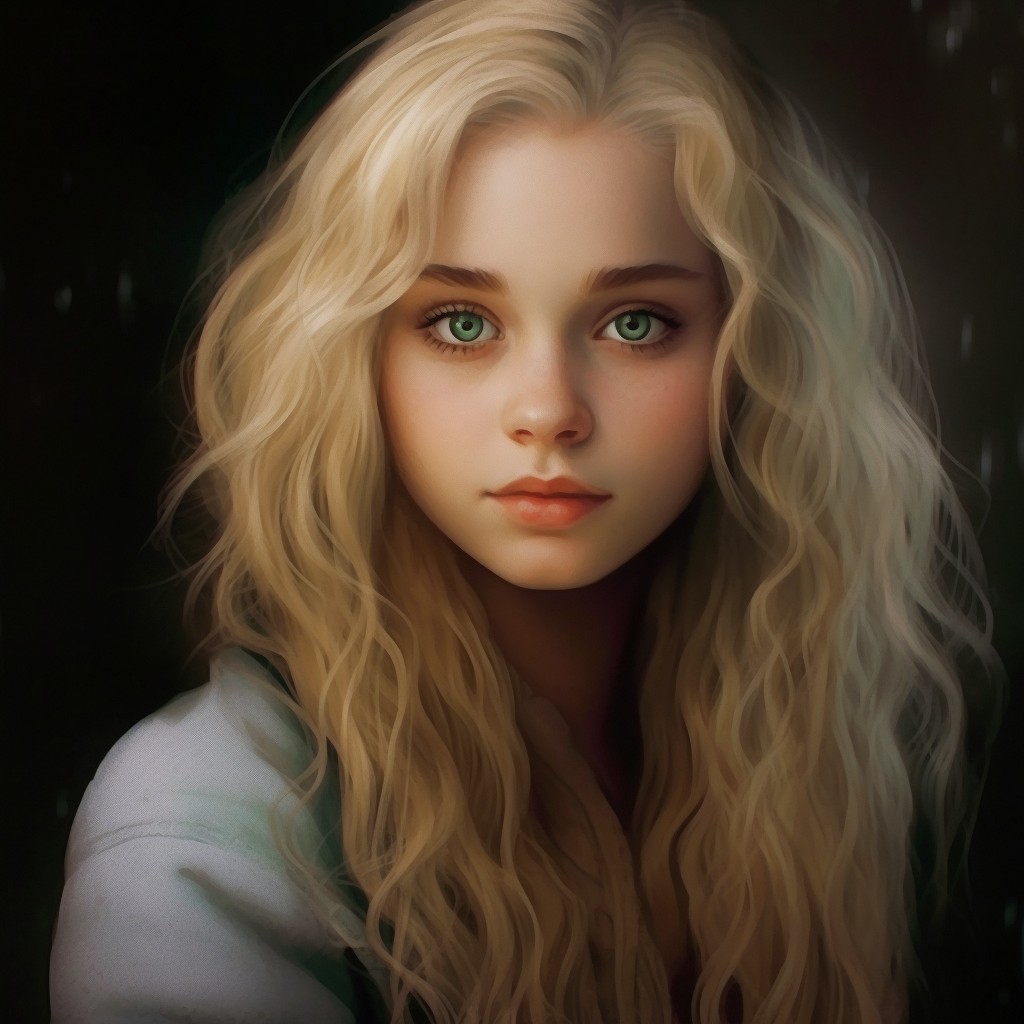
| image 1 | image 2 |
 |
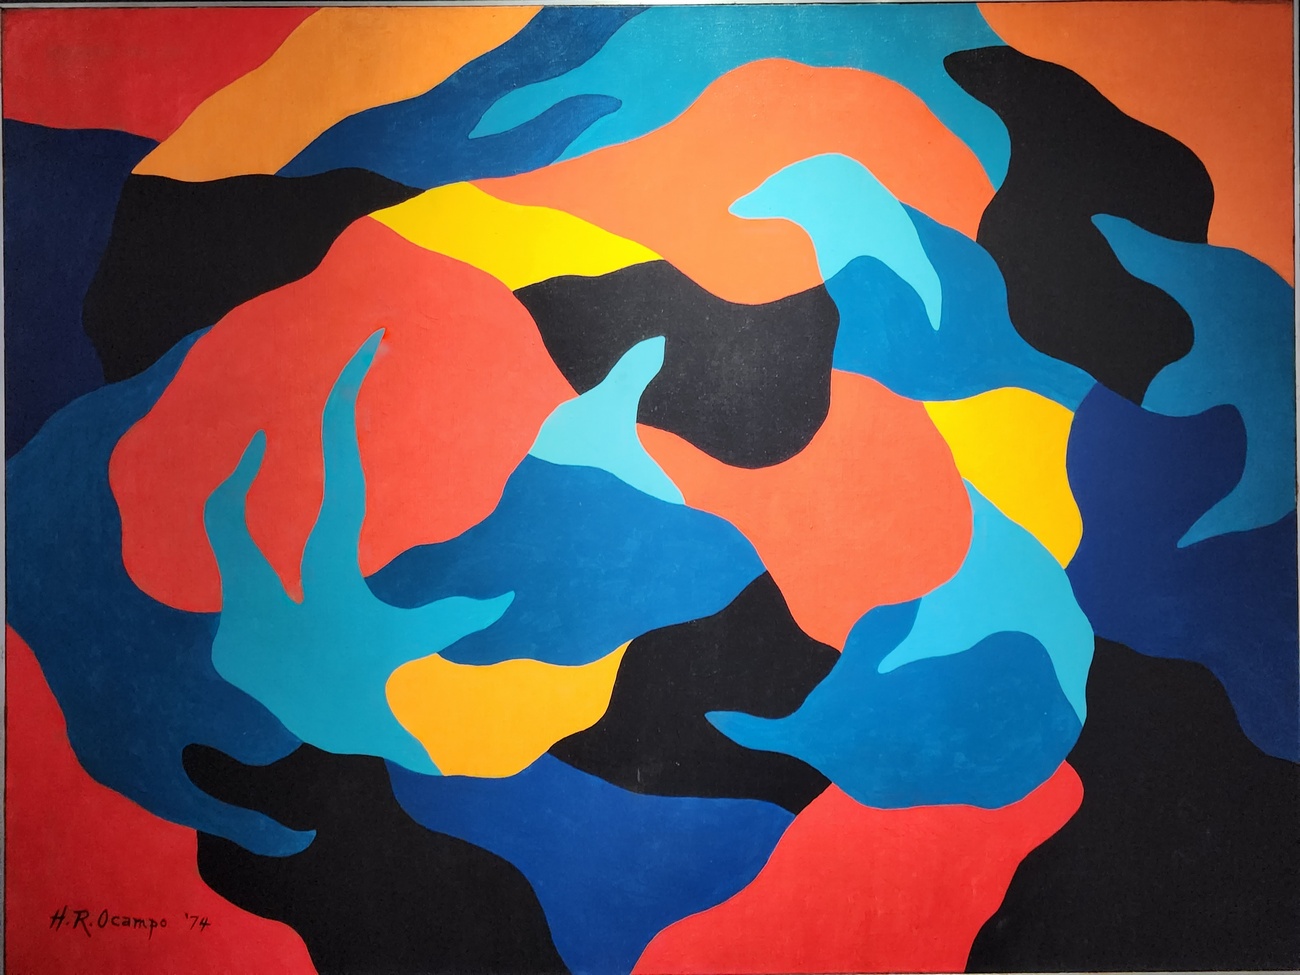 |
| 2 images blended together without any prompt (the girl and the painting) | |
 |
|
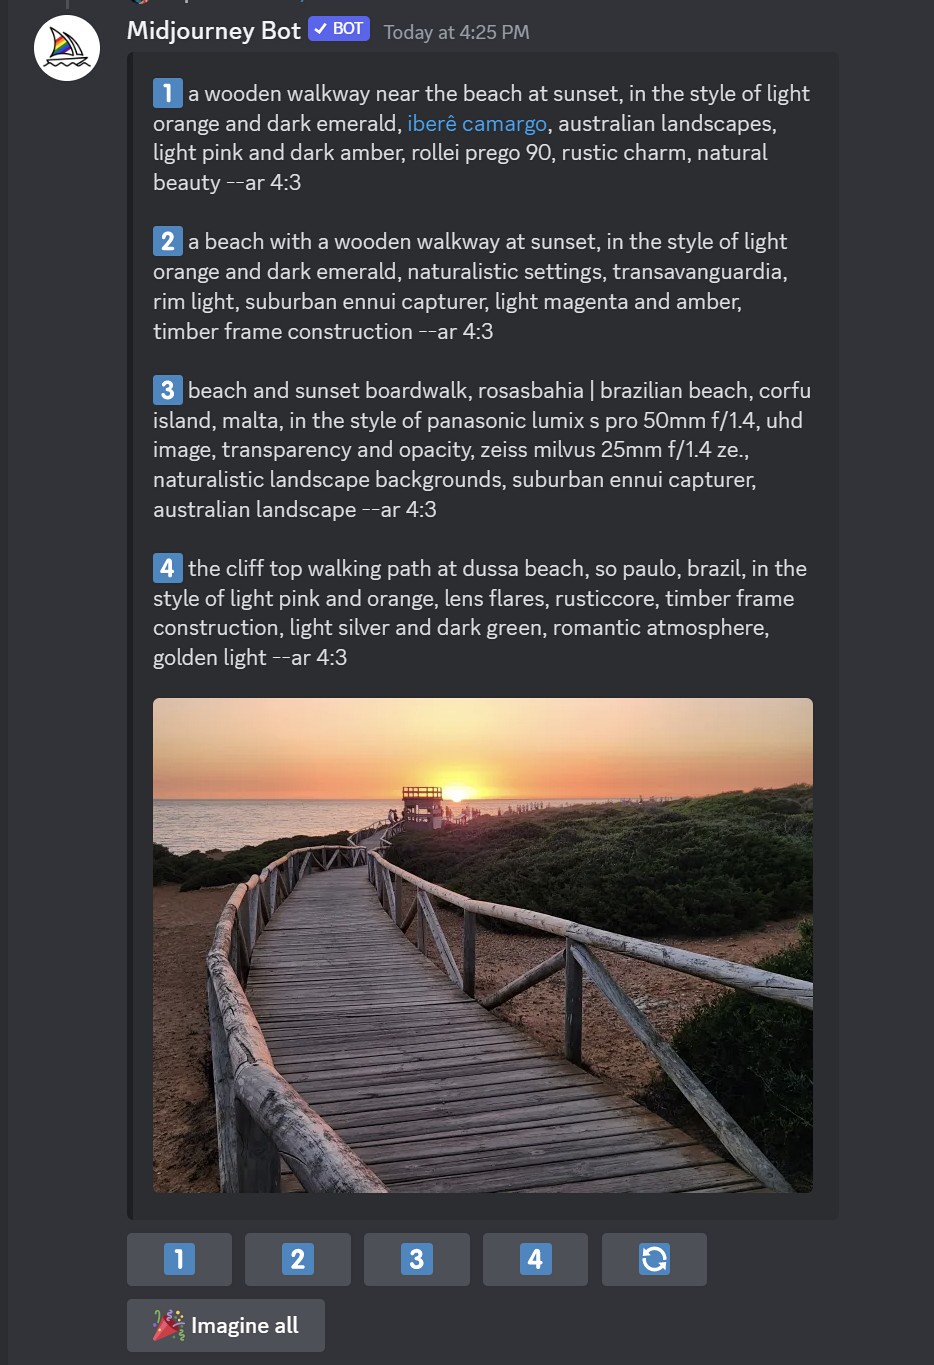
Describe
The /describe command in Midjourney is a way to generate text prompts based on an image that you upload. You can use this command to learn how to write better prompts, to reverse engineer an image that you like, or to discover new words and concepts that you can use in your prompts. Here are the steps to use the /describe command in Midjourney:
- Type `/describe` in the Midjourney Discord channel and press enter. You will see a prompt to upload an image. You can drag and drop an image from your computer or phone, or use the upload button to browse your files. You can also paste an image that you copied from another source by pressing Ctrl-V or Cmd-V.
- After you have uploaded your image, press the send button. The Midjourney bot will process your request and generate four text prompts for you. These prompts are rough guesses as to what might produce a similar image, but they are not necessarily well-formed or accurate. They are meant to give you some ideas and inspiration, not to be used as they are.
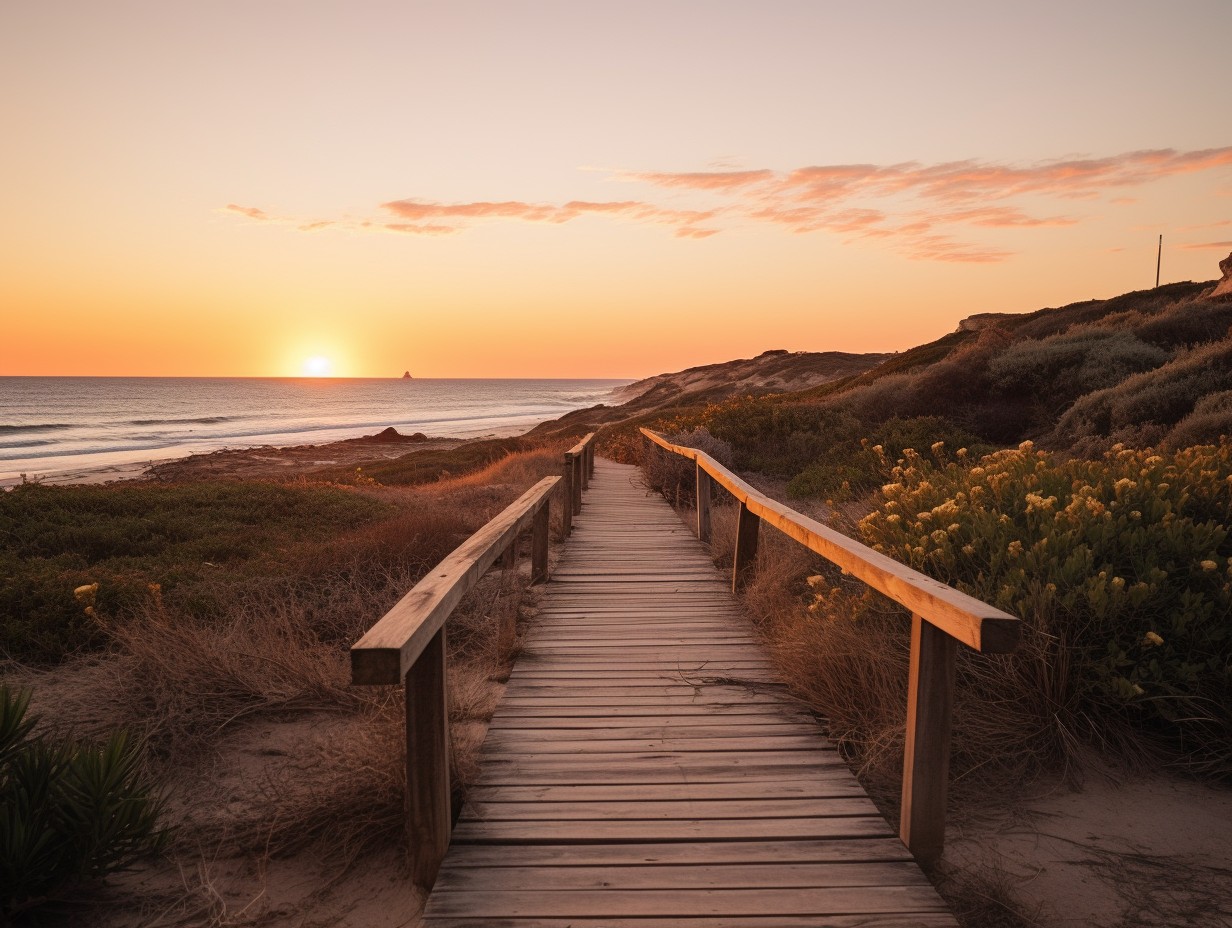
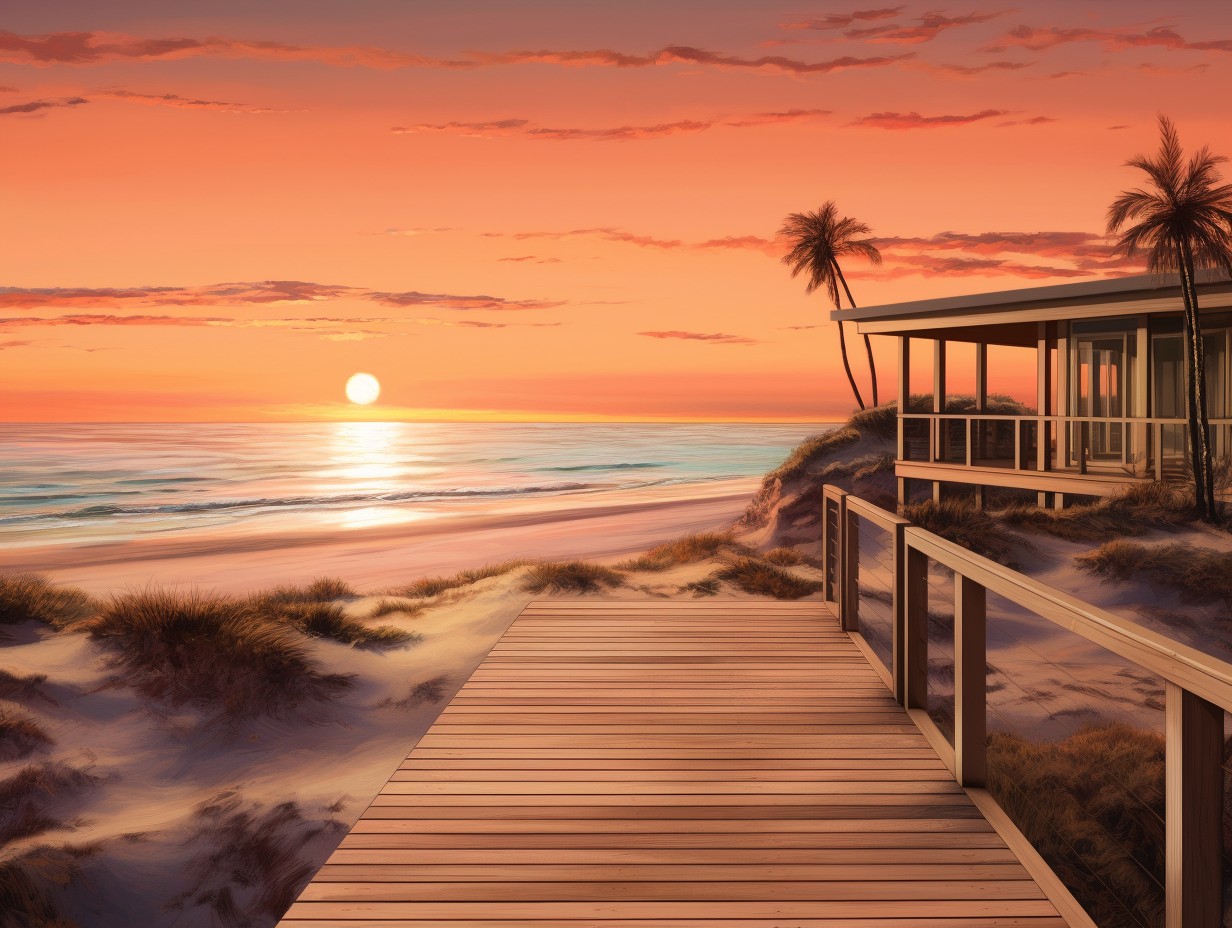
- You can view the four prompts that the bot generated for you. You can also see the original image that you uploaded and the images that the bot produced from the prompts. You can compare the results and see how different words and phrases affect the output.
- You can use the prompts as a starting point to create your own prompts. You can modify, combine, or delete parts of the prompts to make them more specific, coherent, or creative. You can also use the /shorten command to get suggestions on how to make your prompts more concise.
- You can use the /imagine command to generate an image from your own prompt. You can experiment with different prompts and options to create the image that you want.
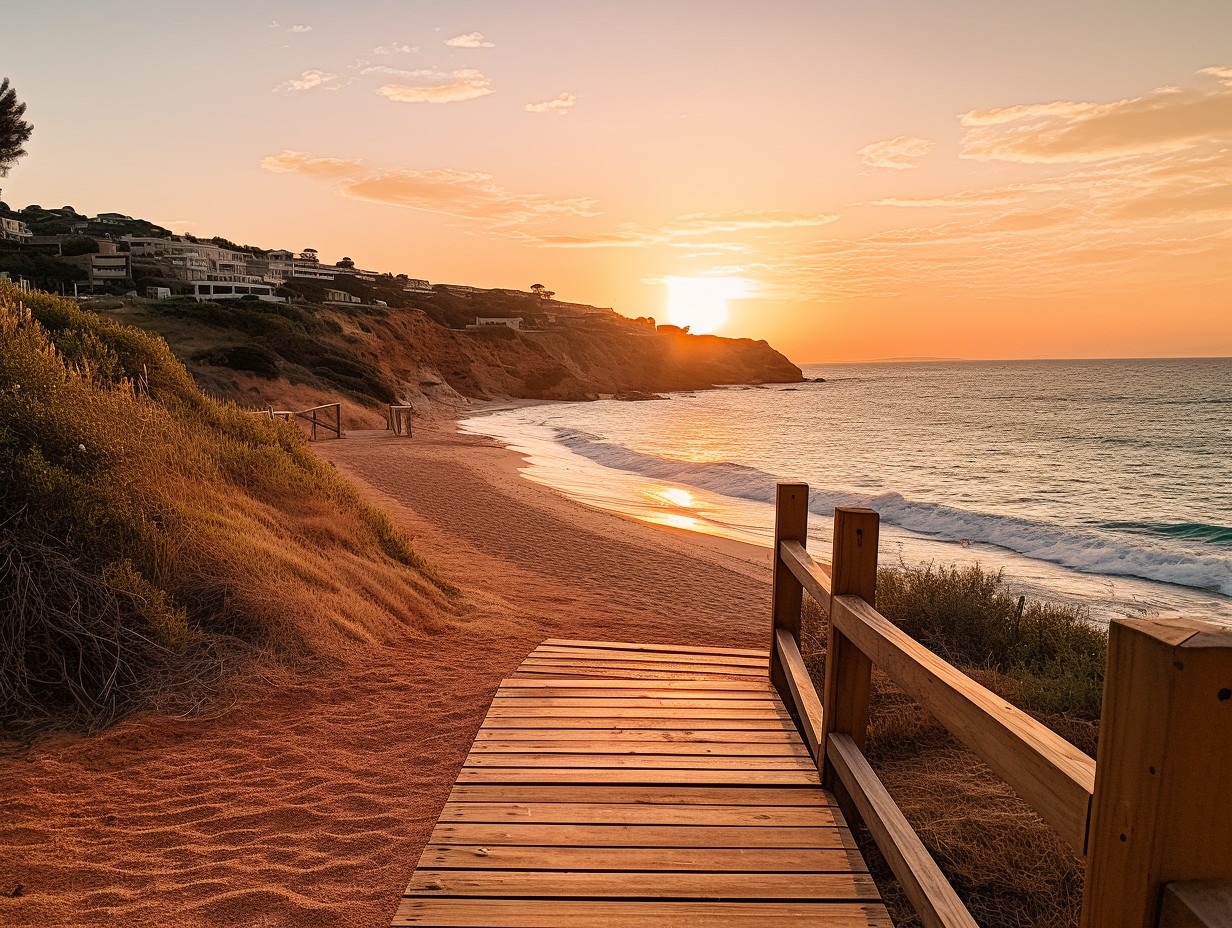
| Generate description | V1 – a wooden walkway near the beach at sunset, in the style of light orange and dark emerald, iberê camargo, australian landscapes, light pink and dark amber, rollei prego 90, rustic charm, natural beauty –ar 4:3 |
 |
 |
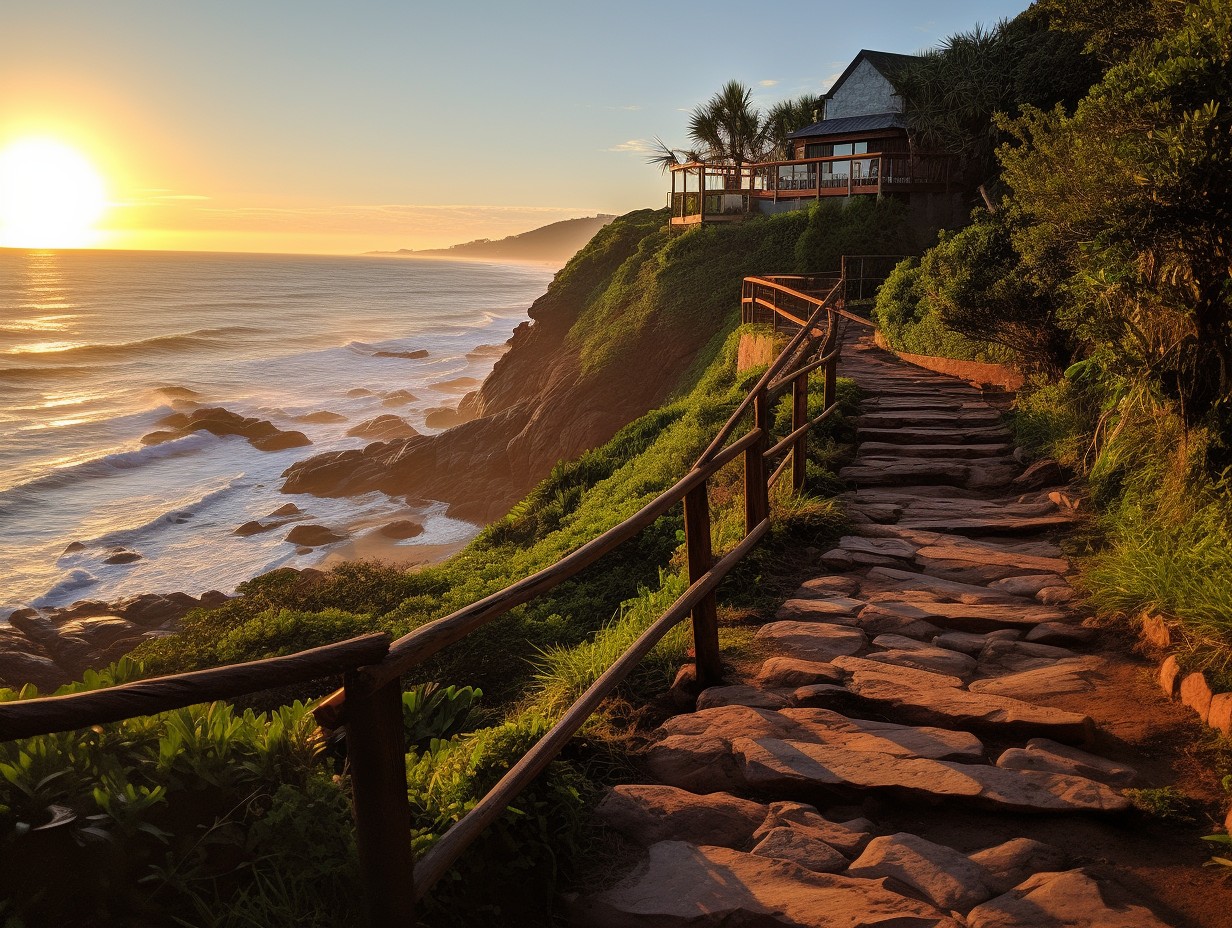
| V2 – a beach with a wooden walkway at sunset, in the style of light orange and dark emerald, naturalistic settings, transavanguardia, rim light, suburban ennui capturer, light magenta and amber, timber frame construction –ar 4:3 | V3 – beach and sunset boardwalk, rosasbahia | brazilian beach, corfu island, malta, in the style of panasonic lumix s pro 50mm f/1.4, uhd image, transparency and opacity, zeiss milvus 25mm f/1.4 ze., naturalistic landscape backgrounds, suburban ennui capturer, australian landscape –ar 4:3 |
 |
 |
| V4 – the cliff top walking path at dussa beach, so paulo, brazil, in the style of light pink and orange, lens flares, rusticcore, timber frame construction, light silver and dark green, romantic atmosphere, golden light –ar 4:3 | |
 |
|
Shorten
- The /shorten command in Midjourney is a way to optimize your prompt by focusing on the essential words and phrases that influence the output. With this command, you can get suggestions on how to make your prompt more concise and effective. Here are the steps to use the /shorten command in Midjourney:
- Type `/shorten` in the Midjourney Discord channel and press enter. You will see a prompt to enter your original prompt. You can type or paste your prompt in the text box and press send.
- The Midjourney bot will analyze your prompt and highlight the most important tokens in bold. Tokens are the units of meaning that the bot uses to understand your prompt and generate an image. They can be words, phrases, or even syllables. The bot will also suggest some words that you can remove without affecting the output too much. These words will be crossed out with a strikethrough.
- The bot will also generate five shortened prompts based on the analysis. These prompts are ranked from the longest to the shortest, and they show how you can reduce the length of your prompt by removing or replacing some words. You can compare the results and see how different prompts produce different images.
- You can use the shortened prompts as a starting point to create your own prompt. You can modify, combine, or delete parts of the prompts to make them more specific, coherent, or creative. You can also use the /tune command to adjust the style and appearance of your image. You can experiment with different prompts and options to create the image that you want.
- More at: https://docs.midjourney.com/docs/shorten
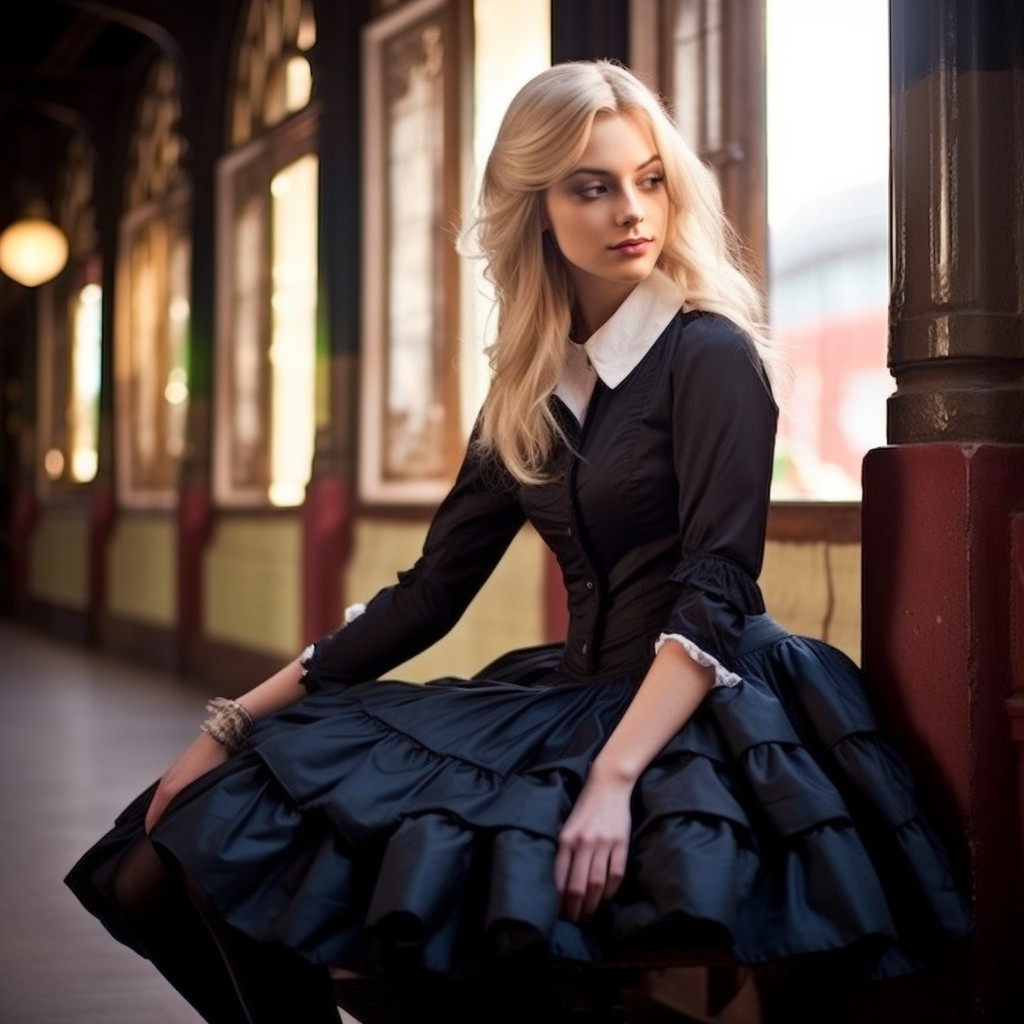
| Shorten Prompt | Original prompt: daylight, seated side on portrait of a classy 35 year beautiful French blonde female model, wearing a plain, v neck, textured, short sleeve black silk dress, showing arms and her shoulders, long pleated ivory skirt, shot on a beautiful bright sunny day, bounce fill light, natural light portrait, ring lighting, photographic high quality,:: in the style of Patrick Lindenberg, side on pose,:: both wrists in full are showing, Sony Venice, f/ 2. 8 aperture, ISO 200, Kodak Portra 400 filmstock, low angle shot and leading lines, global illumination, 8K |
 |
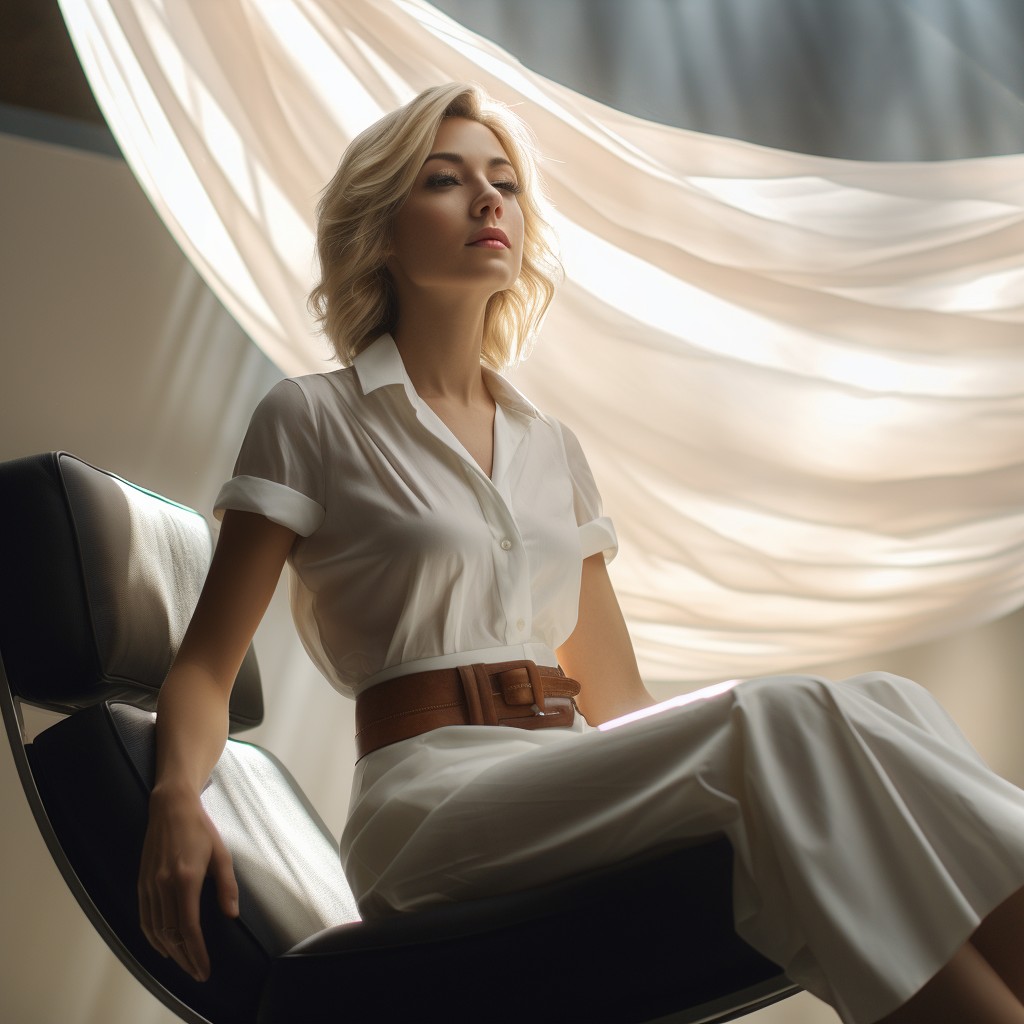 |
| V1 – seated side on portrait of a classy 35 year beautiful French blonde female model, wearing a plain, short sleeve black silk dress, showing, long pleated ivory skirt, sunny, bounce | V2 – seated side on portrait of a classy 35, beautiful French blonde female model, short sleeve black silk dress, showing, pleated ivory skirt, sunny |
 |
 |
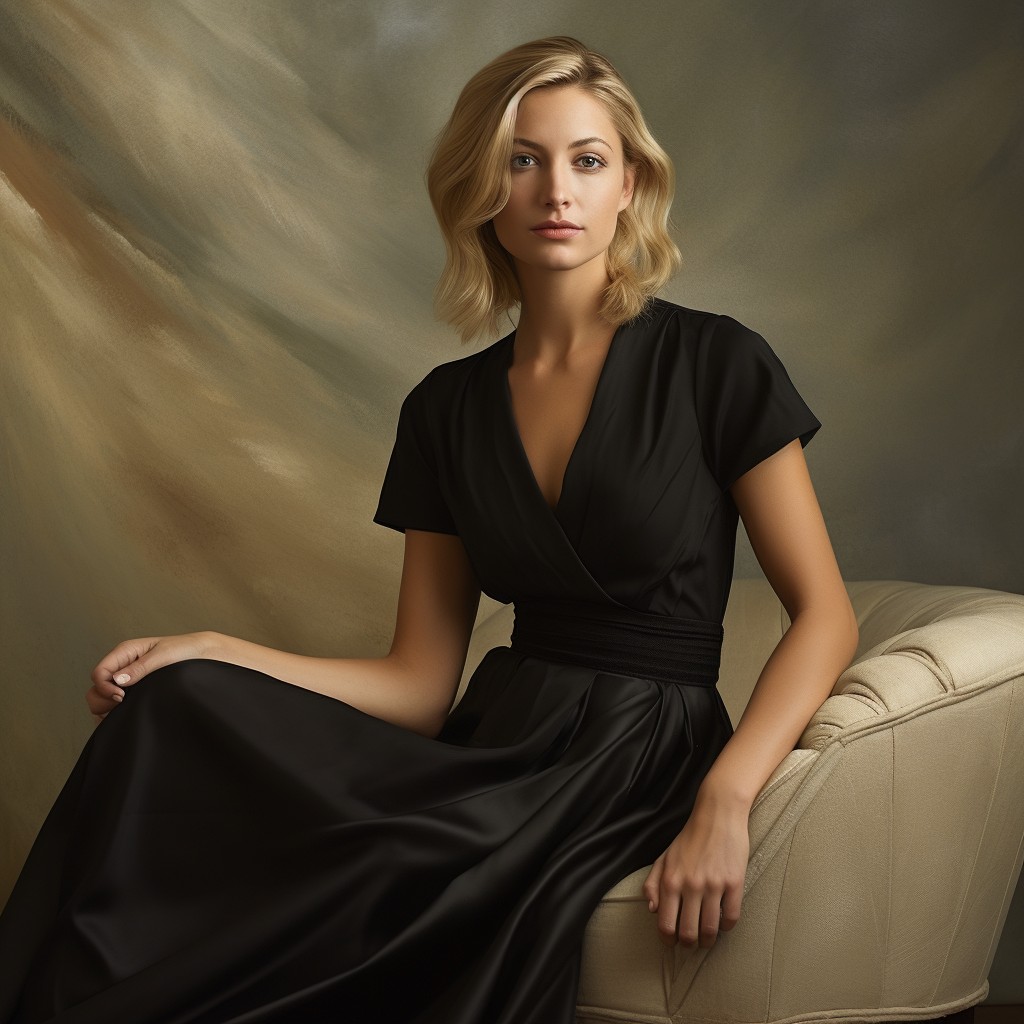
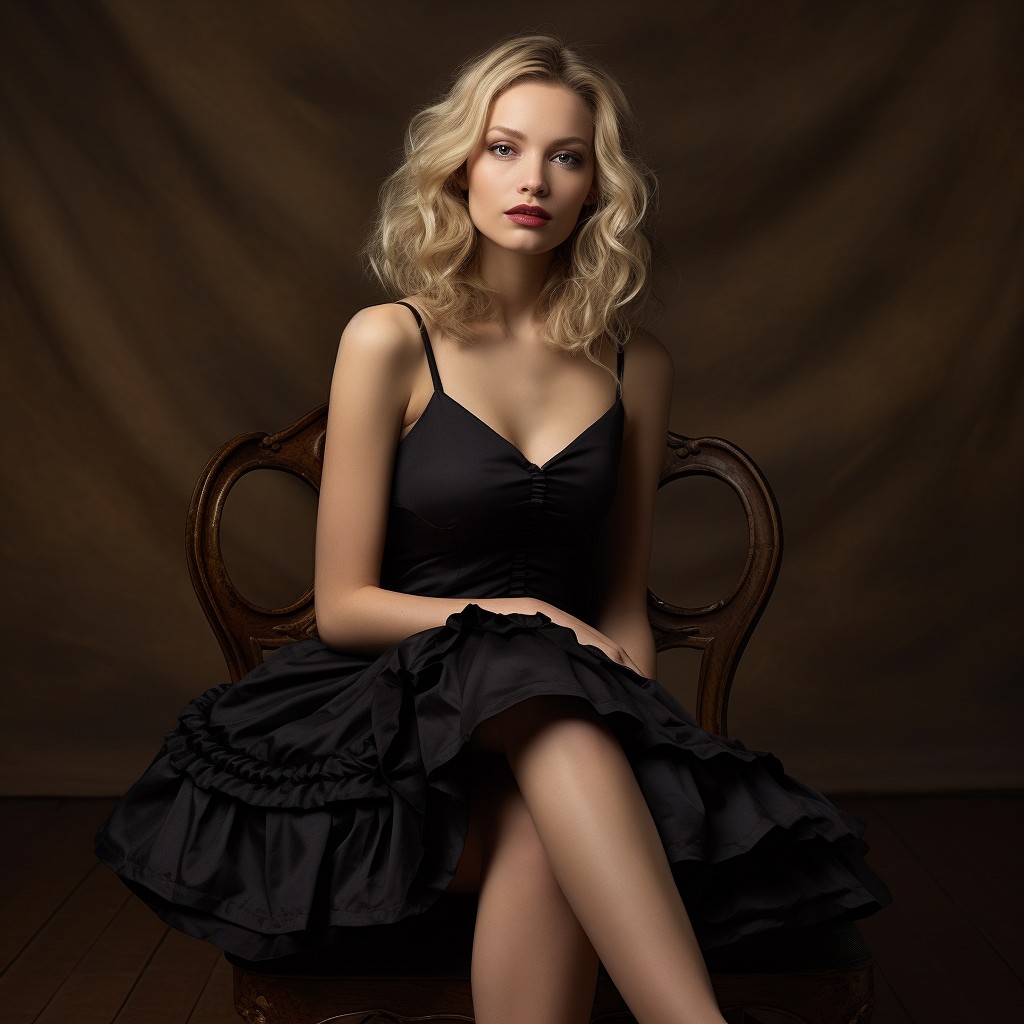
| V3 – seated side on portrait, beautiful French blonde female model, short, black, dress, pleated ivory skirt, sunny | V4 – seated side on portrait, beautiful French blonde, model, black, pleated, skirt |
 |
 |
Other commands
- Subscriptions – /subscribe : https://docs.midjourney.com/docs/plans
- The /info command in Midjourney is a way to view information about your account and any queued or running jobs. You can use this command to check your subscription plan, your remaining fast hours, your lifetime usage stats, and your renewal date. More here: https://docs.midjourney.com/docs/info
- More about /settings in Midjourney https://docs.midjourney.com/docs/settings-and-presets
Useful links
- Applications of Text-to-Image Models for Business, Media and Personal Use
- Midjourney Images Showcase
- Library of Midjourney artist styles – (Google Sheets)
- V4 Midjourney Reference Sheets – (Google Sheets)
- Artworks by style – WikiArt.org
- PromptHero – Search prompts for Stable Diffusion, ChatGPT & Midjourney
- Prompter – Prompter Guide
- Midjourney Prompt Generator v5 – artificin.com
- For prompts and AI created images:
- Follow #PromptShare on X (Twitter)
- Follow text-to-image creators on X (Twitter)- => list


 – Palawan, Philippines")
")